Demon animated Sketch 04 by ChrisCold on deviantART
Click through to see animation.
Demon animated Sketch 04 by ChrisCold on deviantART
Click through to see animation.

Bekku
My Secret Pumpkin this year is crazy about cats (but not a crazy cat lady). I mulled for months over what to make her. I thought about doing a doll, but I’d never done one, and I knew the learning curve would be steep. Finally, I decided to go for it, even though I’d only sculpted two faces, ever, and had never sculpted a body.
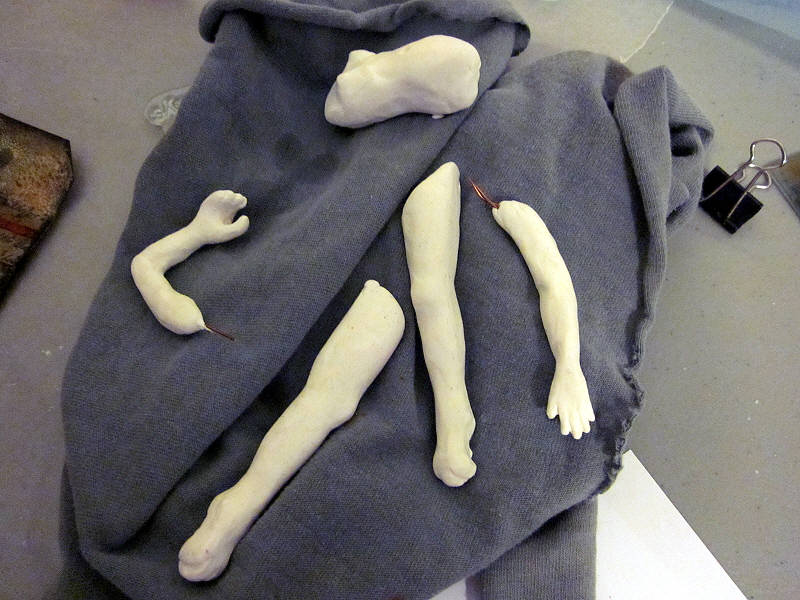
Bits and pieces
I decided she would be called Bekku, the word in Kannada for “cat.” She would be a Guardian Demon.
I envisioned an Abyssinian with faceted red crystals for eyes. The biggest stumbling block: the dress. Because man, do I ever not sew. I mulled that for ages, finally realizing I could bead her dress! Yeah, okay, I’ve only dabbled in beading (though I have a whole lot of beads!), but I still thought it would be easier on my nerves than trying to sew.

Abyssinian Face
I had this polyclay mold for a fairy, and thought I’d use that for the body. So, here’s the thing about those cheapo polyclay molds. They only get you a rough shape. I ended up using them to get things approximately the right size, and that’s it. Next time, I won’t even bother.

Ready to bake
Stuff I learned:
I’m sure I’ll find better, faster ways to do things in the future. I managed to stretch her staff-holding hand in the process of baking, so I was going to have to deal with that later, but everything else went well.
I had all these beads I was trying for the staff, and nothing made me happy until I found a 50 cent necklace at a garage sale. Behold, a power crystal! I used a Dremel to carve tiny letters into a chopstick (not telling you what they say, that’s for Myra to figure out), filled them with red ink, and put a layer of Rub ‘n’ Buff over the top. The rest of the staff got stained, and I cut down some nice brass jump rings for accents. Much gluing and waiting ensued.
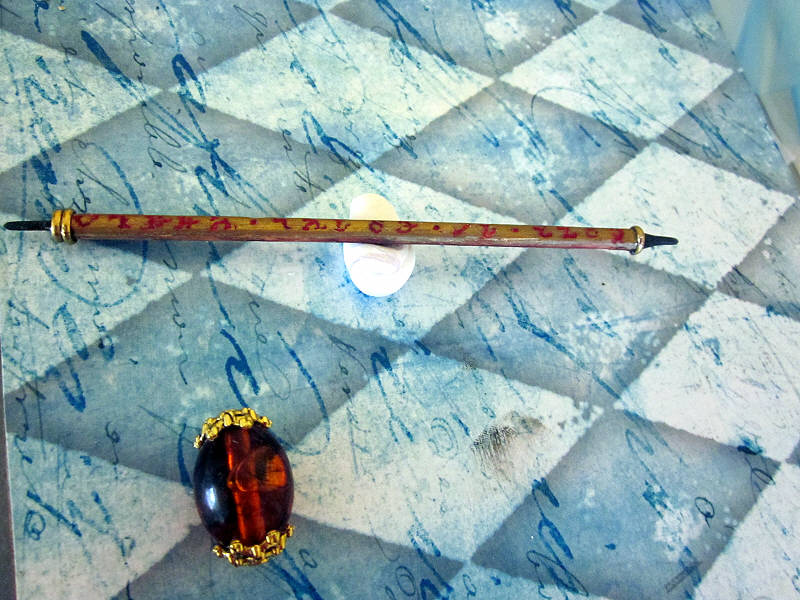
Staff
Next, it was time to stop avoiding the paint job. Boy, acrylic paint dries instantly on polyclay. I could have added extender, but I was okay with the zero wait time. I surprised myself by not painting over the eyes. Go me!
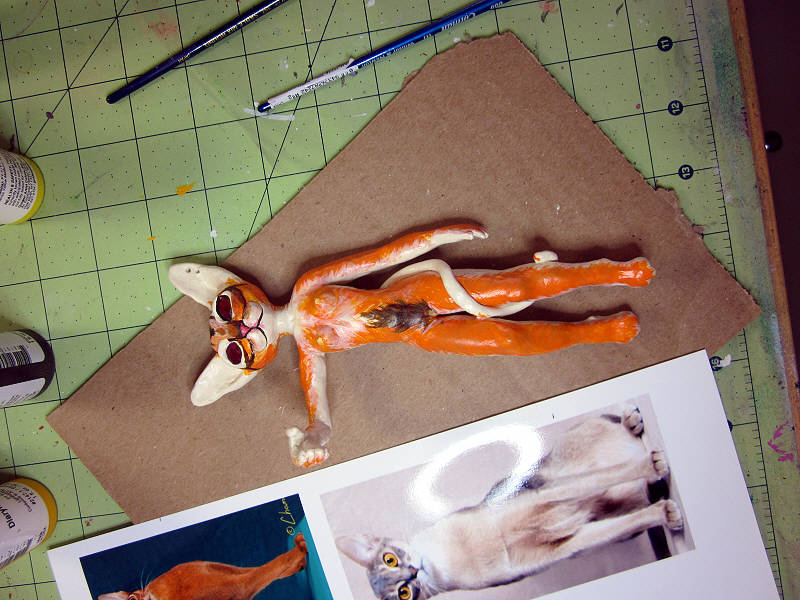
Painting
Finally, the dress. I’d been dying to play with my loom, and this was my opportunity. I drew out my pattern. Customizable graph paper helped a ton! I wove the beaded fabric in gold, red, and black delicas. I was seeing a two-piece thing, with the sides completely open.
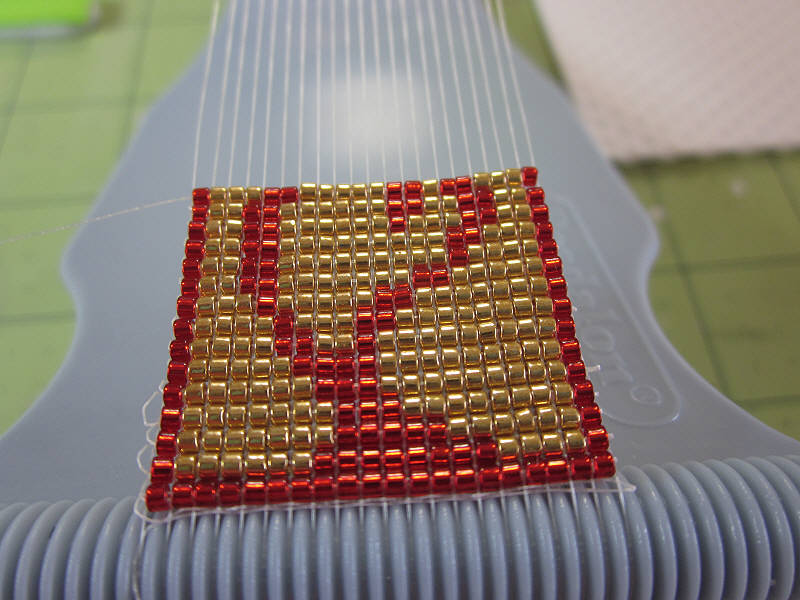
Starting the skirt

Almost done!
I finished the front skirt, and discovered the loom, a Beadalon Jewel Loom, had broken. Alrighty then, new loom it is. Didn’t like the second one much, either. Who puts bendable warp rods on a loom? But that’s fixable, and I made it through the back skirt. Attached some square stitch to make the front and back halters, and good to go.

Front and back, finished
Last touches to the costume–a little belt with a cat charm, and earrings.
Finally, the stand. Of course I didn’t have a drill bit that was small enough to fit what I was using as a support rod, which may or may not have been a BBQ skewer, so I put a little washi tape at the bottom of the rod. A light coat of black paint on the stand finished things up. At a guess, I’d say 80 hours work, but a lot of that was my sheer inexperience.

Front and back, nekkid

Front and back, dressed
I packed her in blocks of foam with cut-outs, and the PO put on a fragile sticker. They still managed to break her arm. DEMON ABUSE. GAH. But she’s gluable.
My favorite part:

Lookit those feeties!
So now all I want to do is make dolls. I already have an idea for the next one. Stay tuned.
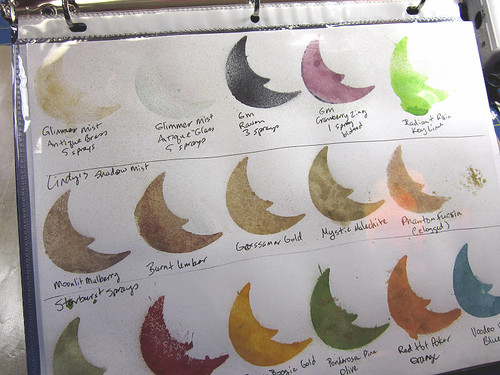
I finally got around to doing swatch sheets for my sprays. You know how people show off their tidy little swatches with perfectly printed labels and neat edges? Yeah, so not me. So I finished up (there are two more pages like that one), went to put them with the sprays, but I realized I have most of my spritzes in one place, and all my Dylusions in another. What to do? But lo, what is this–I have an extra notebook! Why not take all the color swatch sheets I make, sprays, paints, inks, etc., and put them in one place? So that’s what I’m doing. Just making the swatch sheet encourages me to create. Having this handy will be extremely helpful.

Spent some time at the Heirloom Rubber Stamp and Paper Arts Festival today. I went thinking I wouldn’t spend much. More fool me. Had a great time even though it’s a fairly small show, with only 21 vendors. There were lots of indie stamps and dies. Tessler Stamps/Stencils Company had a particularly good selection of wafer-thin dies. I didn’t pick anything up today, but I want to go back when their site is working (down as of this writing).
Here’s a short haul video:
My special guest says thank you!


Woke up with the urge to hit an antique store or two and find some photos, ephemera, and maybe some boxes. I think I did pretty well. If you’d like to watch me go through every bit of it, here’s a video: