Archives

All posts for the month October, 2014

I have seen a few costumes for bearded dragons, and was mighty tempted to make something for our girls, Ellen and Portia. I didn’t want to make them uncomfortable. Just something light that could be stuck on for a minute with a bit of peanut butter.

No lizards were harmed in the making of this project.

lh 01

In the same box as the Makit & Bakit crystals, there was a large ziploc of tiny hats. They seemed to be made out of pressed styrofoam. They are quite delicate, and most of them are misshapen. I two that look the best, and carefully remove the embellishments.

lh 02

One gets a coat of black, and the other gets orange. My extensive (really, far too extensive) collection of washi tape yields cute hat bands.

lh 03

In to the shiny box I go, affixing seasonally-colored rhinestones to the side of each hat.

lh 04

The bat is a Halloween button I’ve trimmed the shank from.

lh 05

The black hat gets a cute brad–shank also trimmed. No way it was going through the styro.

Ellen and Portia say HAPPY HALLOWEEN!

ellen in orange

Ellen in Orange

portia in black

Portia in Black

Vicki will be receiving the Little Monster note cards! Kisah will get the Ghost Garland.

This concludes the 2014 Month of Spookdays Raffle

THANK YOU EVERYONE FOR PLAYING!

Okay, here’s how it works. I’ve assigned a number to each card I’ve received, and used random.org to choose the first one.  The first person drawn gets to pick the item they would like. Once they’ve chosen, I will draw a second name, and that person can choose, and so on.  I’ll give each person 24 hours to respond, then they lose their place and go to the end of the queue, so look sharp!

I’ve received 15 cards, and there are 15 items. Nicely done!  The items eligible to be chosen are in the table below. Click through to learn more about them. Note that there are a few from previous years thrown in, so there’s even more variety.

Once an item has been chosen, an X will appear through the picture.

Raffle drawees in order:

  • Ms. Misantropia!  chose Dolly Grim
  • Kisah Meyer (Kisah didn’t get in touch, so she’ll get to choose at the end)
  • Myra Tsung chose Felt Kitty
  • Rabbi chose the Grimoire Box
  • Witch Kittin chose the Stacked Bead Dolls
  • Lisa Harkins chose the Monster Eye
  • Lady M  chose the Shadow Box
  • Lauren Churchill chose Tiny Tombstones
  • Ichabod Crane chose Movie Monster Light
  • Melissa Putzke chose Specimen Bottle Necklace
  • Sarah Fuller chose Makit Bakit Votive Sleeves
  • Amber Terry chose Angel of Death Notecards
  • Reg Levy chose Soda Can Box
  • Wyvern chose Felted Pumpkins
  • Vicki chose the Little Monster Notecards
  • Kisah will get the Ghost Garland

Here come the last batch of Cryptkeeper introductions.

Cult of the Great Pumpkin

Cult of the Great Pumpkin

I have been enjoying the heck out of these guys this month. They’ve been sharing tons of hard-to-find Halloween music, and their posts are just generally great. Or is that Great?

Doo Wacka Doodles

Doo Wacka Doodles

This month, Belle Dee is not only sharing uber-cute Halloween illustrations, there are scans of classic Halloween Ideals–find out about them here.

Airless Chambers

Airless Chambers

Airless Chambers is a dark papercraft blog, with several talented contributors. It’s hard to find other dark craft blogs, so I was thrilled to follow along this month!

And now, linkies:

Secret Fun Blog shares their Spook Light adventure.

Secret Fun Blog shares their Spook Light adventure.


LESS FEAR, MORE FUN!
Toxic Cupcakes by My Scary Blog

Toxic Cupcakes by My Scary Blog


Thorough coverage by Gravediggers Local 16 on royalty-free haunt music.

Thorough coverage by Gravediggers Local 16 on royalty-free haunt music.


Make teddy bear ghost prints

Make teddy bear ghost prints


The fantastic sculpture of Dug Stanat

The fantastic sculpture of Dug Stanat


Werewolf in a Can, and other amazing things from Mythic Articulations

Werewolf in a Can, and other amazing things from Mythic Articulations

Both via Church of Halloween


The Many Deaths of Ambrose Bierce

The Many Deaths of Ambrose Bierce

Via Cult of Weird


Scary Lady makes fantastic props, and shows you how. I plan to waste several days going through all her videos. Also, I must have that engraver. Must.
The sculpture of Ewgeny Hontor

The sculpture of Ewgeny Hontor


The delightful Halloween art of Grelin Machin

The delightful Halloween art of Grelin Machin


More Halloween art from Chad Savage

More Halloween art from Chad Savage

gb 26

A while back I went to a garage sale, and paid $1 for a box of buttons and other doo-dads.

gb 01

gb 02

This deliciously ratty whiskey box needed a new life.

gb 03

gb 05

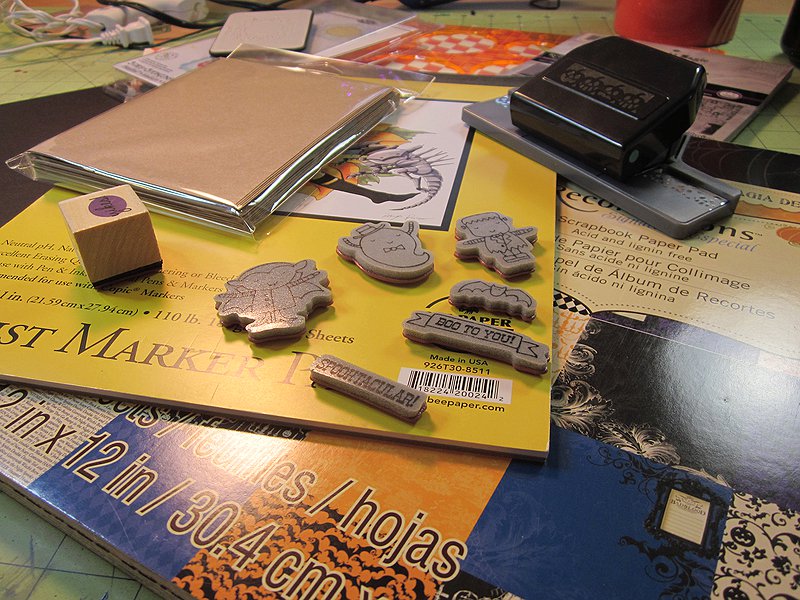
I gathered my supplies. I had some fantastic cast foam pieces from DG Gothic. I think that skull has found a home. I also printed the title of the book, “Vile Incantations,” on a clear sticker, so I could use it as a painting guide, and gathered several papers for collaging the inside.

gb 04

The box got a couple coats of black paint on the inside. I didn’t really need them, but my plans were amorphous at this point.

gb 06

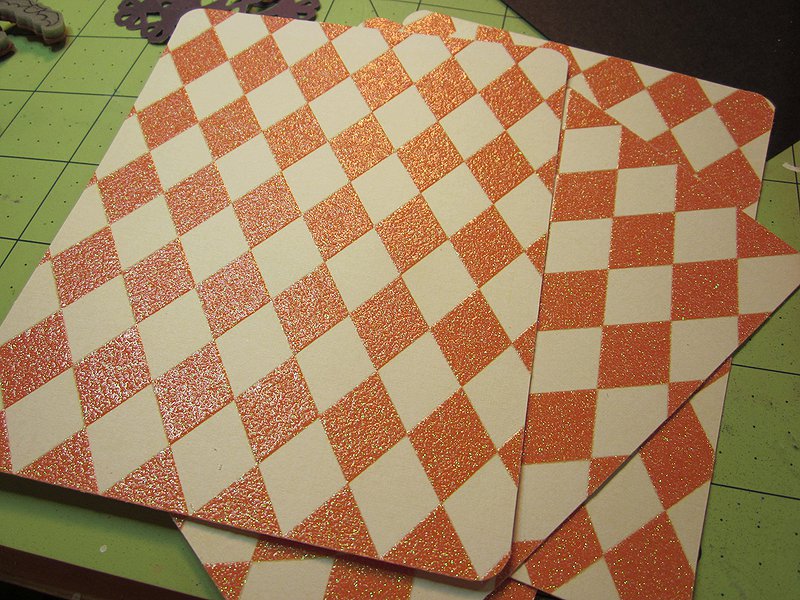
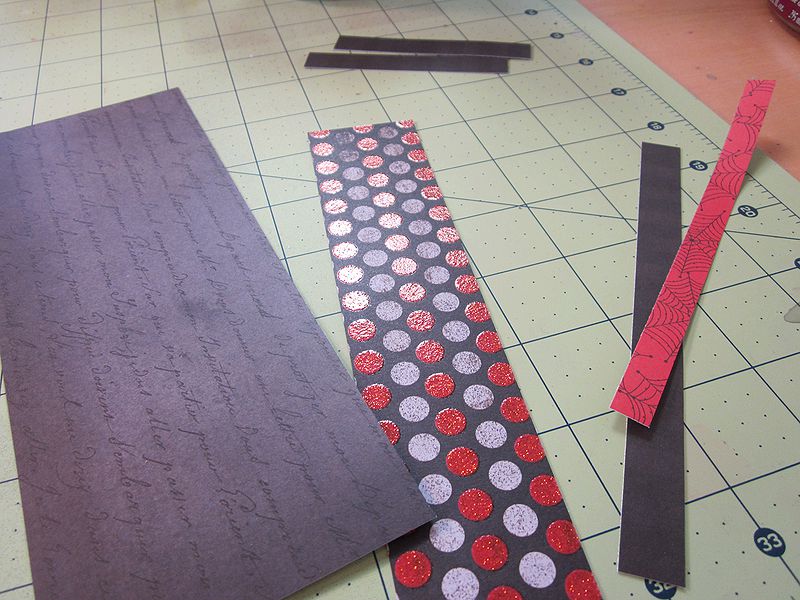
I decided to use several seasonal papers to collage the inside. Looking back, I might have done something spookier, as this is a little incongruent with the outside.

gb 24

Grunged it up with a black glaze.

gb 08

I thought I got more pictures of the letter painting, but I didn’t. This took a teeny, tiny brush, and several sessions. Then the back and side got a base coat of gray.

gb 09

I used toilet paper (or bog roll, as the Spousal Unit calls it) and liquid matte medium to create texture. The paper gets extremely mushy, so you can push it around where you like.

gb 11

Another coat of gray. Okay, I didn’t really need the first coat. Shut. Up.

gb 13

It doesn’t photograph well, but I did a glaze of black to get into the nooks, then wiped it back.

gb 14

Next, a lighter shade of gray is dry-brushed with a fairly heavy hand.

gb 15

A lighter touch is used to dry-brush a layer of white.

gb 12

The spine gets the same treatment, avoiding the painted details.

gb 16

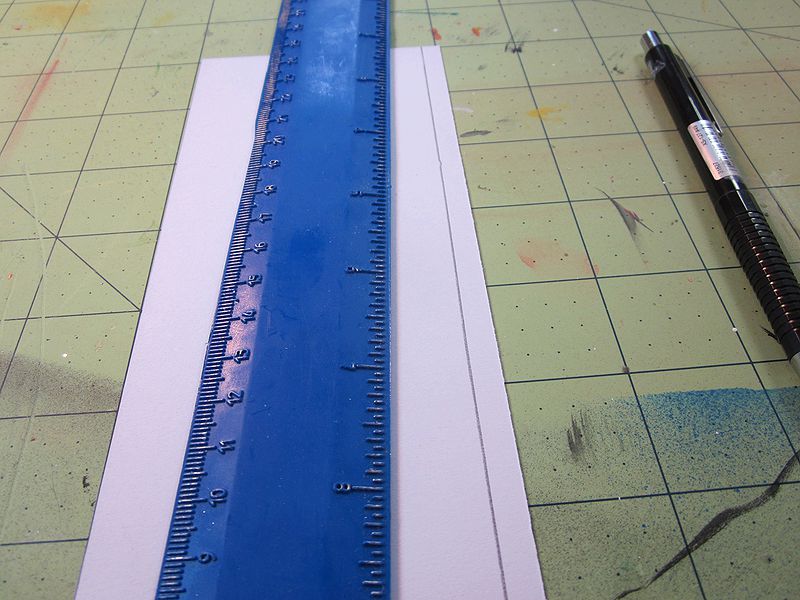
I was going to leave the “paper” alone, but I decided to freshen it a bit. I discovered there were subtle grooves, so I did a base of Titan Buff, a very light wash of brown to stick to the grooves, and a gentle dry brush with white to hit the high points.

gb 17

I waited until the very last to do anything with the top, as I didn’t want to have to use the skull for support as other parts were drying. His name is Rutger. Isn’t he gorgeous? He got glued down with Liquid Nails, as apparently, I’m out of E6000.

gb 18

Once the glue dried, there were some gaps between him and the surface. I used liquid matte medium and bog roll to fill them.

gb 19

I wanted Rutger to look as if he were a part of the book, rather than just glued on, so more bog roll was used to create a smooth transition. Then the rest of the front cover was treated.

gb 20

Before I did any painting, the entire skull got a coating of liquid matte medium. This is because paint looks different, depending on the substrate. I wanted to have a consistent substrate so the paint color would be the same.

gb 21

Time to paint! First, my base coat of gray. That red you see around Rutger is the red dye from the original book cover coming up. No worries, it will all get covered.

gb 22

The front cover got a glaze of black to stick in the low points, which was wiped back bit by bit. Then two successive dry-brushing layers of ever lighter gray, finishing with a light touch of white. The teeth and the area around the eye sockets got a little extra white for emphasis.

gb 23

I could not be more pleased. It was an absolute joy to work with DG’s skull. This grimoire is the last raffle-eligible item of the season.

gb 25

lm 08

I don’t often go for cute, but I admit I’ve been wanting to use these little monster stamps for a while. So long I don’t remember where I got them. Knowing me, they were Studio G stamps in the bargain bin (I checked, I was right). So, since I did a set of fairly dark cards, I thought I’d do something cute for those who dig that.

lm 01

For this project, I used:

  • Blank kraft paper note cards, with envelopes
  • Papers by Recollections
  • Plain black card stock
  • Bristol paper
  • Versafine Onyx Black
  • Extra-fine embossing powder
  • Distress Markers
  • Fiskars circles template
  • Studio G Stamps
  • Sizzix Decorative Frames
  • EK Success jack-o-lantern edge punch

lm 02

I chose a harlequin pattern and cut it to 4¼” x 4″, centering the pattern as much as possible.

lm 03

I punched out jack-o-lantern edges, and trimmed them so they’d have attaching room below, and be 4¼” long. I needed six edges for the three cards.

lm 04

Next, my three little monsters got stamped on Bristol with Versafine and embossed. I originally used marker pad, as I’d planned on using Copics, but that wasn’t going as well as I liked, so I switched to watercolor.

lm 05

Distress Markers applied with a water brush colored the monsters.  Before I painted them, I marked a light pencil circle, 1½” across, using a Fiskars circle template. I didn’t use their cutter, as it’s not all that trustworthy. I did two of everything, just in case, then I cut out my monsters and chose the best.

lm 06

I stamped these sentiments from the same Studio G set on to another piece from the Recollections stack.

To assemble, I edged the harlequin paper with the jack-o-lanterns, top and bottom. Centered toward the top, the decorative frame went down, and a monster on top of that. Sentiment below. Everything is stuck straight down for easier mailing. Adorbs.

Raffle status: Definitely sending these off.

lm 07

2m pk myra

I got wonderful loot over the weekend!  On the left is an amazing Dia de los Muertos skull from Prairie Kitten–she even put my handle on there! In the back is a lovely sparkly pumpkin from Lady M, who keeps an awesome blog, and is a fellow Cryptkeeper. Middle bottom is a creepy Pumpkin Lord from Myra. She carved that stamp, BTW. And over on the right with bats and sparkles all the way from Sweden is another Cryptkeeper and spooky blogger, Ms. Misantropia.

Only two days until the deadline!

fc opener

When the next project on my board said “felt ornaments,” I decided to go in a slightly different direction.

1459103_624835144247095_1257176730_n

I have had a kitty from Sew Many Cats on my studio wall for several years. I thought it would be fun to try feltcraft and make a Halloween kitty.

fc 01

I didn’t want something huge, so I drew my kitty shape on a single sheet of paper. I decided to attach the tail at two points for extra stability.

fc 04

fc 05

Kitty got traced on to some high-quality black felt, and cut out twice.

fc 02

Went through a pile of possibilities, deciding on off-white, red, and purple for accents.

fc 06

Felt accents get planned, cut, and placed on Kitty to see how they fit. Looking good, on to the fun stuff (well, even MORE fun).

fc 07

Paint! I wanted the accents mostly pre-painted. I went a little wild, doodling with acrylics. Some colors had to be gone over several times to get enough vibrancy.

fc 08

Eye and belly parts, ready to be layered on.

fc 09

Painted accents are attached with fabric glue. That’s right, didn’t sew ’em. I’m a very slow tailor, and it would have taken me two weeks. I like glue. Glue is my friend.

fc 10

Kitty’s design was looking a little heavy on one side, so I gave her a pet spider to even things out.

fc 11

More paint! The spider isn’t actually attached yet, but this is how she will look after she’s all sewn up.

fc 12

To avoid tears, I did a lot of stuffing as I went along. I sewed the end of the tail, and got that stuffed first. Did I mention I’m terrible at sewing? I knew what stitch I wanted, but couldn’t remember how to do it, or even what it was called. I finally had to look it up–it’s a blanket stitch.

fc 13

Here I’m making sure the ears get stuffed. I also tried to get extra stuffing in the delicate parts, like the tail and neck, so they wouldn’t flop around.

Here’s the finished Kitty. I think she’s faaaabulous.  This was the most fun project so far.

What I learned: Don’t let the sewing intimidate you.

Raffle status: Yup! Kitty will be getting a new home.

fc fin


pl 11

I was browsing the craft magazine section at the local book store (we still have one!), and picked up a copy of Paper Art, which I’d never seen. Inside were several cool projects for making objects from paper. One quick, simple project appealed to me: an electric (yeah, please don’t put a candle in this) tea light holder made from paper and brads only–no glue.  Because this isn’t rocket science–there’s nothing really proprietary here–I’m going to go ahead and share the instructions. I do encourage folks who like paper to pick up the magazine, though. It seems spendy, but it’s almost wall-to-wall projects.

pl 01

Any opportunity to whittle away at my paper stash is welcome. Also, I like going through my pretty papers! I picked out a few sheets from my Halloween stacks.

pl 02

Time to cut. Here are the pieces you’ll need:

From cardstock–

  • 8″ x 3″ rectangle, for the body
  • ½” x 6″ for the handle
  • 3/8″ x 6″ if you want a decorative strip over the handle
  • 2 strips, ½” x 3¼” for the base

NOTE: Don’t make my mistake and use cardstock that’s white on the back. Color is better, just make sure you can still see your pencil lines.

Any weight paper:

  • 8″ x 1½”, for the bottom decorative strip

You will also need 11 brads. I used 4 decorative ones and the rest small and black.

You can also punch out shapes to add to the brads along the bottom decorative strip.

pl 03

Next comes the measuring. I hope you will do a better job than I, as I got a bunch of stuff crooked and had to fix things later.

  • On the back of the largest rectangle, draw guidelines ¼” in all the way around.
  • On the back of the smaller, 8″ x 1½” rectangle, draw a line ¼” from one long edge, and ½” from the other long edge.

pl 05

Next, get out that awl or small hole punch:

On the large rectangle–

  • Punch holes at each corner where the guidelines intersect.
  • On both long edges, punch a hole in the middle of the line.  Same with the short edges (my picture doesn’t show these, because she forget them in the instructions. Ahem.)
  • Decide which long edge is bottom, and measure and punch 2 holes evenly spaced between the outer and middle holes.

pl 06

On the small rectangle–

  • Align the ¼” line of the small rectangle underneath the bottom line of holes of the larger. Punch through, duplicating the holes.
  • On the ½” line of the small rectangle, measure 1¼” in from each short edge and punch a hole. In between these holes, make 2 more evenly spaced holes.

pl 07

  • Connect the large and small rectangles with three brads in the center holes. You can go either way, but I put the larger rectangle on top.

pl 08

  • On the 2 strips for the bottom, measure in ½” from both edges, and fold at to make a 90-degree angle. Yes, that’s paint on my hands, a result of working on three projects at once.
  • Punch in the middle of the square you’ve made.
  • Attach one end of the strips to the first two bottom holes on the small rectangle. This is where I used a fancy brad, for decoration.

pl 09

Handle time!

  • Mark ½” in on the handle strip. Round the corners if you want to (I didn’t).
  • Punch in the middle of the square you’ve made. At this point, I also lined up and punched my decorative handle strip.
  • Attach one end to the top middle hole of the large rectangle.

pl 10

Assembly:

  • Overlap the short ends of the large piece and add 3 brads to close the cylinder. At the same time (oh, where is my third hand!) attach the other end of the handle to the corresponding hole.
  • Connect the loose ends of the bottom strips with decorative brads.

It’s simple and pretty. I made a couple of boo-boos, though. I used white-backed cardstock, so the inside was stark white and didn’t look good. I hit it with a little black paint. DON’T DO THIS. My lantern, sadly, is too opaque to throw much light. If I do it again, I’ll use paper that doesn’t need to be painted. I’ll also be mindful of color; I think orange would let through more light than black.

This one is too delicate to send out for the raffle, but I bet you can make your own easily.

pl 12