Spooky

Happy Halloween LTC

I have a hobby called letterboxing. It’s a treasure hunt where you hand-carve rubber stamps and leave them in interesting places for others to find. Then you go find theirs. An adjunct to this hobby is the Letterbox Trading Card.  It’s like an Artist Trading Card, but it must include a hand-carved stamp. This year, I planted a series of boxes just for the month of October, and I used the stamps to make a set of cards. I used neon embossing powders from Zing on these, hoping they would fluoresce. For the most part, they do:

Halloween LTCs--flourescent

If you’d like to hunt my series, you have until the first part of November before I pull the boxes. Follow the link above to find out more about the hobby before you venture out, then use my clues to find the treasure.

Ghost Roast


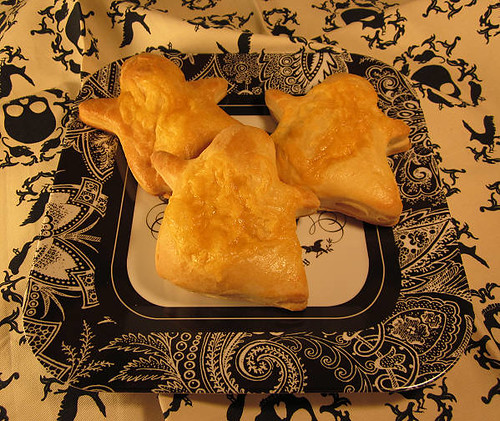
Later in the month, I will be heading to a potluck. It is far-away, and in a park, so I needed something that would be very portable, and good cold.  I also wanted something savory and vegetarian, because there’s always tons of meat and sweets at these things. Though I may experiment with a few more ideas, so far, testing is positive for these little ghosties.  I used a 4″ ghost cookie-cutter, so these are a perfect snack size. They are also tasty.

Indredients:

2 cans Pilsbury Crescent seamless dough (because making dough is a pain in my ghoulish butt)
1 small green bell pepper finely chopped
1 small red bell pepper, finely chopped
1 small onion, finely chopped
1/2 potato, finely chopped
2 cloves garlic, minced
1/2 tsp oregano
Olive oil
Salt & pepper to taste
1/2 c cream cheese
1 egg
1 tblsp water
1/2 c cheddar cheese, grated

Toss veggies with salt, pepper, oregano, and a light drizzle of olive oil. Spread on  greased cookie sheet and roast at 350° for about 20 minutes, until veggies are tender and a little brown on the edges. Dump them in a bowl and mix them with the cream cheese while still warm, so the cream cheese mixes more easily. Set aside.

Roll out your dough, rolling each can separately, to about 1/8″ thickness.  I just tried to get it thin–the dough is very springy. On one sheet, use your ghost cookie-cutter to lightly score shapes so you know where to put the filling. Put a forkful of filling on each ghost shape, avoiding the edges:

ghostroast-score

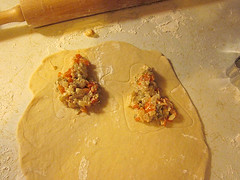
Place second dough sheet over the first, and press around the filling, so you can see where it is when you cut out your shapes:

ghostroast-press

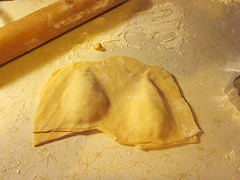
Cut out your little ghosties. Mix egg and water in a small bowl, and brush the tops of each ghost lightly but thoroughly.  Put a pinch of grated cheddar on top of each ghost.

Place ghosts on ungreased cookie sheet and bake at 375° for 12 minutes. Makes about 10 ghosties.

Enjoy!

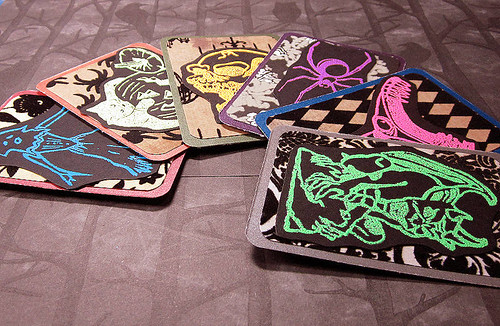
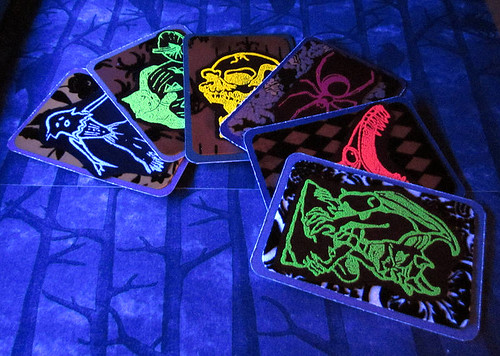
Now, I know you love my blog, right? Well, the Countdown to Halloween list is up, and I’m betting that, if you like my spooky digs, you will like some of these as well!

And now, some delicious links:

Pop art by day, luminary by night!

I love this thing. I had a couple of false starts, but the project was a lot of fun. Easy, too, if you have the right tools.  Seriously, I wouldn’t have attempted this without a Dremel and a flex-shaft attachment.

  1. Cut a large hole in the bottom of the pumpkin, so you can place it over lights.  I use electric tea lights, because the smell of burning foam gives me an awful headache.
  2. Mark out your grid. I used a measuring tape to get the lines where I wanted them.
  3. Punch out holes with your Dremel.  Wear gear! Foam dust goes everywhere, no lie. My dust mask was AWOL, so I had to use a bandana.  Call me Dremel Bandito.
  4. Give it a few coats of white paint until you’re happy with the finish.  I used Ceramcoat Oyster White.
  5. Next, a coat of pearl. I used a pearl glaze by Making Memories.
  6. Once everything is dry, play connect-the-dots with a sharpie.  I originally started with black paint, but I just couldn’t get enough control on the uneven surface.  That part of the project will be forever known as The Back of The Pumpkin.
  7. Paint the stem black. Always paint the stem last, so you can use it to hold the pumpkin.
  8. All pretty!

I have one more craft pumpkin, a tall black one. I want to use the Dremel again, but this time I want to actually move it around and carve something, instead of just punching holes like a weenie.

Here is the video that got me started:

Have fun!

And now, a few linkies from today’s mining:

Three cute project ideas from Creative Blog
Pumpkin Topiary from Simpsonized Crafts
Ten truly lovely projects from Tatertots and Jello I want to do that specimen art.
Four Halloween Advent calendars from Tip Junkie
Surprisingly simple and elegant Frankenstein’s Monster (yeah, they just say Frankenstein, but I’m too nitpicky!) glass block

Too Cute to Spook

I don’t know why it took me so long to pick up card making. I think it didn’t catch my interest until my friend Marj got me started. Suddenly, I had something to do with all that paper I couldn’t stop collecting. In fact, I have a deep, abiding love for most paper-crafting supplies, and making cards is a fun way to use a bit of everything, and the recipient loves it. Or if they don’t, they certainly don’t tell you to your face. This little card is getting filled with LTCs and sent off to a friend who is definitely too cute to spook.

In other news, for the next month, you will see a little link on the right that says I’m a cryptkeeper.  That’s because Halloween Blogs does an awesome Countdown to Halloween, and participating ‘cryptkeepers’ post every day during October. Since I was already doing that, naturally I jumped on board.  I can’t wait to get a look at the other blogs on the list!

And now, linkies:

I’m not much for cheesecake, but this candy-corn recipe looks great
Rag wreath from Sassy Sanctuary
Babble gathers a bunch of kid-friendly ghost projects

Blingkin

I brought home two craft pumpkins, one black and one orange. I’d never worked with these, and wanted to do something other than just carving a face in the front. I asked myself, what do I have a ton of? Two things: big rhinestones and purple iridescent pony beads. Don’t know if I’ll use the beads yet, but here are the rhinestones, shimmering against a pretty black background. The best deal and the nicest colors came from Target, oddly enough, so that’s where I bought my pumpkins. Sadly, they were out of white. I kinda want white, so I may just paint the other one.

Things I learned: super glue doesn’t work that well. It doesn’t fill gaps, and it damages the pumpkin. I used a glue gun, but man, I need to find out if there’s such a thing as low-string glue for it. The glue strings were insane. I’d say I learned that I can’t measure, but I knew that already. My method: measure twice, cut once, get it wrong anyway, try again, hang head, learn to accept the beauty of asymmetry.

Some links and things:

I think I have to try this paper-mache pumpkin from Stolloween

Lovely yarn-wrapped gourds from Two Shades of Pink

Shrunken Heads from Our Best Bites

Ribbon Wreath from She’s Kinda Crafty

Pretty black & white pumpkin treatments from Oopsey Daisy

Finally, here’s a video on how to look like a Gothic Lolita doll. Creepy and cool.

Tiny Tombstones

I had a couple of old, primitively-sculpted sprigs from several years ago that I was itching to use, though I think the text stamped one is my favorite.  Polyclay, about 2″ tall.  I’m just in love with these. They will make a fine tiny cemetery.

Sorting Rhinestones

For my next project, I took out my large peanut-butter jar full of silvery rhinestones.  At first I thought: ‘oh, they’re all scratched and shabby from sitting in a jar for a couple years.’  Then I thought: ‘cooool.’ To facilitate proper planning, I naturally had to sort them by shape, take a rough count, and put them neatly into separate Ziplocs.  I felt a bit like a dragon, with my sparkling loot.