Archives

All posts for the month November, 2015

gar 08

It’s done! And I was really bad about taking pics of the process on the last two. Boo.

Here’s the “haunted” flag. Stamp by Rubber Stamps of America.

gar 04

gar 07

Now that I think of it, the doodles should have been windy and snakey. But oh well, I like it as is.

Here’s the “eerie” flag, stamp by Hampton Art, from Rare Oddities 2:

gar 05

gar 06

I started out wanting to match the charms to the flag, but the only owl charm I have is cartoony, so no dice. I really wanted to use the wolf, anyway.

And there they are together:

gar 02

I think it looks pretty impressive. I puzzled over what to use to connect them. I didn’t have any ribbon that worked well enough. Finally, I used some of the fabric from the “Scary” flag. I think it’s just right. This may be one of my favorite projects ever.

gar 03


scf 07

Next I started on the adorable batty, using an old Studio G stamp.

scf 01

Oh, these doodles are so much better. The bat gets a little Lumiere. I’ll be spreading that love around.

scf 02

A gold moon, and little purple dots on the doodling.

scf 03

Blue-violet beads go on many of the little buds.

scf 04

Scary goes on, then some bugle beads. Yeah, they’re crooked. I’m okay with that.

scf 05

And naturally, a little bat charm from my stash. This one went pretty quickly, and I felt like I had a clearer direction than usual. Two more to go!

scf 06

df 07

Mistakes were made.

So I figured I could do the rest of the flags in a production line.

df 01

Don’t worry. That’s not the part that went wrong.

df 02

I started on the candle flag (Inkadinkado, Nevermore). It was the doodle. It had boxes and colored dots of different sizes and it was obnoxious and clown-like. I hated it, and I’m only a little sorry I didn’t take pictures.  I knew it had gone horribly wrong, and I forgot about the camera as I got involved in fixing things.

Lots of paint followed. At first, I put in blocks of black, covering some of the dots. Nope, that was worse. Then I covered almost everything in black, then added a layer of pearl (this is all Lumiere). That was better. Then three more coats of pearl covered everything. Then more paint. More! More!

df 03

I even re-painted the lace because the contrast was off. Some of the blocks and dots are still visible, but now they add texture rather than making me think of tiny, overcrowded cars.

df 05

This one is a bit different from the others. Lots more shimmer with the paint. I skipped adding beads, because it had enough shine, and parts of the lace are bead-like. It went from something I hated to something I loved. I think I need more Lumiere paints, because they are a blast.

df 06

cf 05

Maybe I’ll do the whole garland, maybe I won’t, but I at least have two flags done.

cf 01

Started by laying out some paisley fabric and some pretty orange lace. They got attached with fusible interfacing, and sewed on the top edge.

cf 02

The pumpkin is from the My Mind’s Eye Lost & Found Halloween set.  After I’d filled that in some, I started doodling.

cf 03

At about this point I realized there was nothing spooky about the flag. Fixed that.

cf 08

To bring out the pumpkin more, I used Lumiere’s Halo Pink-Gold and Metallic Russet.

cf 04

This time I distressed the edge with a mix of Neopaque Brown and Lumiere Russet, heavily watered. I like it much better. The edge was sewn, and the spiders given a bit of dimension with beads. After the beads were done, the back got covered in fabric.

cf 06

Finally, a spider charm with a couple of beads attached to the bottom.

This went a lot faster than yesterday’s flag. I think I’m getting the hang of it. So to speak.

cf 07


sf 12

sf 01

I think it was some kit subscription I dumped long ago that sent me this garland kit from Maya Road. It includes six canvas flags. They are nice and heavy, and pre-grommeted. I thought I’d make a garland! We’ll see how that turned out.

sf 02

I wanted to use these Tulip Fabric Markers that I got when I was on a fabric painting kick. I grabbed a piece of muslin close in color to the flags, and did a swatch test. These are gorgeous and bright, and as long as there aren’t a lot of solid areas, they stamp well. Also, they don’t usually bleed.

sf 03

You can only see a bit of my table, but lemme tell ya, half of my studio is on it. I grabbed stamps and ribbons and lace and charms…anything I thought might be nice on the garland.  I chose some fabric, lace, a charm, and a stamp from Craftsmart. I stamped on paper first, so I could decide on placement.

sf 04

Fabric is down with fusible interfacing, stamp is stamped. I grundged things up a bit, and started doodling paisleys.

sf 06

I had planned to get away with no sewing, but the flag cried out for it. I’ve added some color to the paisleys and the skull, and run around the red fabric and the entire flag a few times on the machine. Next, I used a Hampton Art letter set to add some text, and sewed around that, too.

sf 07

A few more details on the paisleys. I decided the skull wasn’t standing out enough, so I added some Lumiere Pearl White. Of course, I took the picture before I added the paint, because I am a genius.

sf 08

A few beads were required. I took out the red delicas from the last project and highlighted the red paisleys.

sf 09

To cover my many sins on the back of the flag, I attached some cool fabric with fusible interfacing.

sf 10

Last, a grommet on the bottom, a jump ring, and red beads to highlight the skeleton charm.  The cord is just for taking pictures. I may or may not make this into a garland later.

See, this took me all morning. Like allll morning, so I decided one flag was good enough for today’s project. I love this, and I’m thinking six like it would be pretty cool, but that’s for later.

sf 13

sf 11

tq 11

I subscribe to quite a few magazines. They are great motivation. My method: I have a Post-It flag dispenser on the ledge of the tub. I go through the magazines, marking things I’d like to try. Then I copy the first page of the article and put it in a notebook, making sure the issue is somewhere on the page. The magazine is stored neatly in date order, so I can choose something from the notebook, and grab the appropriate magazine.

I mention all this, because I picked something from the notebook tonight. This mini trinket quilt is inspired by Vesna Taneva-Miller, and was featured in the Summer 2015 issue of Sew Somerset.

tq 01

For this project, I’m going to use upcycled shrink plastic–#6 plastic from a takeout container. Rock N Roll is one of my favorite sushi rolls. It’s deep fried. Don’t judge.

tq 02

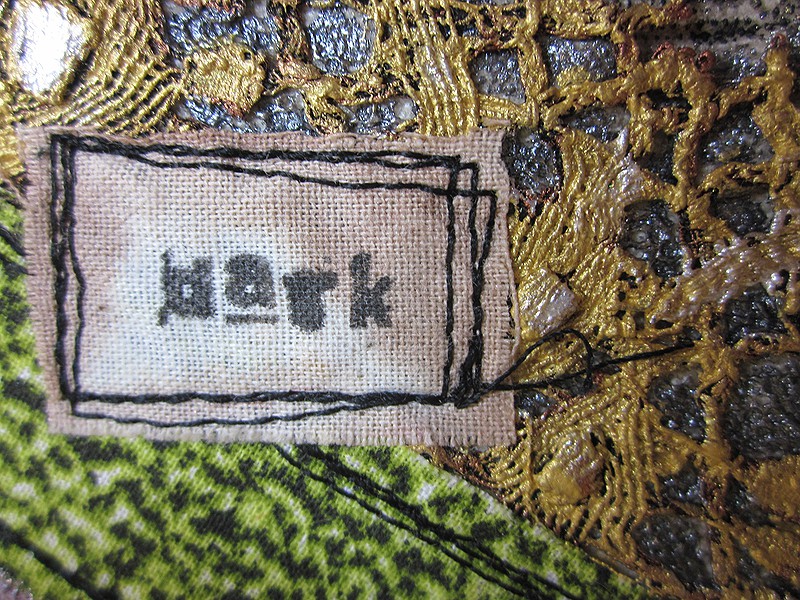
I cut out the best piece of plastic, gave it a good sanding on one side, and stamped on the sanded side. The spell book is from Inkadinkado’s Nevermore set. I often leave the pressed symbols from the container in, as I like to show where the material came from.

tq 03

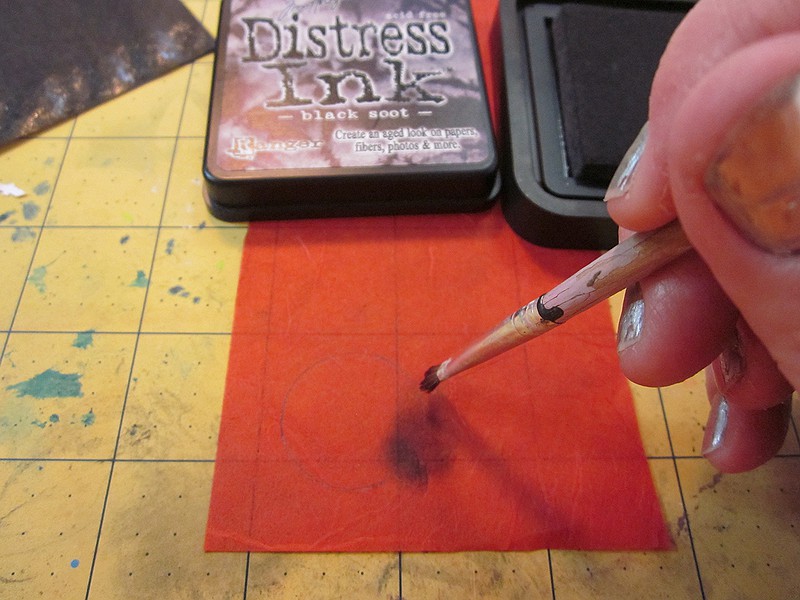
Next, the image is lightly colored with pencils. You don’t want to add too much color, as it will become very concentrated when the plastic shrinks.

tq 04

A 1/8″ is used to make stitching holes around the image. A couple of these got very small, and had to be opened with one of my tiny diamond files. Not much to be done about that.

tq 05

All shrunk. See what I mean about color concentration?

tq 06

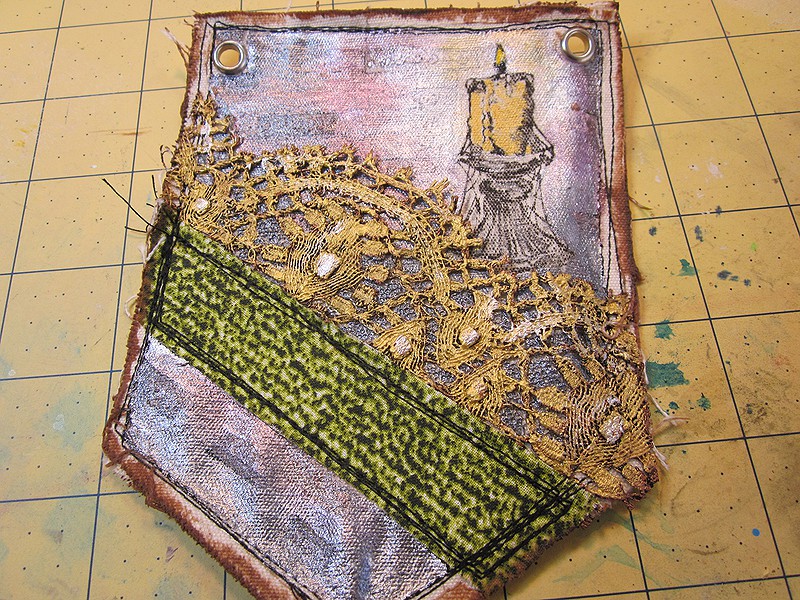
Time to choose fabric! Muslin, tulle, a very soft fleesish (it’s a word because I say so) thing, and some lace scraps.

tq 07

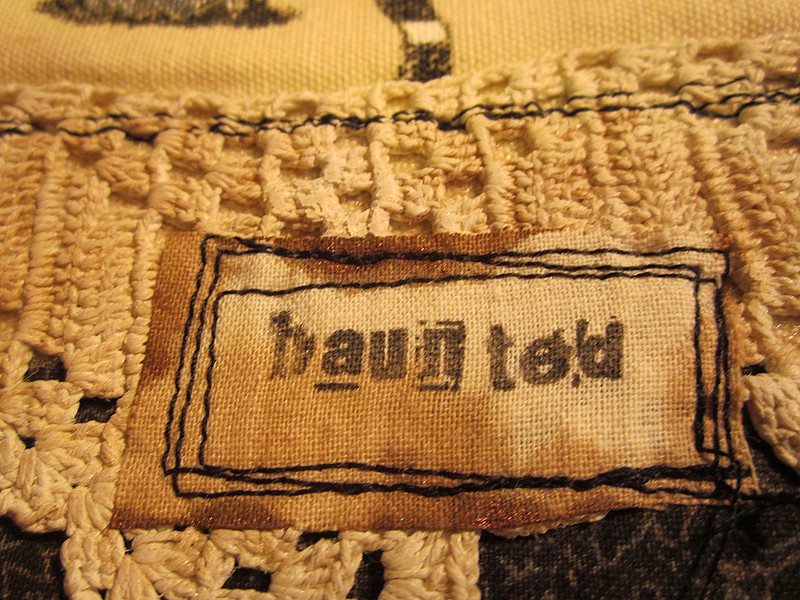
I used a machine to go around the layers several times with black thread. Red embroidery thread attached the spell book.

tq 08

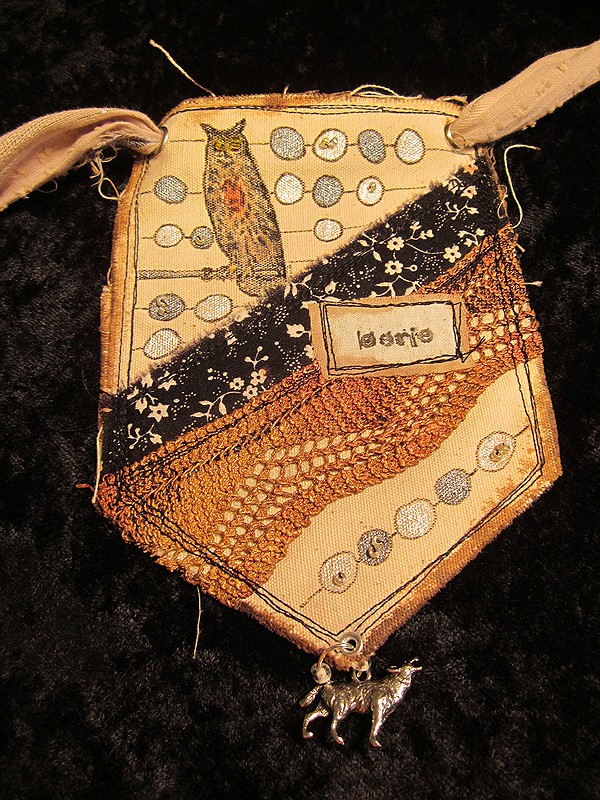
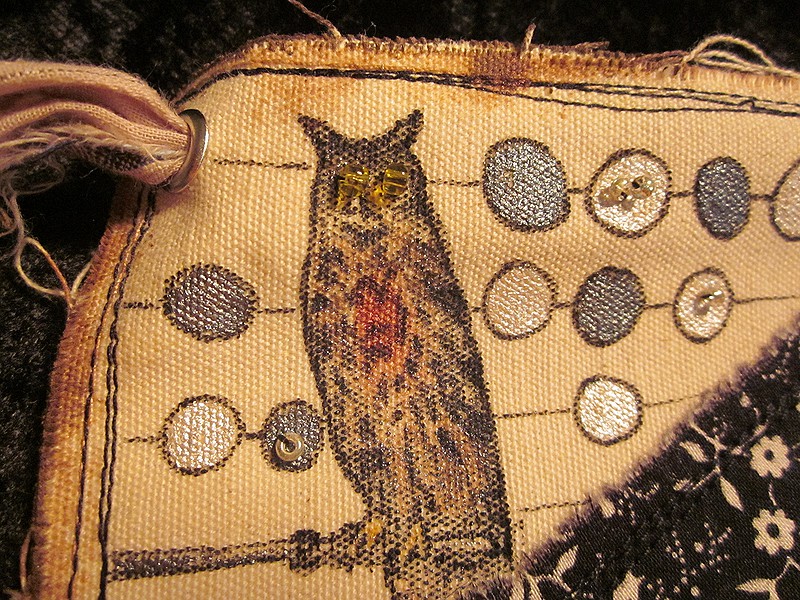
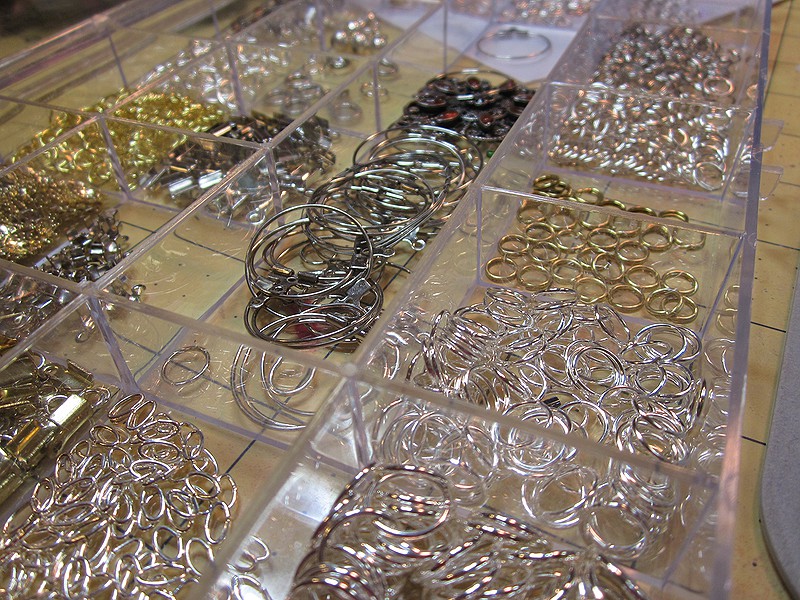
I’ve been wanting to use those silver beads forever. Along with the red delicas, they are nice accents.

tq 09

Muslin backing is added once all the embellishment is done. Because of those nifty corner beads, I had to hand-sew. And since I was hand-sewing, hey, why not add some jute?

Mind you, I had to do this twice, because I cannot sew a straight line. The second time, fusible interfacing kept everything in place.

Eyelets were set in the upper corners (because I found a Crop-A-Dile for half price at Tuesday Morning!), and binding tape used to make an over-the-head necklace.

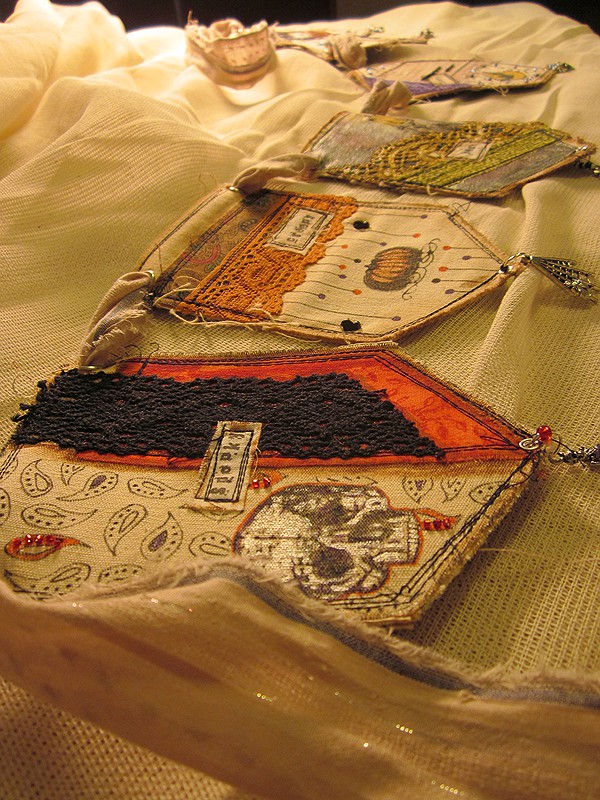
The only thing I would do differently is use a shaped stamp, like a pumpkin or skull, so it was more immediately recognizable. This thing is tiny, and if someone wanted to see what it was, they’d so be up in my face. Overall, though, I loved the process, and I think the result is fabulous.

tq 10

rp 07

I had some paints I wanted to play with, Silks Acrylic Glazes and Pebeo Prisme Fantasy. Some of it worked, some of it didn’t.

rp 01

I found some nice flat cardboard in my stash, and decided it had to be postcards. I cut four, and will use the rest later.

rp 02

I started out with a coat of gesso, then some Silks in Wine and Roses and Azurite. So pretty.

rp 03

I used Versafine to stamp this raven from Inkadinkado. Since I got it a little too high, I added a Hampton Arts banner. After three tries. Getting it upside-down the first time. Let us never speak of it again.

Clear embossing powder came next. I was hoping it would act as a resist.

rp 04

I read the directions on the Pebeo, and realized it required turps to clean up. Then I thought, hey, I’ll just use a disposable makeup sponge! Did you know? I always get paint on my fingers. Luckily, alcohol worked well enough on my skin. The layer wasn’t thick enough to get the paint’s effect, and of course the embossing didn’t resist it much. I ended up buffing it with a baby wipe. It actually looks pretty cool, though next time I would just use something water-based, like Lumiere.

I also took a cotton ball (because there was one sitting on my table for no reason), and went over the edges with more Wine and Roses.

Then I kinda got involved and stopped taking pictures, because I am a goob.

I wanted a little more color and contrast, so I used the Silks again–Persimmon for the banner and Chestnut Brown for the wreath. I painted them then pressed a tissue over the paint to pull most of it back.

rp 06

The bird was an issue. It ended up with five different layers of three different paints on it. In the end, I’m okay with it. It had a base of Lumiere black mixed with Golden black, then many attempts at dry brushing with Lumiere white and Golden white, then finally a very watery wash in black.  Oof.

Overall, I like the look, and would like to try again with different paints, and a better idea of direction.

rp 05


BONUS!

USCB has released their library of cylinder recordings from the turn of the 20th century. It is way cool. Only one thing comes up for Halloween: “The Halloween Dance.”

IMG_6458

I picked up a mess of Tim Holtz Facets at Tuesday Morning for cheap, and I’ve been wanting to play with them. For this pendant I used:

  • Tim Holtz Facet, small round
  • Red handmade paper from Daigo Japan
  • Fab Lab Autumn Craft decoupage paper
  • Studio G bat punch
  • A Wink of Stella brush
  • Golden Fluid Matte Medium
  • Sakura 3D Crystal Lacquer
  • QuickStik
  • Distress Ink, Black Soot
bp 01

I always forget something in supply pics. This time: Distress Ink.

bp 02

To make my bats a little sparkly, I applied a couple coats with my A Wink of Stella brush. I love this thing.

bp 03

While that was drying, I ran a pencil around the Facet on my background paper.

bp 04

Using Distress Ink and a dry brush, I created a fairly deep vignette, so it would still be visible despite the strong facets on the pendant.

bp 05

Tissue paper doesn’t play nice with punches. You can make it behave by punching it along with a piece of plain paper. Then you verrrry carefully separate the paper from the tiny tissue shape. I punched out three bats, and made sure they were sparkle side down.

bp 06

I coated the entire back of the Facet with liquid matte medium.

bp 07

QuickStik is extremely handy for picking up tiny things. I placed the bats sparkle-side-down on the back of the Facet. I had to hold the bat down with the tip of my pencil and carefully lift the QuickStik, as the hold was a bit strong for itty bits of tissue.  Once the bats were arranged, I gently went over them with matte medium. Be careful not to move the bats around. Like I did.

bp 08

Making sure there was plenty of matte medium on the back, especially on the edges, I turned the pendant over and pressed it to the background tissue within the penciled guidelines.

bp 09

Working quickly, I applied matte medium to the back of the pendant, over the tissue, making sure everything was covered. With a damp fingertip, I carefully pressed the tissue, rolling my finger toward the edge, to eliminate any bubbles.

bp 10

I love how the back turns translucent. Now, wait for the pendant to dry completely. COMPLETELY. If you trim early, you’ll rip the tissue. Like I did.

bp 11

Okay, now you can trim. It’s easiest to do this right-side-up. Trim right up to the pendant edge.

bp 12

I applied a coat of 3D Lacquer to the back. I like this stuff because it’s very tough, and dries clear. I could have done a dome effect, but I like the thin coat better. It looks all artsy.

Add a jump ring (included with the Facets) and a cord, and you have a pretty sparkly bat pendant!

bp 13


sb 01

I have a rule about insomnia: after an hour of worrying about clowns eating me, I get up and do something. Last night, the clowns wanted to play with shrink plastic.

sb 02

Usually, I’ll use #6 plastic containers for my shrink film. This time, I wanted a white background, so I headed for my small stash of commercial sheets.  Everything except for the cat is stamped in StazOn Jet Black.

I used four stamp sets:

  • Mindscapes Halloween by Inkadinkado (pictured above)
  • Halloween Hauntings by Tattered Angels
  • Trick or Treat by Studio G
  • Beware by Studio G

sb 03

When I first stamped the cat (Tattered Angels), I had the hole by the tail, and it was so long it curled completely over and fused to the body. Oops. I went to re-stamp, and discovered I was out of white shrink plastic. I decided having a black cat would be cute, so I got out the White Opaque StazOn. I was right, it’s way cute.

sb 04

Once everything was shrunk, the blank backs looked sad, so I grabbed a damask stamp from Great Impressions.

sb 05

Now they’re as pretty on the back as the front. That’s an idea I’ll be going back to.

sb 06

Time for beads! Maybe. I was originally going to go lazy, and use stretch cord, but it wouldn’t work with the beads I wanted, so I rethought…

sb 07

…and ended up building a charm bracelet from jump rings. It won’t be the strongest, so I’ll have to wear it carefully.  At this point it’s about 2:00am, and I probably shouldn’t be trying to put together patterns from recalcitrant bits of metal.

sb 08

This looked good, but ended up being four inches long. Sigh. I took it apart and re-designed, and got a decent start before I fell over at 3:00am.

sb 09

Yay! All done. I managed to get the “Trick or Treat” charm on backwards, but hey, it wouldn’t be me if something wasn’t cockeyed.  I absolutely love this thing. I’m keeping it forever and ever. Or until I catch it on something and the jump rings separate.

sb 10