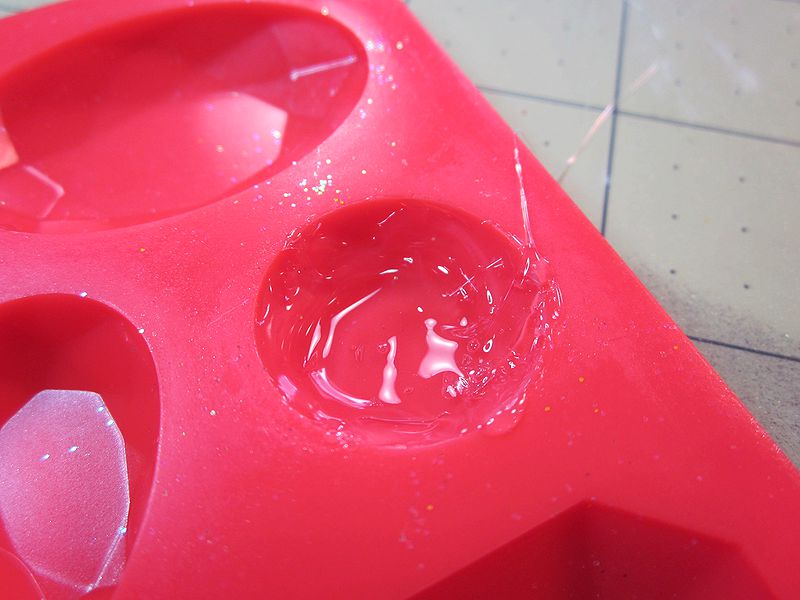
I was working on stuff for my Month of Spookdays, experimenting with adding stuff to hot glue, when I stumbled upon something very unexpected: a pretty decent faux opal, made with hot glue. They look much better in person, and are hard to photograph. Here’s a slightly better shot:
Here you can better see the internal texture.
This is how you do it:
You will need:
–Hot Glue Gun. Mine is high heat.
–Silicone mold. I’m using a Mod Melt mold. I wish I had one for a plain cabachon, but I could only find facets.
–Ultrafine glitter in Light Blue Transparent, Lavender Transparent, and Gold. My blue (Powder Blue) and lavender (Plum Fun) are from Suzie Sparkle, and the gold (Tang) is Barbara Trombley’s Art Glitter. Sparkle has no web presence, and is a small independent in Oregon. I’m sure other glitters will work—experiment!
–Pearl Powder in Interference Green or Blue. I’m using Pearl-Ex Interference Green.
–Chunky salt of some kind. I’m using “Pure Ocean” salt, which I bought from some wankery place. They probably thought I was going to cook with it. Nope.
–Soft paint brush.
–Heat gun (optional)
–Popsicle stick

Line your mold with glue and let it cure for a few seconds. It should be soft, but not liquid. This is so you get a decent top. Remove as many air bubbles as you can. I used a toothpick.

Get ready to work quickly. Fill the mold about a third of the way up.

While the glue is hot, layer your glitter. Use mostly blue first (more than you see here—I did a better one later). Add about half as much lavender. Finish off with a tiny bit of gold. The gold here is more centered, but I often put it off to the side. TIP: Glitter will stick like mad to the mold. Clean it off with a baby wipe.

Add several salt crystals. Keep them away from the edges, and press them firmly into the glue.

With the paint brush, apply a thin layer of pearl powder. Don’t overdo. Blow away excess.

Here’s the thing: hot glue doesn’t stick to salt. Unless you don’t want it to. That means all that salt is just sitting there, and if you put the glue gun nozzle down by it, your salt will move. So drop the last layer of glue on top from a few inches up. Once all the salt is covered, you can move the nozzle down and make sure all the edges are filled. I usually end up over-filling a bit.

Coat the back of the cabochon with pearl powder.

If you have over-filled, you can flatten things out while the glue is still warm with a popsicle stick.

Allow the glue to cool completely, and pull your gem.

Give it a trim. This is more easily done with scissors than a knife.

I think a milky look is more opal-like, but if you want to increase the clarity of your gem, hit it with a heat gun for a few seconds. I flipped over my mold for a heat-resistant surface. If you have facets, this will soften them.

The gem on the right has been clarified.

Of course, they don’t feel at all like opals. But they sure are pretty! If you try this, I’d love to hear back how it went. There’s lots of room left to experiment with colors, glazes, etc. I found that the gems look less opal-like when I used a nice, neat mold. Blobs on the work surface have a wonderful color. Fixing that problem is another project.


You could make a cabuchon mold pretty easily. You could just sculpt the shape and surface you want out of oil-based clay, stick it in the bottom of a throw-away container, and pour a plaster mold.
Pretty cool stuff here!
Yup, I could. I was pushing through quickly. I’ll be mold making later, though.