Making Stuff

me 09

So I was wandering the dollar store, and I grabbed a bag of large glass cabochons. The kind most people put in vases. Me, I thought: monster eyes!

me 02

They were not all of equal clarity, so I placed them over some finely detailed paper, and chose the best.

me 03

Next, I grabbed an eye graphic off Pixabay, and changed the color to make it more seasonal. I printed it on glossy photo paper, and hit it with some matte sealer because I have a mere inkjet, and didn’t want anything to run.

me 04

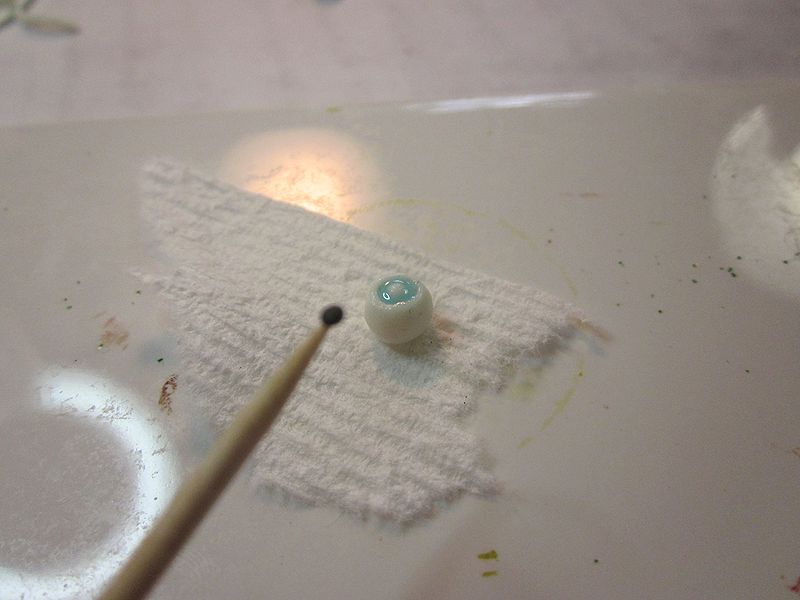
I used a tiny amount of Glossy Accents on the back of the cabochon, and applied the eye. I pressed and kept pressing to work out as much air as possible, though there wasn’t much to begin with. Hard to photograph, but it makes a pretty cool monster eye.

Now, what to do with it?

Stink_Eye_-_Front

I know! How about a low-rent version of this awesome Jimmy Pickering piece?

me 05

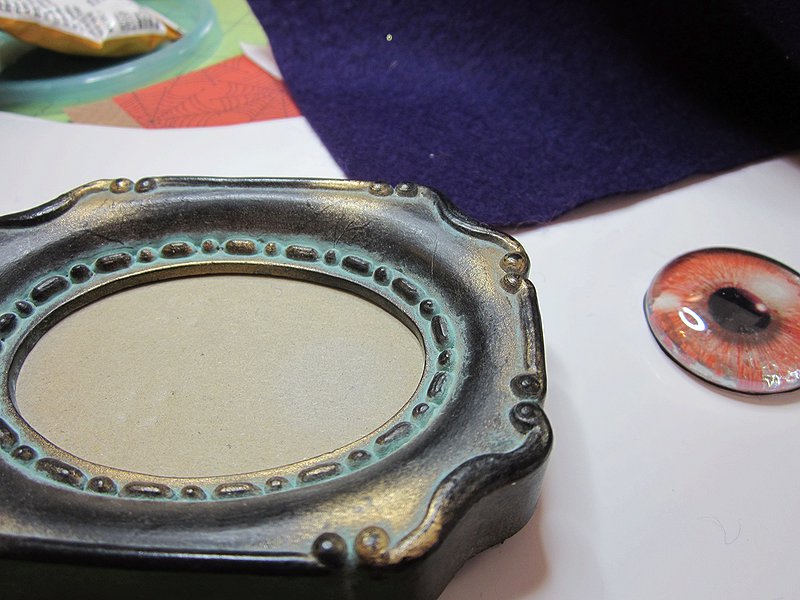
I gathered a frame I’d been wanting to use. Don’t have to do a thing to it, I love it as is. Now, I could go all polyclay, but I was aiming for quick and dirty, so I went with purple felt.

me 06

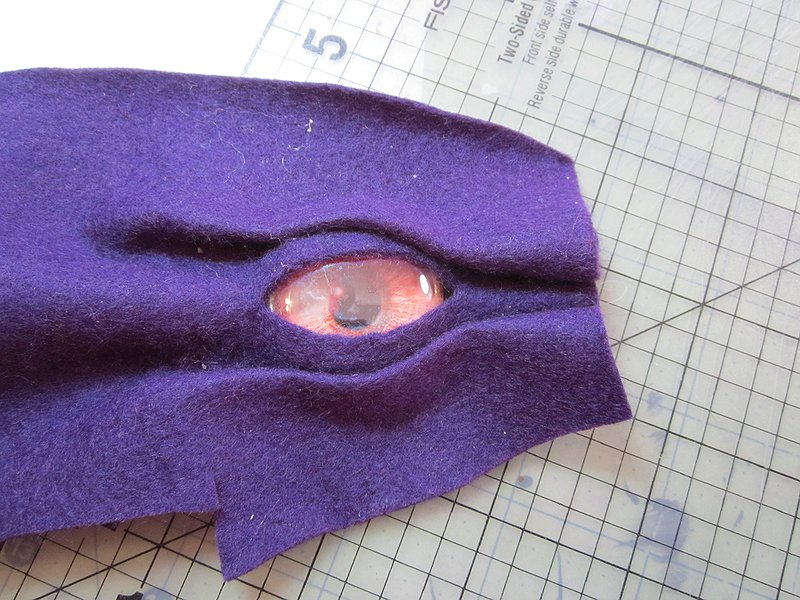
I cut a slit in the felt, enlarging it until it fit over the eye to my satisfaction. I fastened it open over the eye with Scortape.

me 07

Next, I used hot glue to add folds for the top and bottom lids.

me 08

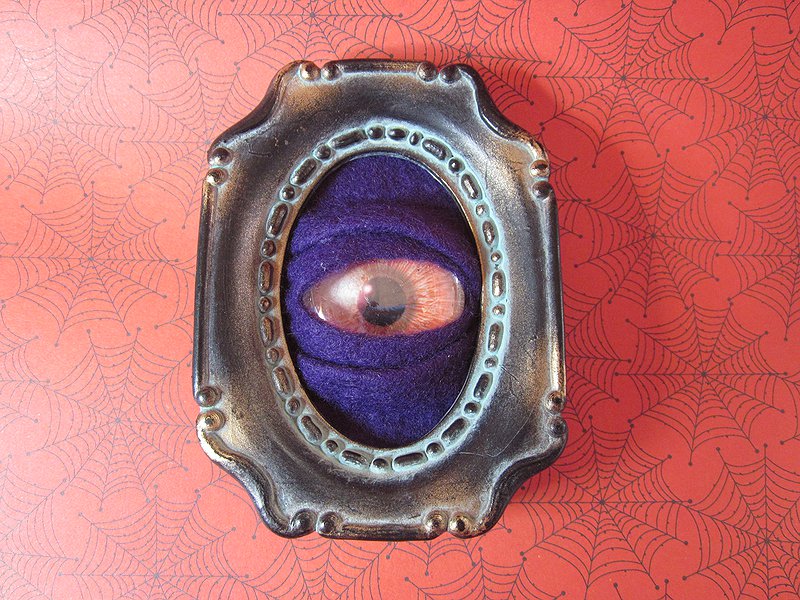
I glued it to the backing cardboard and trimmed, then put it back in the frame. It went in much more easily than I expected.

me 10

Voila! This took me about an hour. They eye is 1¼”, so you can see the whole thing is pretty small. Very easy last-minute craft for a little bit of creepy!

Raffle status: yes, I can mail this one.

sb 10

Inkle, Punkle, and Thrum

Today’s project is inspired by the work of Maureen Carlson.

carlson

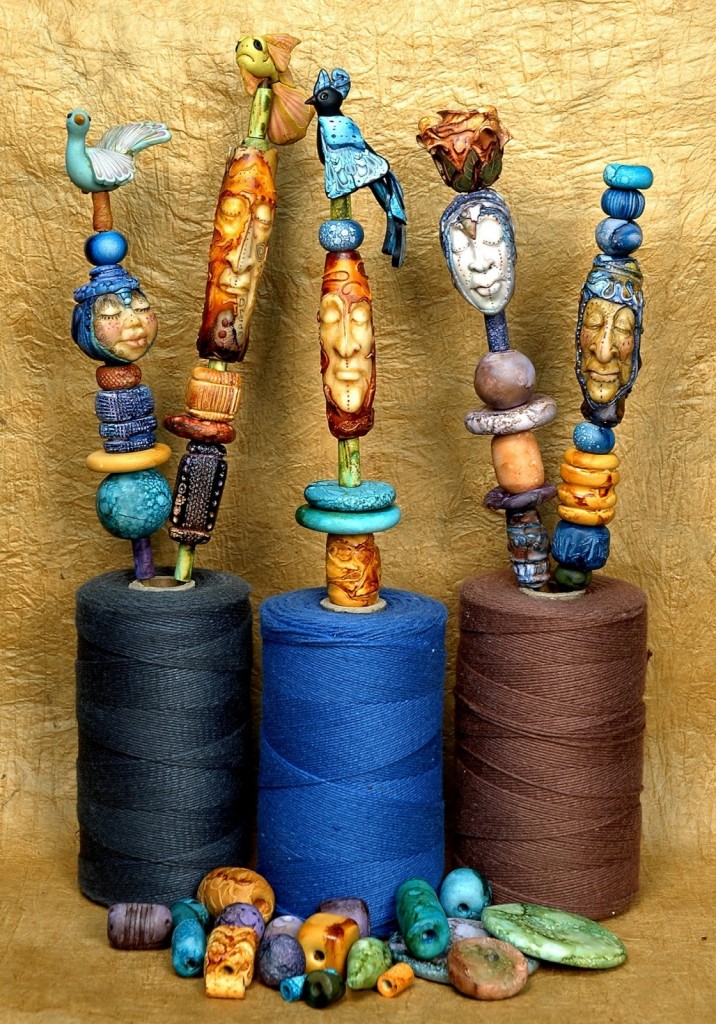
Maureen Carlson’s Stacked Totems

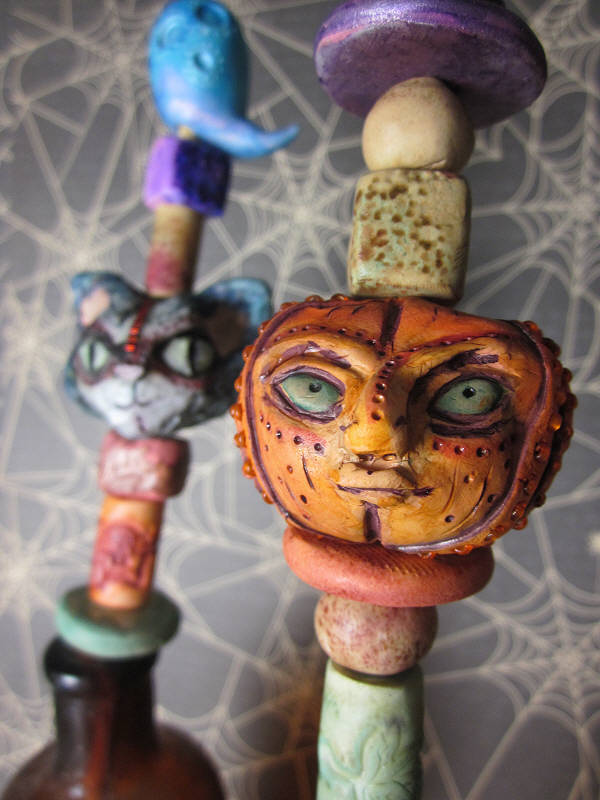
I came across her stacked bead totems in an issue of Polymer Cafe. I knew someday I had to try it. When I was brainstorming for my Month of Spookdays this year, I remembered her fantastic bead stacks. They had to get the Halloween treatment.

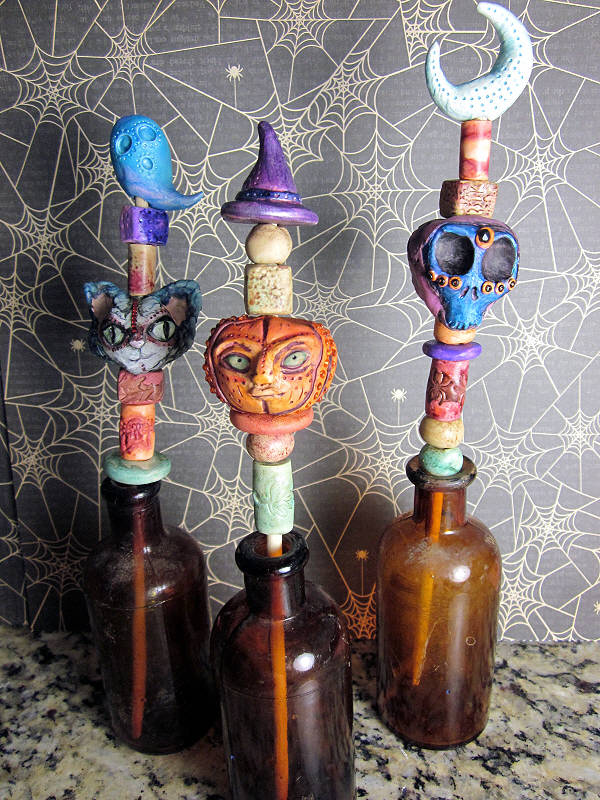
The stacks consist of a base bead, which should have a tight fit, fill beads, face beads, and finials on the top, which are only pierced on the bottom, and should also have a tight fit.

sb 01

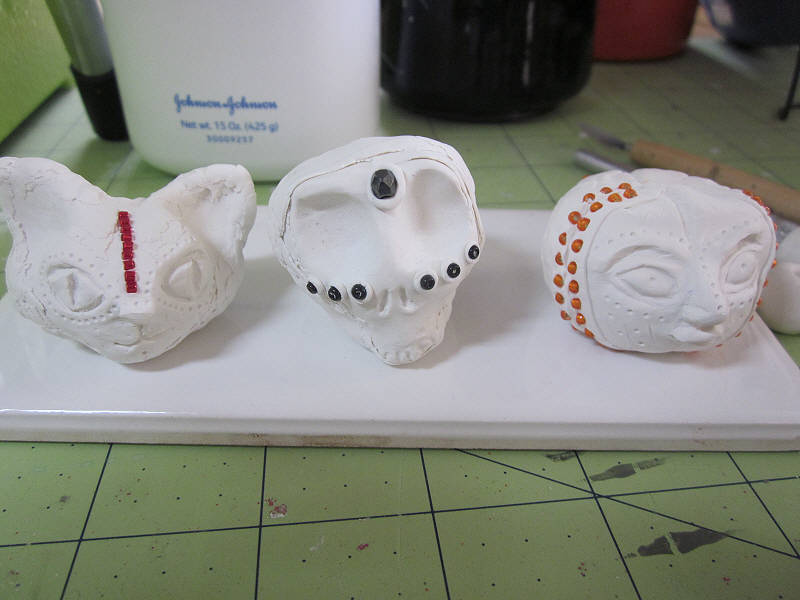
I started by grabbing some Sculpey and making a few faces. These would become molds I would use for beads. I’m using Sculpey for this project because I have a lot of it, and want to get rid of it to make room for better clays (because now I have one of these magnificent beasts, and can condition harder clays without killing my hands). I ended up deciding the long face was too big. Also, it didn’t mold well, because I suck at making molds. Instead, I sculpted a little cat face (Thrum) right on the bead.

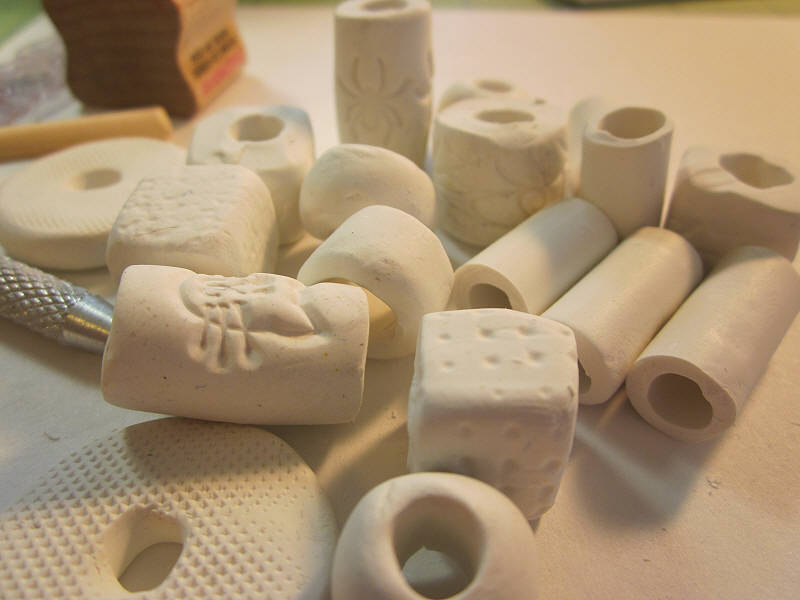
While I was curing molds I started making the other beads I would use on the stack. I used stamps, texture plates, even the grip on my sculpting tools to get texture. The long tube beads were made by making one long tube and cutting after baking. That worked better than I thought it would.

I used a knitting needle for bead piercing. If the clay is too soft, it helps to pop it in the refrigerator for 30 minutes. Now, I could have made these beads all neat and perfect, but I was already over schedule on this project, so I left them a bit primitive. I’m okay with that—I think it adds to the charm in the end.

The beads are colored using alcohol inks and a spray bottle full of 91% rubbing alcohol. Mix alcohol and ink in a small cup, and roll the beads around in it to “pot dye” them. Afterwards, play with dripping, spraying, and wiping back with a paper towel. I decided these beads weren’t dark enough after pot dying, so I dripped some straight purple on them and turned them over the dye pot.

I made sure my three base beads were the only green ones, as they fit much more tightly than the filler beads.

On the face beads, I also used quite a bit of Copic Marker, for greater control.

Here are the beads ready to go in the oven to set the dye. If you make beads, I highly recommend a baking rack!  After dying, bake them the same way you would the clay. After that’s done, they get a very thin coating of liquid polyclay. I emphasize very thin, because I had some drips and sticky parts I had to smooth down and re-bake. In the foreground here, you can see my finials a little.  I made a witch hat, a ghost, and a moon. I used a stylus tool to make little dots that would catch pigment, and gave them a bit of a shimmer with pearl ink.

Here are Thrum, Inkle, and Punkle after their first cure.

Carlson has several great techniques for adding ink-catching texture. My new favorite is rolling out a very thin sheet of clay, tearing it into bits and layering it on the bead. She likes to tear it into strips to frame her faces.  She also cuts slits in the surface, and inserts beads (see below).

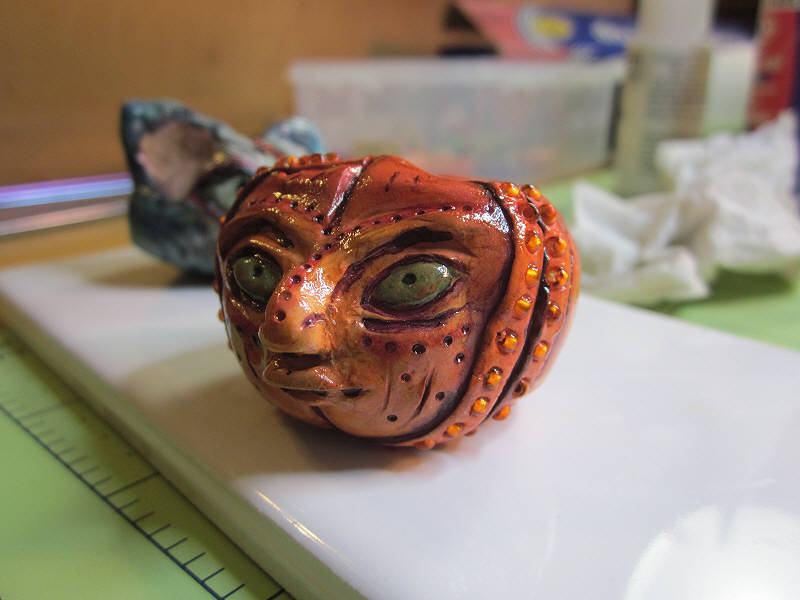
Here’s Punkle (with Thrum in the background) with a coat of liquid Fimo, ready for a final bake (don’t worry, I only put it on the top half. Then I figured out he’d fit on the rack, and coated the rest of him.) The beads are baked a total of three times: once after sculpting for the initial cure, once after applying ink, then once after applying liquid polyclay for a final protective coat. Punkle, I admit, is my favorite of the face beads.

Here’s a detail shot of Punkle’s back, where I cut slits and inserted beads. If you use beads, insert them deeply, so they stay. I also like to use a tiny, tiny bit of liquid polyclay before I apply beads. It acts as a glue, and makes a very firm attachment.

To get the color on Punkle, he was first pot dyed in orange, then I took an Argyle Purple Copic and went over the edges in small sections. Then I put a little alcohol on my finger, rubbed it lightly over the Copic, and wiped back. I also ended up using a yellow Copic over the whole thing to warm up the colors. A Lipstick Red Copic was used over the dots in the face to make them stand out, and a few different green Copics were used for the eyes.

I started to make stands, but I wasn’t happy with them. If you’d like to make stands, form a conical armature from foil. Give it a wide base and pack it tightly. Add a layer of scrap clay, then a layer of top clay. Pierce the top deeply so it will hold your stick. Add details, then go through the same baking and coloring steps as the beads.

Since I didn’t like how my stands were going, I wondered what else I could use. Duh—bottles! The vintage bottle I used to form my Makit & Bakit Votive Sleeve has siblings (and at least a dozen cousins). Here they make an appearance as stands. I used a chopstick to hold the beads. Chopsticks are always handy—I get them in huge bags from the local Asian grocery.

I like this a lot better than the stands—the old, dusty bottles add to the rustic feels of the dolls.

Raffle status: Yes, these will be going, minus the bottles. You will have to get your own bottles.

sb 01

The Spousal Unit is a research scientist, and sometimes he brings home interesting things that would otherwise be discarded. Like this tiny bottle. Naturally, I had to do something creepy with it.

sb 02

I didn’t use any liquid inside the bottle, so the necklace would be worry-free. I’ve never been great at distressing the inside of bottles. I should probably look up some directions one of these days. Here’s my first run, with alcohol inks, I think. Maybe glue. And stuff. Didn’t stand up well. I finally went for Vintage Photo Distress Ink, from the re-inker bottle. I moved it around and hit it with the heat gun for texture.

sb 03

Once it was completely dry, the inside got coated with Glossy Accents, so my “specimen” wouldn’t scratch the color off the inside. Heat gun again, because it made pretty bubbles and things. I suspended the bottle upside-down over paper so the Glossy Accents could drain out. I let this dry overnight.

sb 04

A result I like, and it’s plenty sturdy.

sb 05

Next, the specimen. I chose Cernit because it’s extremely flexible without breaking. That means I can shove something tiny into a bottle.

sb 06

I rolled a very thin snake, wrapped it around a toothpick, and gave it a little texture with some play foam. The “guts” were baked before moving on. Sadly, some of the center bit had to be removed to fit in the bottle.

sb 07

All specimens need creepy eyes, right? This is a tiny, tiny ball of Cernit. I used the end of a retracted pen to get the basic shape of the iris, then used the awl to further narrow the pupil and shape things.

sb 08

I was at a loss as to how to color the liquid Fimo for the iris blue, as I didn’t have alcohol inks in the correct shade. StazOn refill to the rescue.

sb 09

I carefully used a toothpick to fill the iris with a layer of Fimo. I made a tiny, flat dot of black Cernit and placed it over the pupil, and added another layer of liquid Fimo to fill in.

sb 10

Ready to bake! They didn’t stay glossy, but they still looked pretty nice in the end.

sb 11

Using tiny dots of Cernit and liquid Fimo, I attached and baked on the eyes one at a time.

sb 12

In you go!

sb 13

Next, I grunged up some medical gauze. I used acrylic paints rather than ink, so the color wouldn’t run.

sb 14

I folded the gauze over several times, put it other the top of the bottle, and wound the excess around. Then I used some black yarn to further seal the bottle, and add a loop for attaching to the necklace.  All of this got tacked down with Helmar, then coated in hot glue for strength. I wasn’t keen on using wax to seal, as I didn’t want it to chip off during wear.

sb 15

Instead, I melted some ultra-thick embossing powder, and colored it with very small amounts of crayon.

sb 16

Drip drip. Holy crap, that is super gross. Win!

I love this project. It’s very light and durable, and here’s something special…the Cernit I used is phosphorescent. That’s right, if you go into a dark room, the specimen gently glows.

Yep, I’ll be sending this one off to some lucky raffle winner. For certain values of “lucky.”

sb 17

sbox 01

There are tons of great Halloween shadow boxes around. I have three of these shadow box frames I picked up at a garage sale. They are old and sturdy, and the front glass is glued in. I’d like to fill each of them in different styles this year. The first one is intended to be simple, and subtly eerie, using vintage photos.

sbox 02

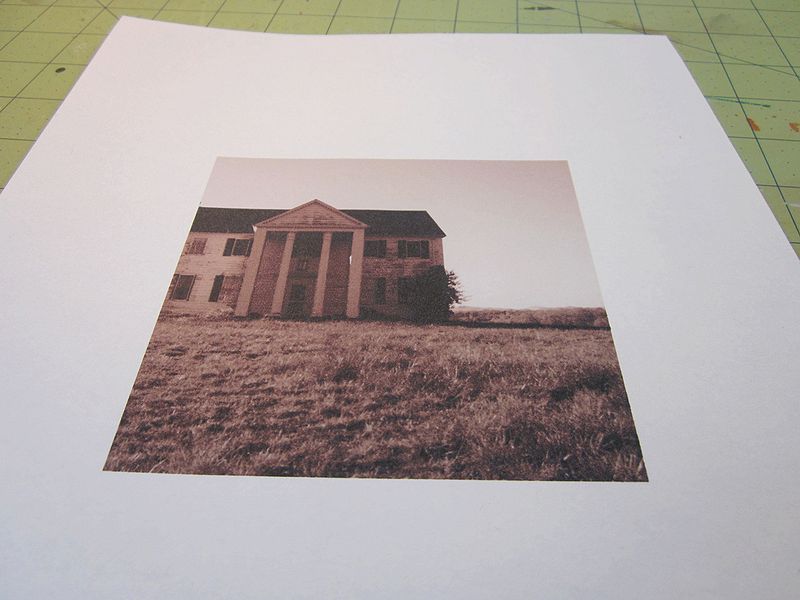
I used The Commons at Flickr to find some photos that were free to use and modify. I wanted a house with some space in front of it, and a creepy girl.

sbox 03

I used charcoal and colored pencils to alter the house a bit. The charcoal looks much more subtle in person, thank goodness.

sbox 04

Creepy girl was part of a group photo. She’s printed on wood grain cardstock for texture. I cut her out, used an awl to scratch out her eyes, and inked the edges so they wouldn’t show white. I left a long bit below her feet so I could fold it and attach her to the box.

sbox 05

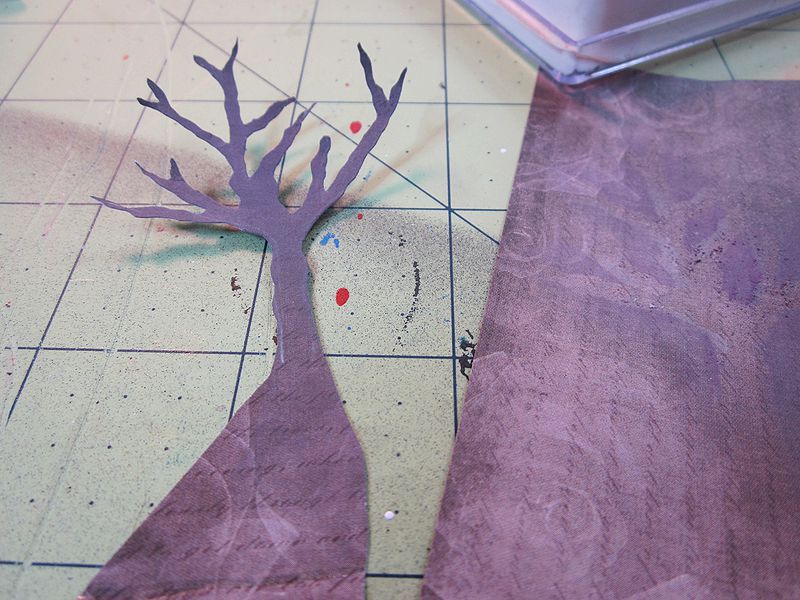
Next, a tree is cut out from some spooky paper. I also used purple blending chalk to give it subtle color. Again, I’ve left a bit on the bottom for attachment.

sbox 06

The house is attached to the back board of the shadow box. I decided that it also needed some blending chalk around the edges to create a vignette effect. Here I’m deciding on placement.

In the end, I wish I’d made the tree taller, and painted the bottom attachment flaps white. Otherwise, I’m pretty happy with this quick project. Though it’s madness to photograph–I’ll have to get better at that.

Raffle status: Yes, I’ll send this off.

sbox 08


aod 03

I really dropped the ball on taking pictures of this project.  I’ll try to describe the process as much as possible.

aod 01

I chose two subtle patterned papers, one in green and one in off-white, and cut out four sets of wings with Tim Holtz’ Alterations Layered Angel Wings die. Each piece was edge distressed, first with Pumice Stone Distress Ink, then with Black Soot Distress Ink.

The tag is another Alterations die, Tiny Tags and Tabs. I used a heavy vellum. With a fine permanent marker, I wrote “Requiescat” on each tag twice, one over the other. The tags were distressed with StazOn Black and Brown.

The skulls were stamped on to some Memory Box paper. They used to do the most gorgeous Halloween collections. The stamp is Inkadinkadoo, the ink is Colorbox Chestnut. I then embossed with clear extra-fine powder, and edged with StazOn, adding some shading on one side.

Finally, I attached the tag to the right-most large wing piece with a plain black brad, then glued down the wings and skulls, alternating colors. Wish I could remember the paper I used for the card itself. Maaaaybe Recollections?  Corners were rounded at ¼”.

aod 02

Oh look! I took another picture! This is one of the envelope papers. I made custom envelopes with the We R Memory Keepers Envelope Punchboard, which I love to death.

I’m so stoked about these cards. One of my favorite projects of the season. I made a set of four, and they are definitely going to someone in the raffle.

aod 04

lg 13

Sometimes I go thrifting for the fun of it. I’ll get out $20 cash, and go from thrift store to thrift store, looking for interesting things that spark ideas.

lg 01

When I saw these swirly lampshades for 50 cents each, I thought of delicate ghosts.

lg 02

After much experimenting, the ghosts ended up consisting of clear labels, transparency sheets, and tulle.

lg 03

I noticed an electric votive fit into the lampshade very nicely, so I took advantage of that. I cut down transparency sheets to about 5-1/2″ x 4-1/2″.

lg 04

I fiddled around with some photographs, and came up with three faces.  Here’s a PDF if you would like to use them. I made this sheet, and printed it out on clear label stickers. I printed two so I would have an extra, and also so I could use the second one to guide placement.

lg 05

Facial features get fussy cut. If the nose and mouth were very close together, I left them attached.

lg 06

I laid the transparency down in landscape orientation, and placed the guide face in the middle, near the top. I then used it to stick down the features.

lg 07

The transparency is rolled around an electric votive, and held in place with a bit of tape.

lg 08

Tape goes on the top seam as well. It won’t show.

lg 08a

I’m using a 6″ wide roll of tulle I got from the dollar store. Cut 4 to 6 lengths of about 15″. The number of lengths depends on your taste in tulle. These ghosts have 4 and 5 lengths.

lg 08b

Smoosh the tulle so it gets all wrinkly. Not only will it look better, it handles better as well.

lg 09

Place two lengths of tulle over the bottom of the lampshade, crossing one another.

lg 10

Push the transparency with its candle down on the tulle, into the lampshade, until the candle is just under the lip.

lg 11

Place a piece of tulle over the opening of the transparency roll, and push it down. Do this with the rest of your tulle lengths, crossing each piece.

lg 12

Add another electric candle under the base, and you’re done.

These look best in the dark, and would be nice on a spooky black-and-white table arrangement.

Raffle status: Sorry, too delicate to ship.

lg fin

cs b 02

I was poking around Pinterest, and I kept seeing neat coffin shrines. When I went to prepare this entry, I learned they were all from the same place: Immortal Visions. She makes lots of delightfully spooky things.

inspiration cs (3)
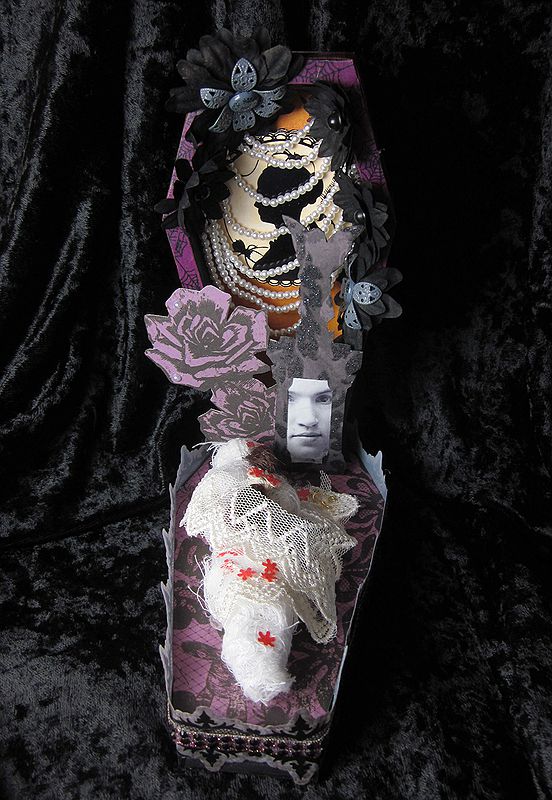
For my own coffin shrine, I decided on one of my favorite themes: the ghost bride. As a further challenge, I decided I would use no wet media. No edge distressing, no antiquing. Just cutting and gluing. I only broke my rule twice, and it was touching up, not altering.

I already had a few little wooden coffins, but I inherited a bunch more, including some that were pre-painted black, from a friend. Time to remove the hardware. I put it in a Ziploc and saved it. You never know when you’re going to need a tiny hinge.

While the touch-up paint on the coffin was drying, I got out the stuff. Good times in the paper closet, the lace drawer, and the Halloween bins. I didn’t use everything here, and of course, I found other stuff to grab later.

In Immortal Visions’ shrines, she uses the coffin lid as a base. I chose several papers for this project, in purple and orange. This goes on top of the lid.

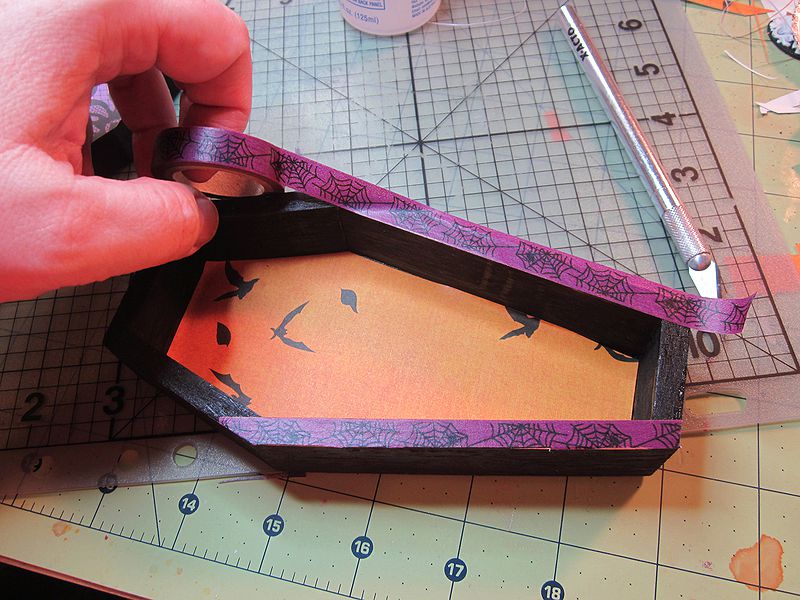
I lined the shrine with orange paper, and edged with washi tape.

Important thing I didn’t take a picture of: that orange paper had a nice graveyard on the bottom. I grabbed one of the stones and used it as a template to cut out with different paper. I cut out a center bit, and added a printout from a vintage photo.

The outside of the shrine gets more washi tape.

The gravestone was for the front of the upright, along with some purple roses I’d cut from another paper choice. Working on the inside of the shrine, I cut this cameo from another paper collection, and attached it with foam squares.

Much stringing of tiny plastic pearls.

Then with the hot gluing of the tiny plastic pearls.

Paper flowers will cover that glue mess.

Everything is attached, and the shrine top is done. On to the base.

First things first, lets shroud a doll! I actually thought I was going to wrap her arms separately, but I realized I could blast some heat on them to get them to bend a bit. So the doll got unwrapped.

Glue wasn’t going to do it, so her arms got pinned into position with Scor tape. We, uh, won’t talk about me cutting her feet off to make her fit. Yes, I saved the shoes. You never know when you’re going to need tiny shoes.

Once our unfortunate bride was all shrouded, leaving her lovely braid out (because hey, extra creepy hair!), I decided I wanted some tiny flowers. At first, I tried fussy cutting some out of scrapbook paper. I didn’t like the results or the amount of work I was looking at. So hmm…what do I have that can cut a tiny flower? Well, a Christmas edge punch, of course!

The only red that made me happy was the tissue in a heart doily. Go figure. So I cut off the fiddly bits around the solid heart, and managed to get a few flowers out of each one.

Two gold jump rings were tied together and glued on to lace, which winds delicately around the bride.

A Halloween border, from a pile I’ve been wanting to use, edges the base. That border is a sticker, so I carefully applied PVC glue to the top half to get rid of the stickiness.

When I was going through my Shiny bin, looking for accent pearls, I found this fantastic ribbon I bought years ago at a shop in Portland. It had to go on too.

Close shot of the top.

Here’s the middle bit, with the vintage photo. Tres spooky, oui?

Poor Bride. So young, so lovely, so dead.

Raffle status: Sorry, too delicate to ship.

Drink Can Box by Atomic Shrimp

Drink Can Box by Atomic Shrimp

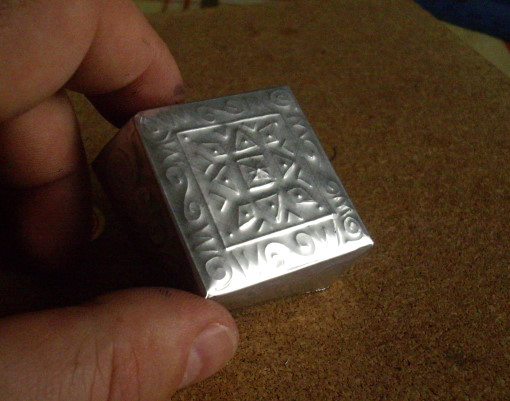
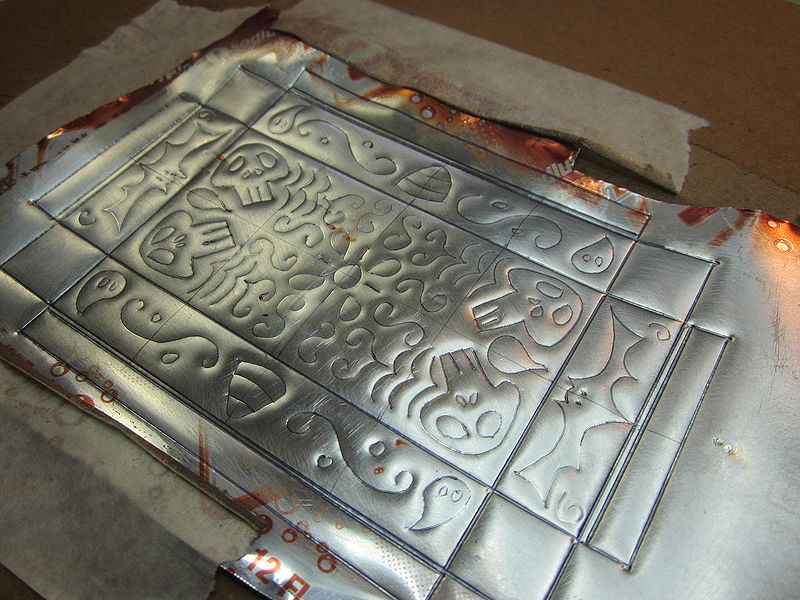
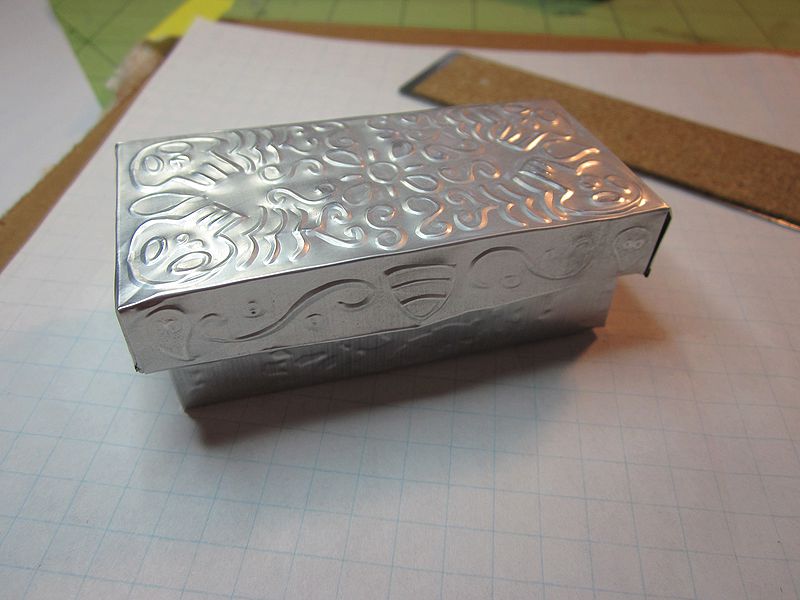
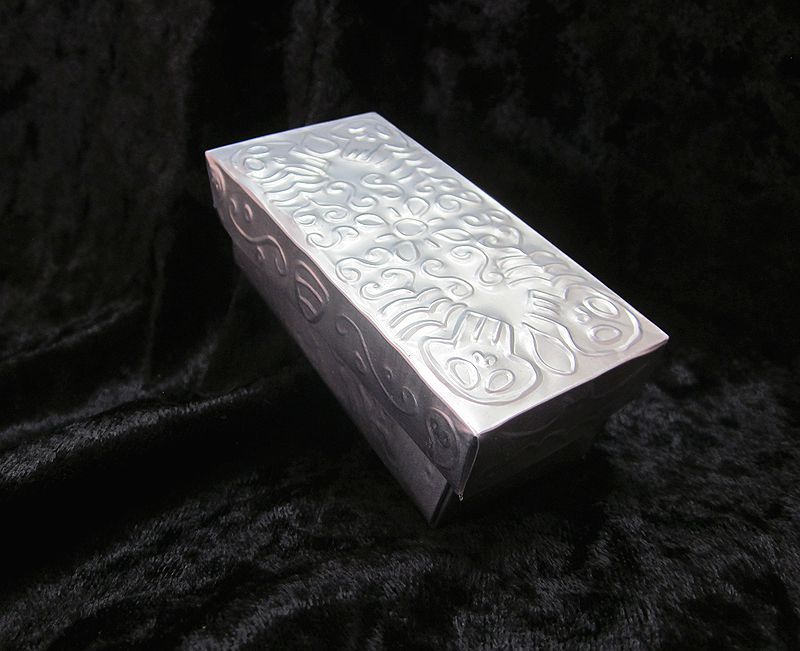
My inspiration for this project is an embossed aluminum box by Atomic Shrimp.  I read the directions, I watched the video–I even watched the FAQ video linked at the end of the instructional video. I still ended up doing a few things differently–but mostly I followed directions. I can do that. Sometimes.

sc box 01

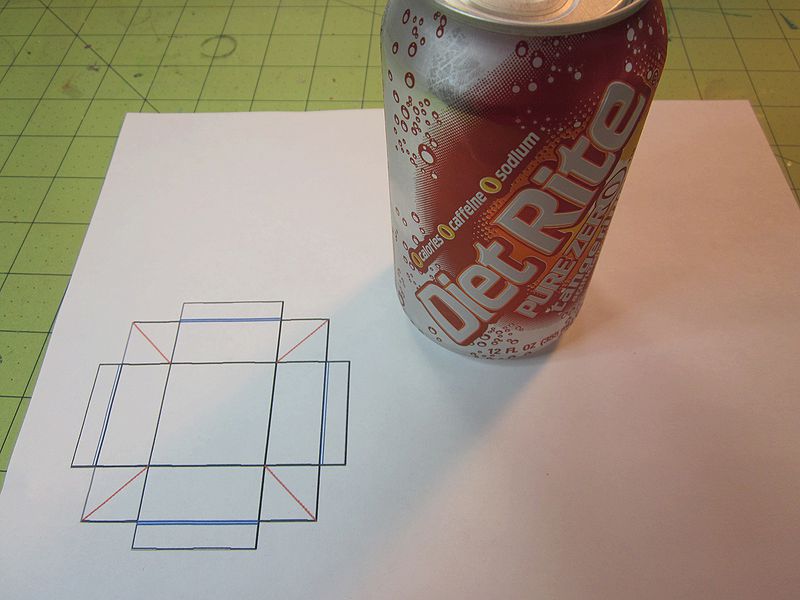
We begin with a can of my favorite soda. My can is not as big as those for energy drinks, so I have less room to work with. This is the diagram from Atomic Shrimp. I didn’t end up using it.

sc box 02

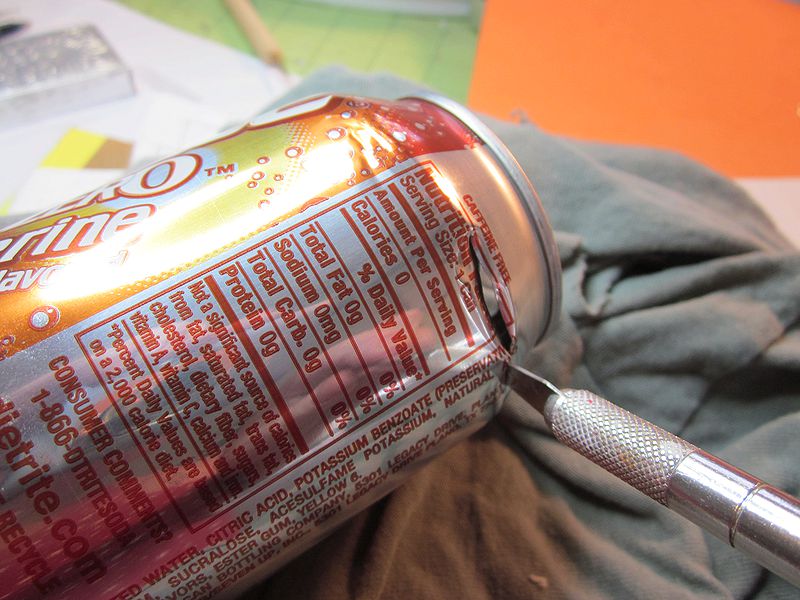
First: cut an aluminum sheet out of the can. I found it was easier to start the top end with an craft knife, then I cut the rest with scissors.

sc box 04

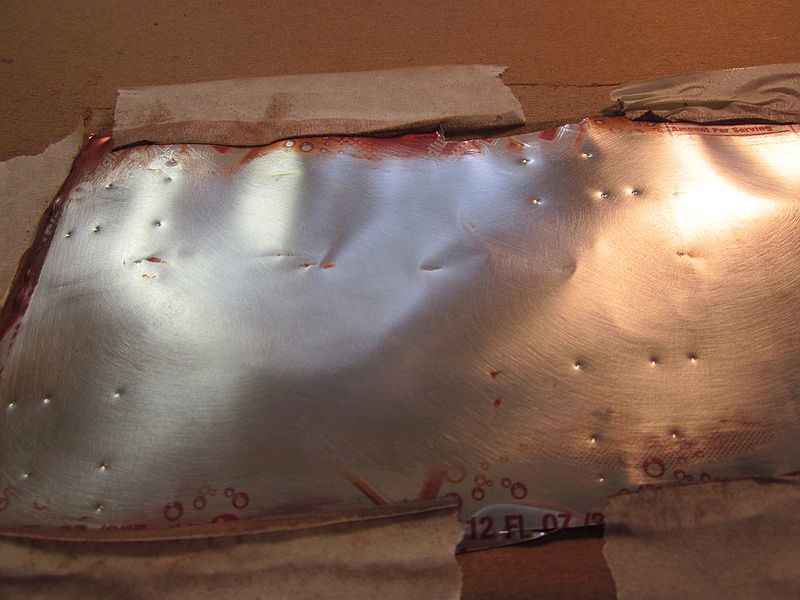
In the video, he sands the paint off a full drink can. In the photo tutorial, he tapes down the cut out sheet. I preferred the latter. We used to go to a bakery that was right by a nail salon. The salon gave out maintenance kits that sometimes got dropped on the way to the car. That is how I obtained the free block sander that worked perfectly for this project.

sc box 03

I figured out a box shape that would use as much of the can as possible. Graph paper was my friend, as I am terrible at measuring things.

sc box 05

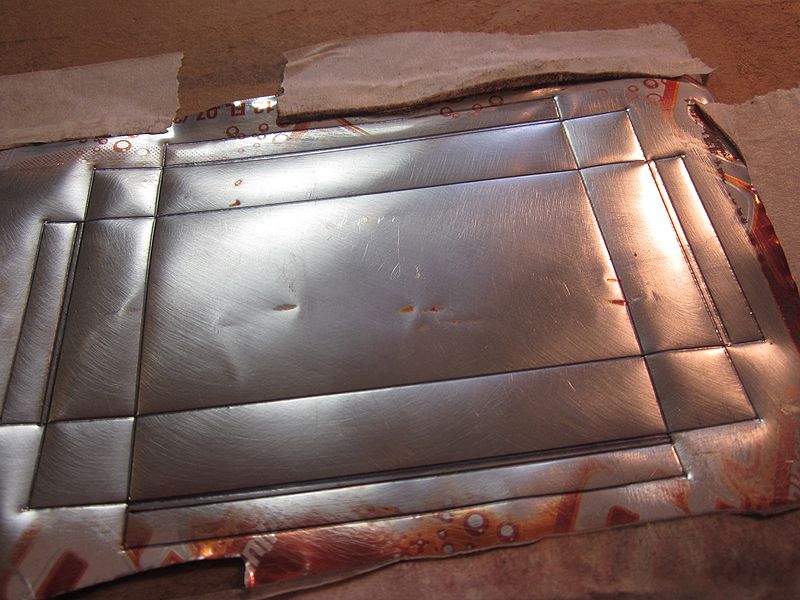
I incised the guide lines with a ball-point pen. I was a little too careful of breaking the metal, and didn’t push hard enough. Most of these lines had to be re-incised later.

sc box 06

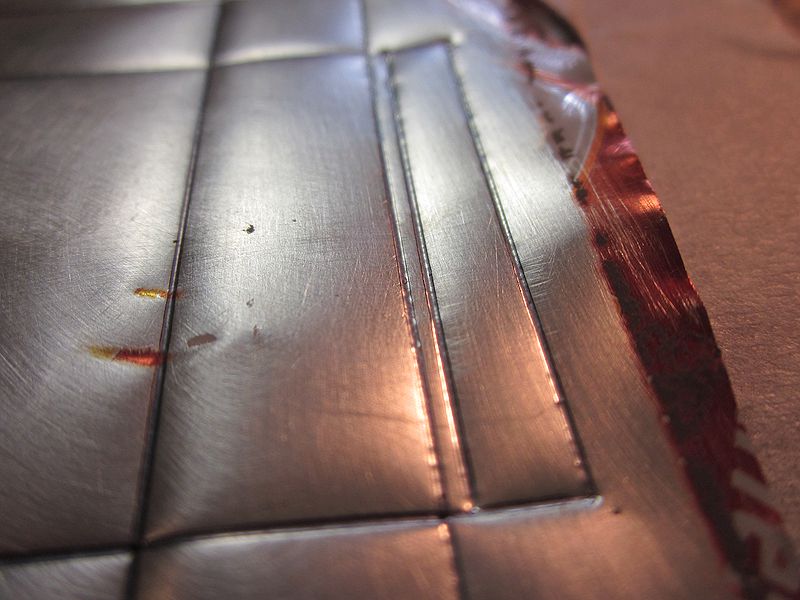
Note the double-lines on the flap. That’s so the flap can fold over sharply without breaking.

sc box 07

I drew some light lines to guide my design.

sc box 08

I incised the design with a ball-point pen on the inside of the box.

sc box 10

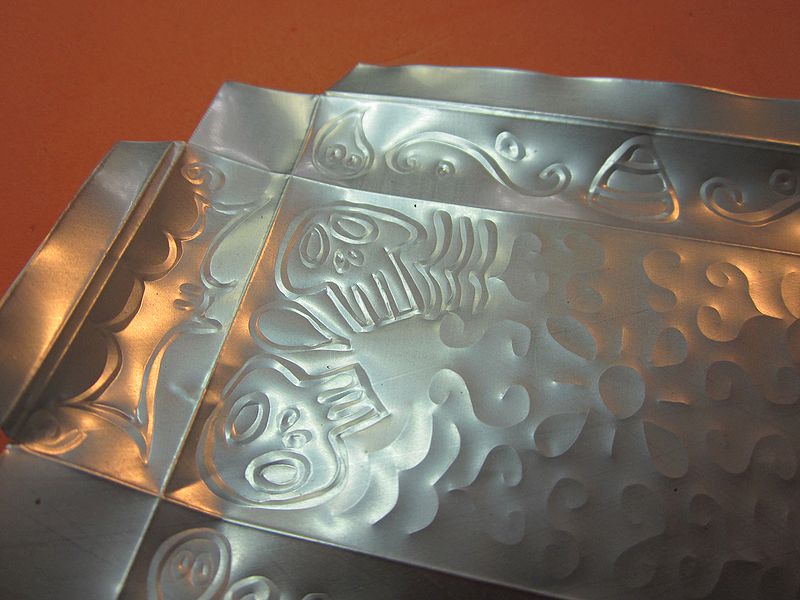
To go around the design on the outside, I used a stylus, since I didn’t want ink to show. At this point, for no real reason, I decided it was time to cut out the box.  Here’s something I modified: I cut the corners of the flaps at a slight angle. This makes them fold over and fit much more easily.

sc box 12

Now the inside has been re-incised, and the design is complete.  GREAT BIG IMPORTANT NOTE: If your hands are weak or injured, don’t even try this. All the pressing to incise the design hurt. A lot. My mild tendonitis flared up like mad, and I was in a wrist brace for weeks. Heed my warning–this project is for tough fingers.

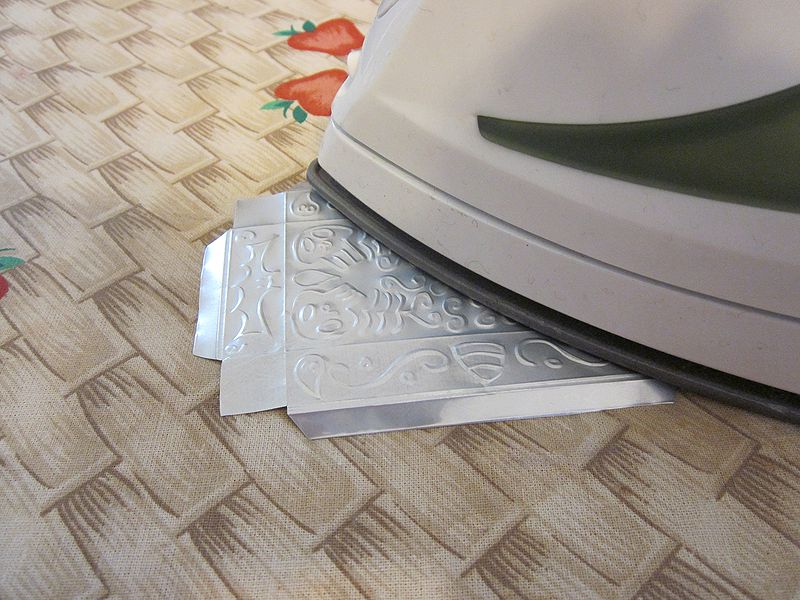
I notice the metal is a bit curvy. That’s going to make it hard to fold.

sc box 13

Naturally, I iron it. It took a few minutes on high heat, but it didn’t hurt the design, and it helped flatten the metal sheet quite a bit.

sc box 14

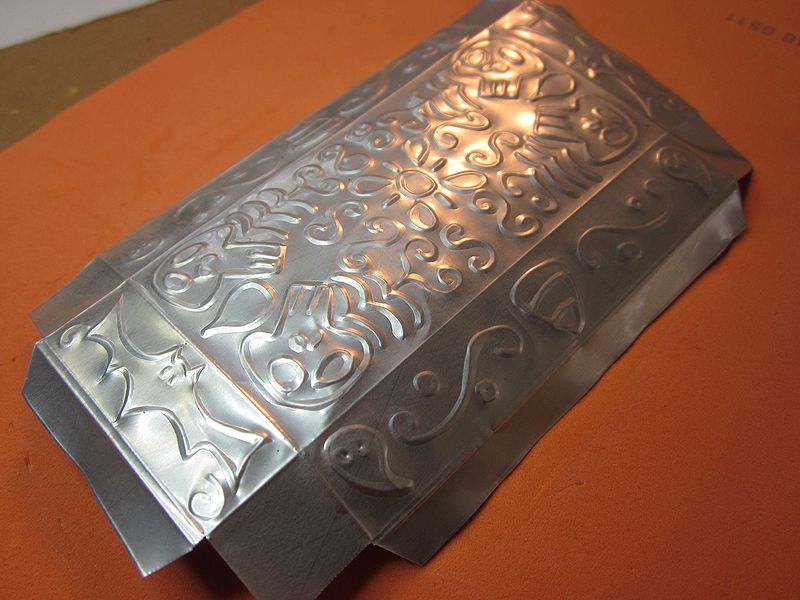
The corners got incised on the top side so they’d bend properly, and I folded according to instructions. I could have used an extra hand, but it turned out okay.

sc box 15

To make the bottom half, the center is 1/4″ smaller, and the sides are as much bigger as I could get out of the material.

sc box 16

I didn’t want to do any more hand incising, because OWIE, so I decided to try running the sheet through an embossing machine. I chose a kind of mottled gothic pattern.

sc box 17

It isn’t as deep, but it still looks pretty nice.

sc box 18

I decided not to sand the bottom, because I didn’t need a clear field to incise the design. This way I get to see where the box came from.

sc box 19

The lid is a little big, but I like it! Though I have to admit, I wouldn’t do it again by hand.

Raffle status: this thing is pretty delicate, but I think I can ship it.

sc box 20


bow 08

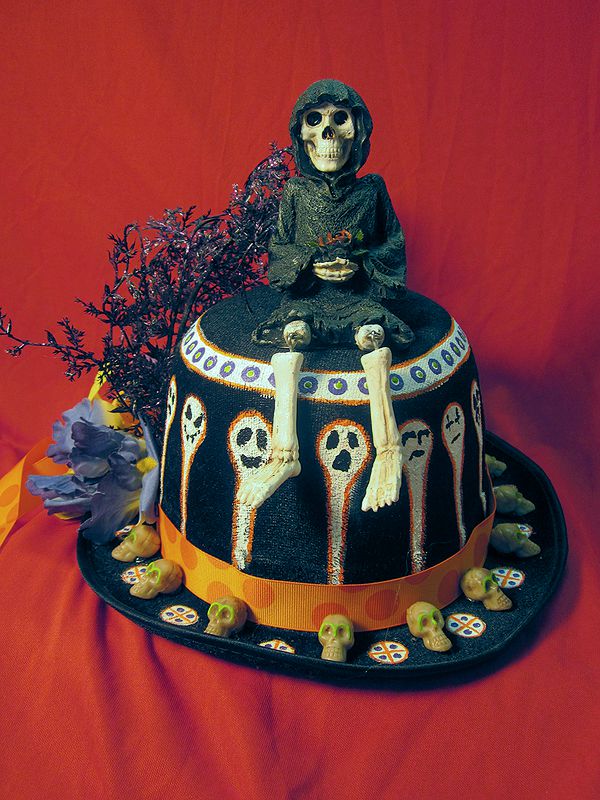
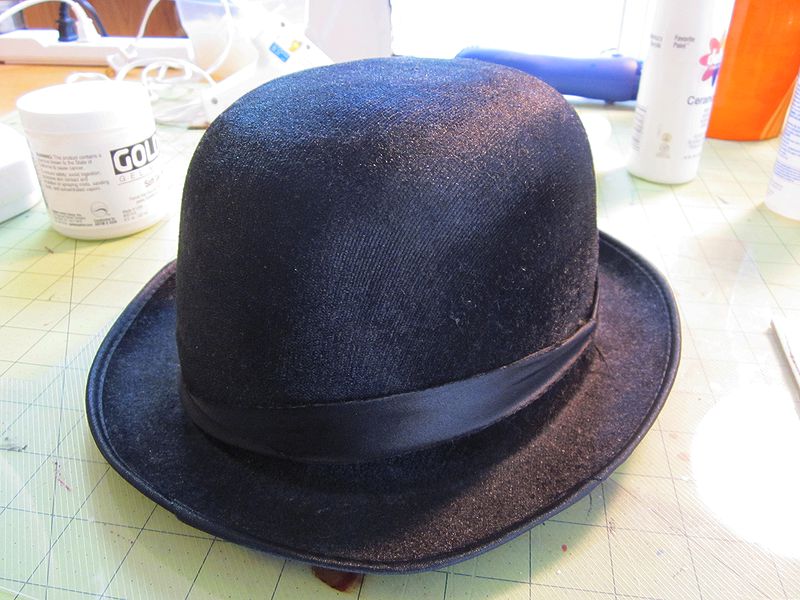
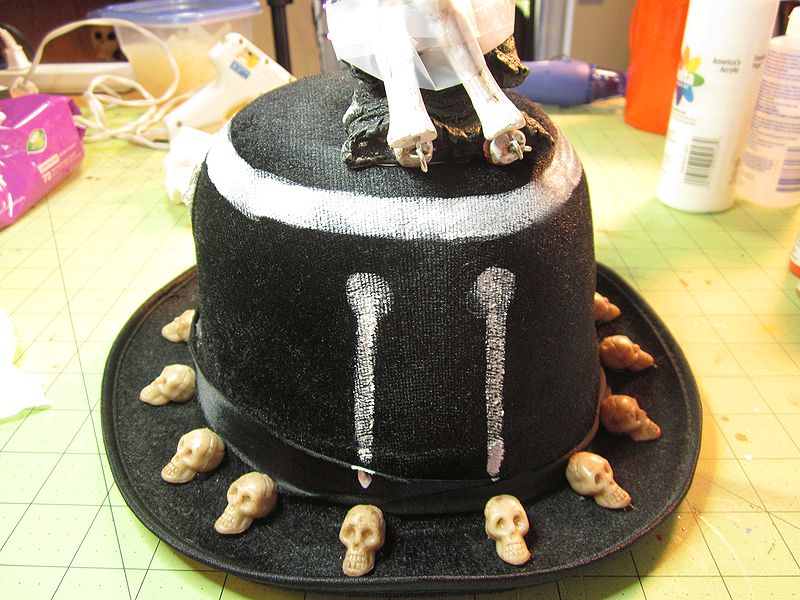
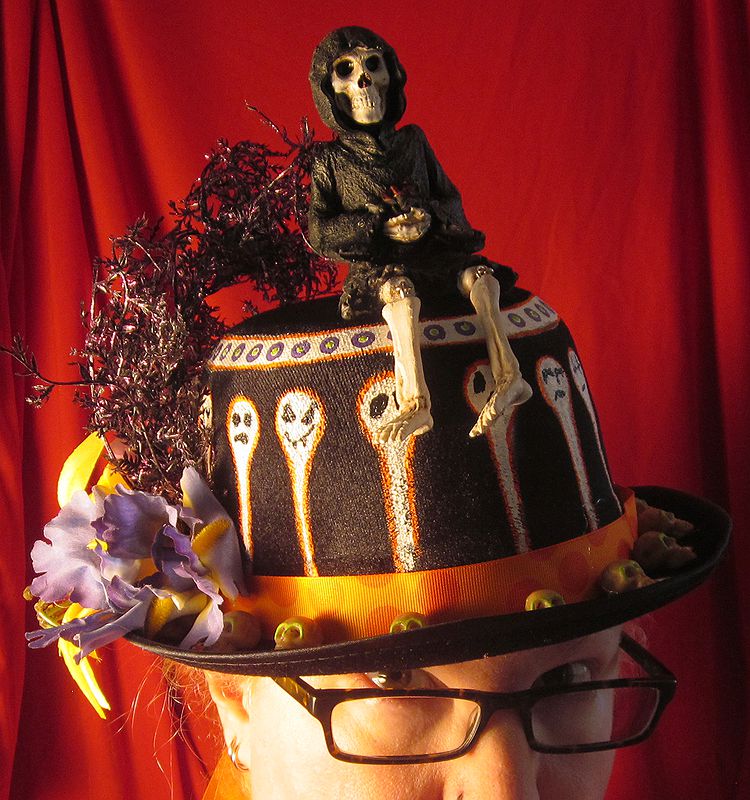
I had this 25-cent bowler I picked up at a garage sale. I swore I wasn’t going to paint it. I wasn’t going to turn a 2-hour project into a 2-day project. Yeah, that worked out. I used:

  • Bowler (garage sale)
  • Skulls (dollar store)
  • Death figure (part of my Secret Pumpkin gift)
  • Flowers (garage sale)
  • Ribbon (Michael’s, $3.99)
  • Purple garland (stash)
  • A bunch of acrylic paint

bow 01

I started by gathering possibilities, and narrowing them down.

bow 02

See those flower things there? Totally on the first iteration of the bowler. The one without paint.

I thought the wonderful Death figure would look great riding on my bowler. He’s a little heavy, but it still works.  I added in skulls, a silky band from the same garage sale as the bowler, and some purple garland from my stash. I finished it. I took pictures. I hated it. I pried off everything but Death and the skulls, taped up Death’s legs, and started painting.

bow 03

Unsurprisingly, I had to go over everything several times to get much vibrancy against the black velvet of the hat.

bow 04

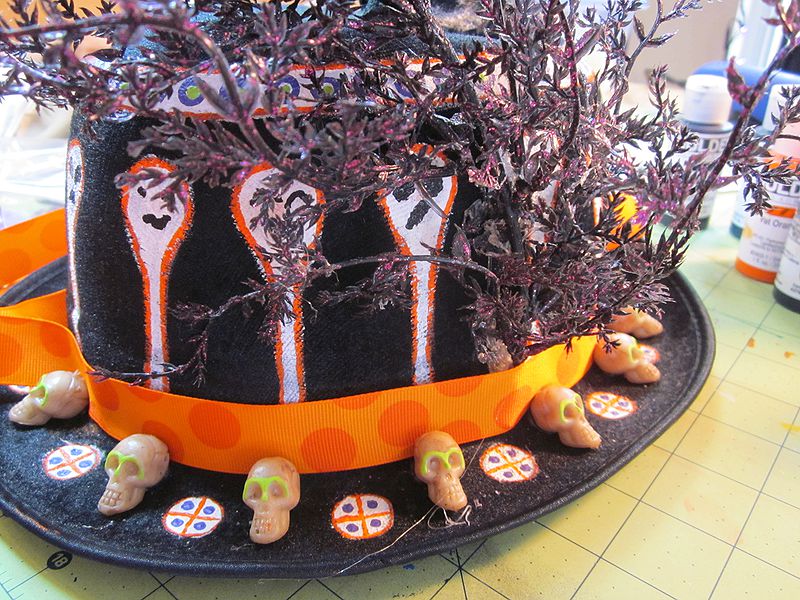
Bit by bit, the hat is painted in white, orange, purple, and a touch of green. I especially love the green on the skulls.

bow 05

That purple stuff gets glued on again, and a new hatband is attached. I actually purchased this ribbon, when nothing in my stash proved satisfactory.  That’s right, I spent actual money on this.

bow 06

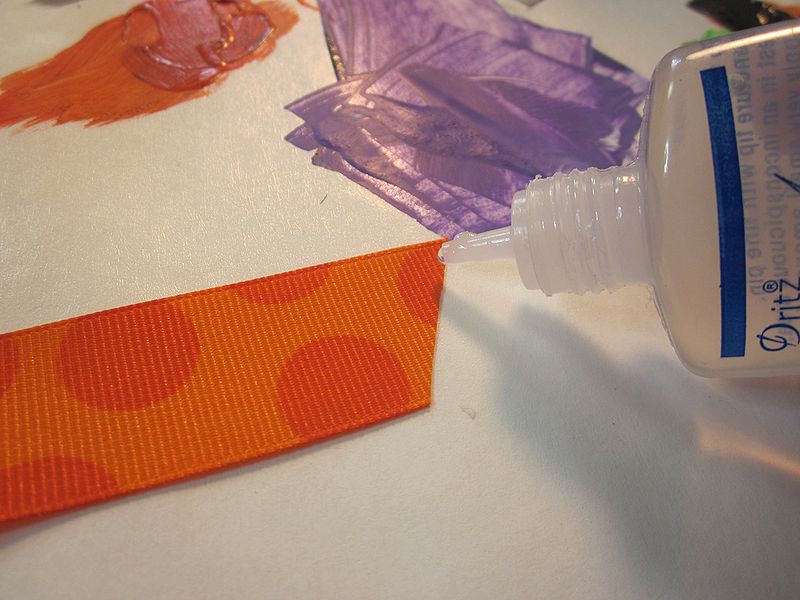
Said ribbon got some Fray Check on the ends as a finishing touch.

bow 07

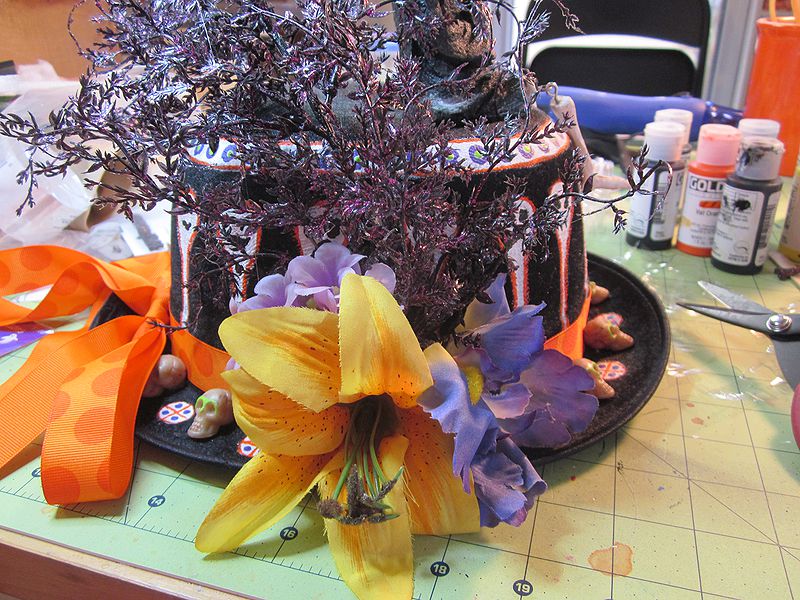
Lastly, from the same box as the Makit-Bakit crystals came a bunch of silk flowers mounted on stick pens. Off they came, to be attached to my hat.  And it is festive indeed.

bow 09

Sorry, this hat will not be in the raffle. It’s too delicate to ship. Also, I want to keep it.

mb votive final light

Note for garage sales: always buy the cheap box of mystery crafts. I looked briefly and spotted a few beads. She wanted $5 for the whole thing, so I glommed it. The biggest prize inside was a whole lot of Makit & Bakit crystals, in a dozen colors. I hadn’t worked with these things since I was little. In fact, I remember doing it once, then never again because oh, the smell. You know, the one they say is “not offensive in a well-ventilated area.” Gah. But I’m all grown up now, and I have a craft oven in a room with a fan.

As soon as I knew what I had, I went trawling on Pinterest to see what others had done. There wasn’t a whole lot, but these luminaria caught my eye:
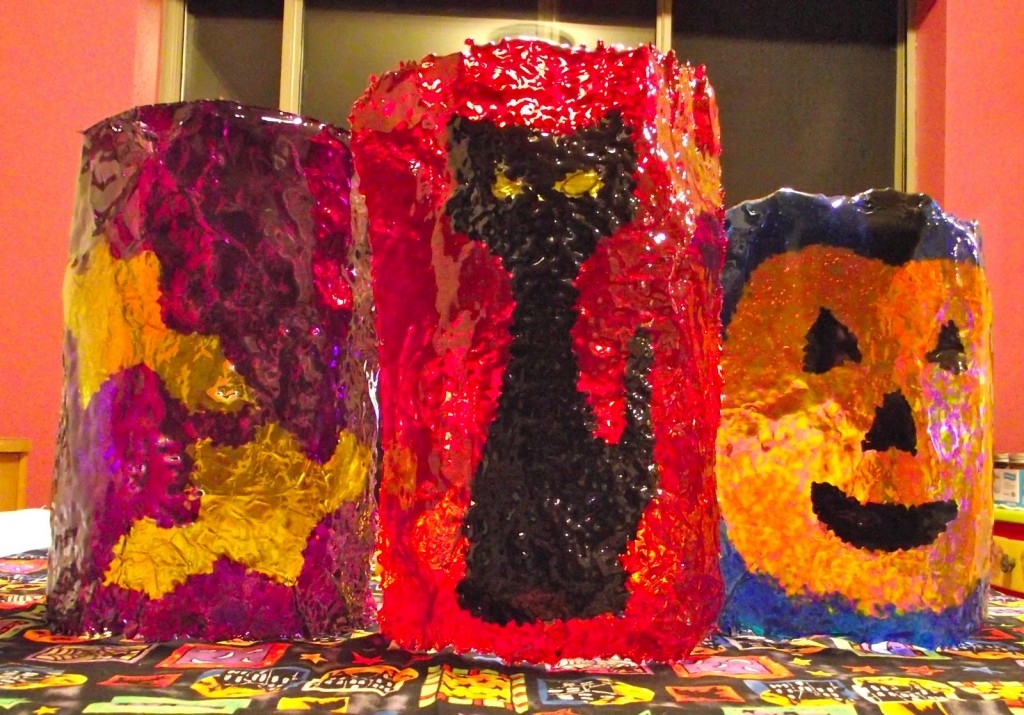
Sara vs. Sarah: Makit-Bakit Inspired Halloween Luminaries

Sara vs. Sarah: Makit-Bakit Inspired Halloween Luminaries

We’ll make a smaller version for votives. NOTE: do not use an actual candle with these, as the plastic is flammable when hardened. Use one of those little electric votives.

You will need:

A bunch of Makit & Bakit crystals (They are plentiful on eBay)
Glass or metal round object, about 7″ around
Aluminum foil
A small piece of corrugated or heavy cardboard
Cookie cutters or silicone candy molds
Electric votive candles
Bone folder or something similar
Tight fitting gloves, like latex

First, find yourself a roller. It needs to be a bit bigger around than your votive.  I measured my small bottle with a string.

mb votive 01

Use this measurement to cut a template from your cardboard. My bottle is 7″ around, so my template will be 2″, for height, then 7″ for length.

mb votive 02

Tear off enough aluminum foil to give several inches of clearance around the template, times two. Fold the foil in half, and fold the edges over so it stays together well. Place the template in the middle.

mb votive 03

Pull straight up on the top edge of the foil, holding the template so it doesn’t move. You are using the template to form a mold out of foil.

mb votive 04

Pinch the corners of the foil as you go around, lifting each side. You may want to fold the corners over so they don’t stick out so much.

mb votive 05

Make sure your corners are neat and your new mold has firm lines. Run your finger around the outside edge lightly.

mb votive 06

Remove the template from the foil. Yes, this is going to mess things up a bit, but we’ll fix it. Push the sides in gently, while running a non-sharp object around the inside, like a bone folder. You can’t see the hand on the outside, because I was taking the picture. You are creating a smooth channel along the edges, to prevent the plastic from wicking up. This will give you neater edges.

mb votive 08

Your mold is ready. Carefully move it to somewhere near whatever oven you’re using. You don’t want to be carrying your unbaked masterpiece across a room. Preheat your oven to about 375°-400°. I say “about” because I used a craft oven, which doesn’t really get up to 400°, so I made do.

Build your design from the bottom, as that will be the front of the votive sleeve. You need very thorough coverage, about ¼” of crystals. I’ve put yellow in the center, amber around it, then white on top of the whole thing.

mb votive 09

DESIGN OPTIONS:

You can have a solid background color, put lines or spots of contrasting colors, and even put shapes to go behind the piece you will fuse on. Keep in mind that the crystal colors do not really blend. If you put in red and blue, you will get mottled red and blue with a touch of purple.

1. Place a small cookie cutter where you would like it on your mold, and put in crystals. Hold down the cookie cutter while you fill the rest of the mold, so it doesn’t move. Lift the cookie cutter before baking. This creates an indistinct shape. I used this technique to create the moon behind the bat.

2. Bake your shape first (we’re getting to that), and put it down in the mold. Fill the rest of the mold with crystals up to the level of your shape.  This is how the luminaria from the inspiration project were done. The shape won’t be sharp, but it will be sharper than method 1.
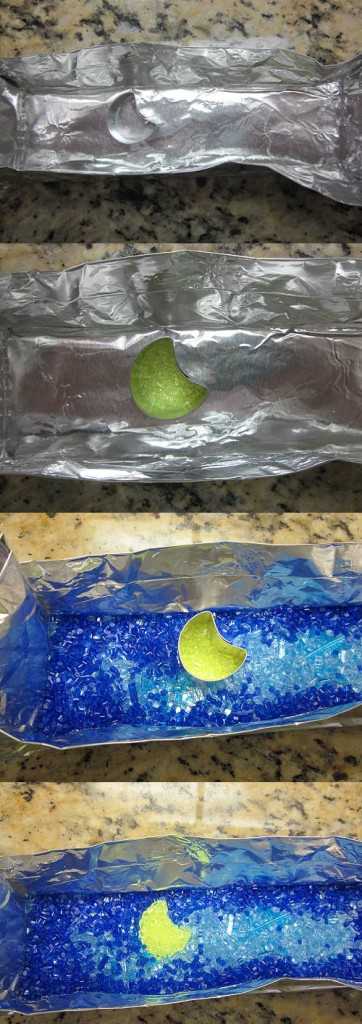
mb votive des op 1

To make the foreground shape, you can use a silicone mold or a cookie cutter.

TO USE A COOKIE CUTTER: cover the top of a strong, flat surface, like a pan or a tile, with aluminum foil. Place your cookie cutter on the foil and fill ¼” with crystals. Do not remove the cookie cutter to bake. The plastic will pop out easily once cooled.

TO USE A MOLD: I buy silicone candy mold sheets during the Halloween season, then cut them into individual molds. I use them for all sorts of things. Put your mold on something bakable so it won’t fall through the gaps in the oven rack. Fill it to ¼”. Keep in mind that if your mold has extra surface details, they will be lost during the fusing process, so you want something with a distinct shape.

I’m using a pumpkin candy mold here. I put some brown around the edges and in the stem, then covered everything with orange.

mb votive 11

mb votive 12

With both your foil and shape molds, be sure to gently push crystals into the corners and nooks.

mb votive 10

Before you start baking, I recommend opening windows, turning on fans, anything you can do to ventilate the area.

Carefully transfer your pieces to the oven. Pretend you’re handling nitroglycerin. Depending on how hot your oven is, baking could take anywhere from 30 minutes to more than an hour. I recommend checking every 20 minutes. It’s done when it’s no longer lumpy.

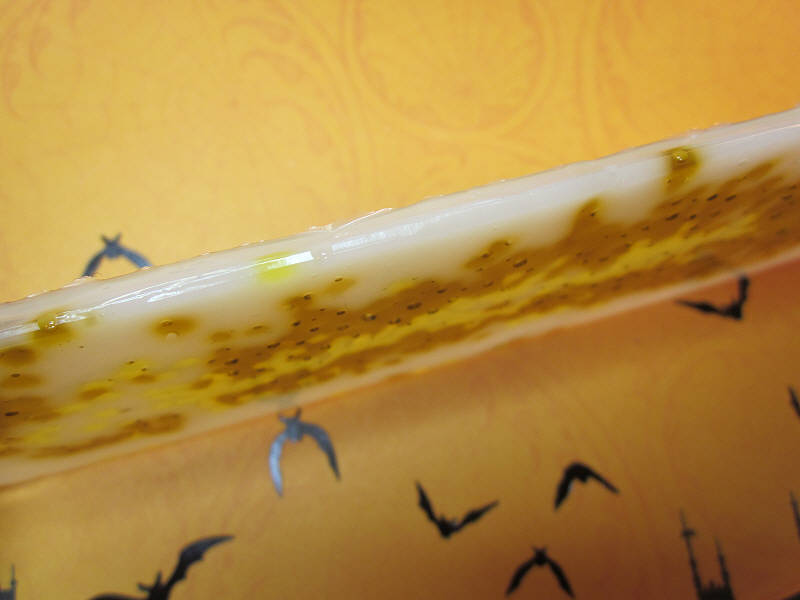
Let things cool for a few minutes, and remove them from their molds. The edge of the rectangle is unlikely to be completely smooth, as that’s the nature of the medium, but it looks pretty darned good!
mb votive 15

This is what happens with a straight-sided mold–the plastic wicks up the sides a bit. That’s fine, the fusing process will take care of it.  NOTE: Those jagged bits are sharp. I speak from experience.

mb votive 17

DESIGN OPTION: If you’re using a mold with surface details, such as a skull with facial features, you can fill those features with a contrasting crystals, and bake until melted–usually about 20 minutes. If your mold is symmetrical, I recommend flipping your piece over and putting it back in the mold to keep the edges sharp. Use a pair of tweezers to add crystals. The plastic may wick up a little, but it will melt down again during the fusing process.

mb votive des op 2

Flatten your aluminum mold, and trim the ends so they are just longer than your baked piece. Do not cut this too close–you want to be able to see what you’re doing when you roll the sleeve, but you don’t want the plastic melting in to your oven.

mb votive 18

Place your shape nice-side down on your mold. Put it where you would like it to end up. In my case, I’ve centered the pumpkin.

mb votive 19

Place your rectangular piece over your shape, pretty side down. Carefully move everything back to the oven. This part goes fast–so be watching! I use the three or so minutes to put on latex gloves, so my hands are a little more heat resistant. You will need dexterity, so bulky gloves won’t cut it. You also might want a potholder handy.

mb votive 13

This is what you’re watching for. The sleeve has slumped over the shape, and they are now fused. Take out your piece, and get ready to work quickly. Use care–this is hot stuff!

mb votive 21

Use your bottle or can or what-have-you to roll up your votive sleeve. Hold the plastic to the roller using the foil, as it should be cool enough. Watch the edges to see that you’re sleeve ends are lining up.

mb votive 23

mb votive 24

To tighten up the sleeve ends (though they probably won’t meet), I’m using a little piece of silpat to pinch the ends together. You can use a potholder to do this.

mb votive 26

Once everything is rolled, hold it for about 30 seconds. If you take your hands away and the ends move apart, hold it together a little longer.

mb votive 25

Remove the foil and slip the sleeve off the roller. All done!

mb votive 27

Raffle status: yup, I’ll be sending these off.

mb votive final dark