I was poking around Pinterest, and I kept seeing neat coffin shrines. When I went to prepare this entry, I learned they were all from the same place: Immortal Visions. She makes lots of delightfully spooky things.

For my own coffin shrine, I decided on one of my favorite themes: the ghost bride. As a further challenge, I decided I would use no wet media. No edge distressing, no antiquing. Just cutting and gluing. I only broke my rule twice, and it was touching up, not altering.

I already had a few little wooden coffins, but I inherited a bunch more, including some that were pre-painted black, from a friend. Time to remove the hardware. I put it in a Ziploc and saved it. You never know when you’re going to need a tiny hinge.

While the touch-up paint on the coffin was drying, I got out the stuff. Good times in the paper closet, the lace drawer, and the Halloween bins. I didn’t use everything here, and of course, I found other stuff to grab later.

In Immortal Visions’ shrines, she uses the coffin lid as a base. I chose several papers for this project, in purple and orange. This goes on top of the lid.

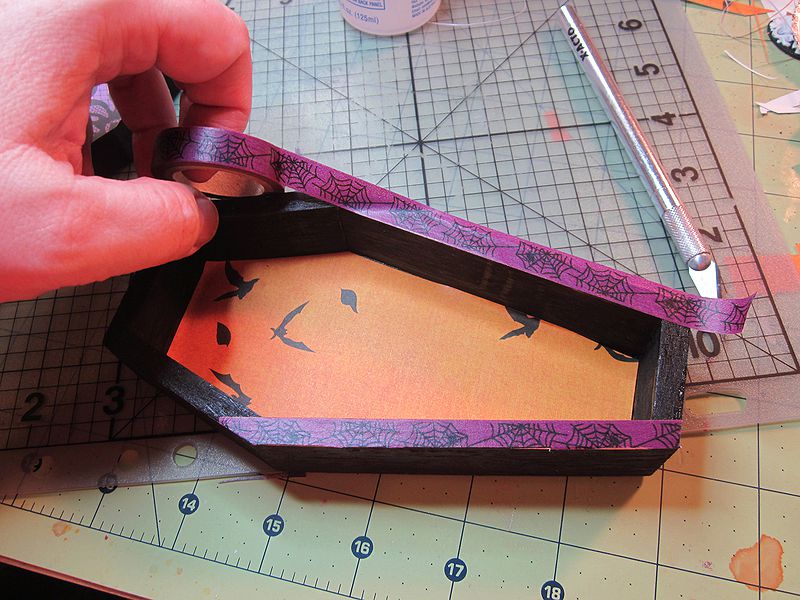
I lined the shrine with orange paper, and edged with washi tape.
Important thing I didn’t take a picture of: that orange paper had a nice graveyard on the bottom. I grabbed one of the stones and used it as a template to cut out with different paper. I cut out a center bit, and added a printout from a vintage photo.

The outside of the shrine gets more washi tape.

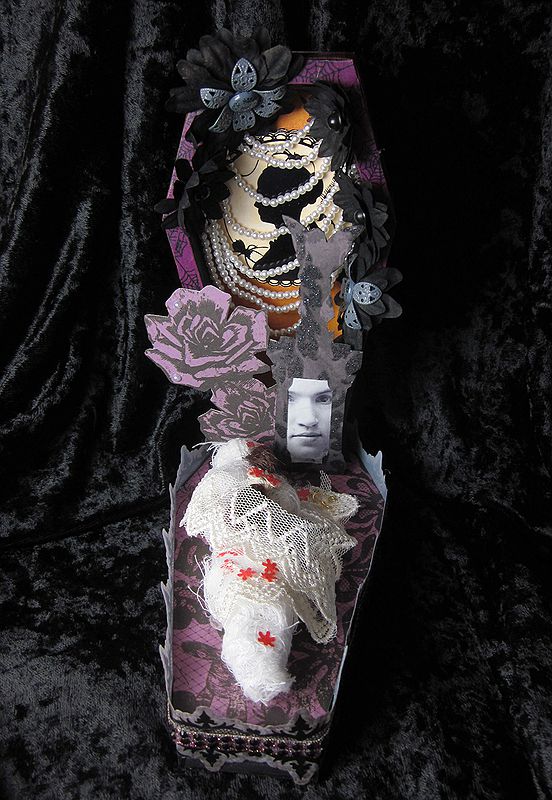
The gravestone was for the front of the upright, along with some purple roses I’d cut from another paper choice. Working on the inside of the shrine, I cut this cameo from another paper collection, and attached it with foam squares.

Much stringing of tiny plastic pearls.

Then with the hot gluing of the tiny plastic pearls.

Paper flowers will cover that glue mess.

Everything is attached, and the shrine top is done. On to the base.

First things first, lets shroud a doll! I actually thought I was going to wrap her arms separately, but I realized I could blast some heat on them to get them to bend a bit. So the doll got unwrapped.

Glue wasn’t going to do it, so her arms got pinned into position with Scor tape. We, uh, won’t talk about me cutting her feet off to make her fit. Yes, I saved the shoes. You never know when you’re going to need tiny shoes.

Once our unfortunate bride was all shrouded, leaving her lovely braid out (because hey, extra creepy hair!), I decided I wanted some tiny flowers. At first, I tried fussy cutting some out of scrapbook paper. I didn’t like the results or the amount of work I was looking at. So hmm…what do I have that can cut a tiny flower? Well, a Christmas edge punch, of course!

The only red that made me happy was the tissue in a heart doily. Go figure. So I cut off the fiddly bits around the solid heart, and managed to get a few flowers out of each one.
Two gold jump rings were tied together and glued on to lace, which winds delicately around the bride.

A Halloween border, from a pile I’ve been wanting to use, edges the base. That border is a sticker, so I carefully applied PVC glue to the top half to get rid of the stickiness.
When I was going through my Shiny bin, looking for accent pearls, I found this fantastic ribbon I bought years ago at a shop in Portland. It had to go on too.

Close shot of the top.

Here’s the middle bit, with the vintage photo. Tres spooky, oui?

Poor Bride. So young, so lovely, so dead.

Raffle status: Sorry, too delicate to ship.


I am blown away by your creations! SO glad I found your blog (through the Countdown) – I am now a follower. Happy Halloween!
Thank you! I’ve been following you through the Countdown, too.