They are pouring in now! The adorable Gorey postcard is from Vicki, who is practically a neighbor over in Orlando, and Lisa, who did lovely things with cutouts that I’m going to steal.
Is your raffle card on the way?

There are tons of great Halloween shadow boxes around. I have three of these shadow box frames I picked up at a garage sale. They are old and sturdy, and the front glass is glued in. I’d like to fill each of them in different styles this year. The first one is intended to be simple, and subtly eerie, using vintage photos.
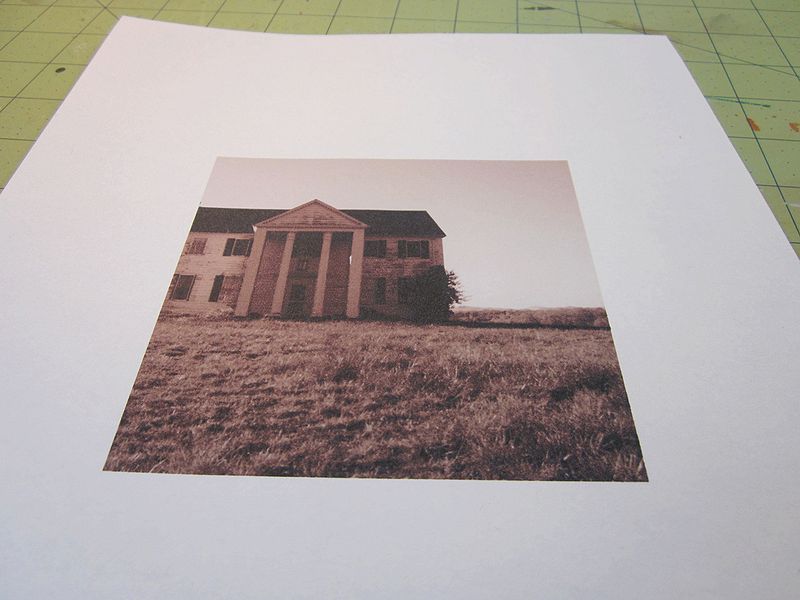
I used The Commons at Flickr to find some photos that were free to use and modify. I wanted a house with some space in front of it, and a creepy girl.

I used charcoal and colored pencils to alter the house a bit. The charcoal looks much more subtle in person, thank goodness.

Creepy girl was part of a group photo. She’s printed on wood grain cardstock for texture. I cut her out, used an awl to scratch out her eyes, and inked the edges so they wouldn’t show white. I left a long bit below her feet so I could fold it and attach her to the box.
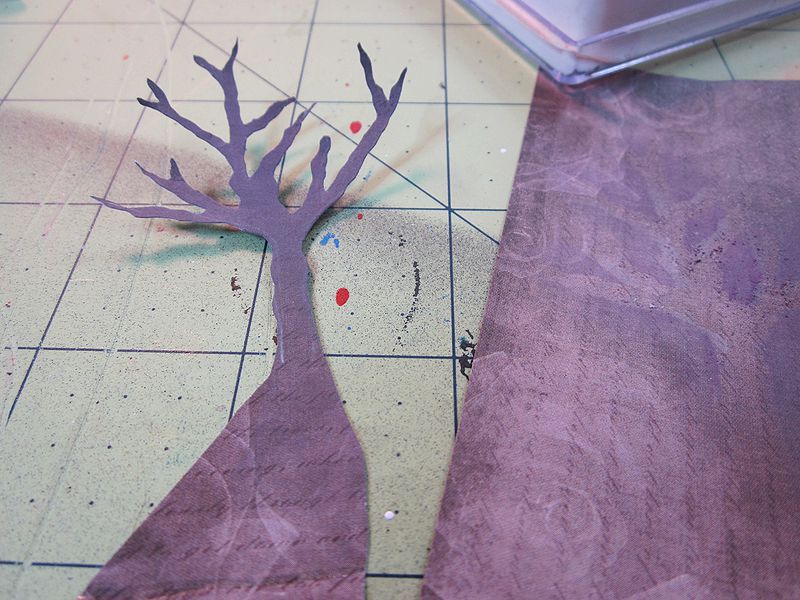
Next, a tree is cut out from some spooky paper. I also used purple blending chalk to give it subtle color. Again, I’ve left a bit on the bottom for attachment.

The house is attached to the back board of the shadow box. I decided that it also needed some blending chalk around the edges to create a vignette effect. Here I’m deciding on placement.
In the end, I wish I’d made the tree taller, and painted the bottom attachment flaps white. Otherwise, I’m pretty happy with this quick project. Though it’s madness to photograph–I’ll have to get better at that.
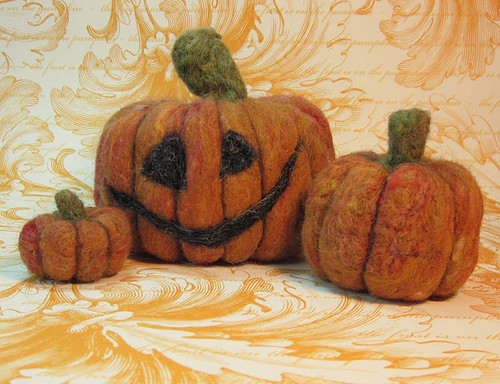
Raffle status: Yes, I’ll send this off.


I really dropped the ball on taking pictures of this project. I’ll try to describe the process as much as possible.

I chose two subtle patterned papers, one in green and one in off-white, and cut out four sets of wings with Tim Holtz’ Alterations Layered Angel Wings die. Each piece was edge distressed, first with Pumice Stone Distress Ink, then with Black Soot Distress Ink.
The tag is another Alterations die, Tiny Tags and Tabs. I used a heavy vellum. With a fine permanent marker, I wrote “Requiescat” on each tag twice, one over the other. The tags were distressed with StazOn Black and Brown.
The skulls were stamped on to some Memory Box paper. They used to do the most gorgeous Halloween collections. The stamp is Inkadinkadoo, the ink is Colorbox Chestnut. I then embossed with clear extra-fine powder, and edged with StazOn, adding some shading on one side.
Finally, I attached the tag to the right-most large wing piece with a plain black brad, then glued down the wings and skulls, alternating colors. Wish I could remember the paper I used for the card itself. Maaaaybe Recollections? Corners were rounded at ¼”.

Oh look! I took another picture! This is one of the envelope papers. I made custom envelopes with the We R Memory Keepers Envelope Punchboard, which I love to death.
I’m so stoked about these cards. One of my favorite projects of the season. I made a set of four, and they are definitely going to someone in the raffle.

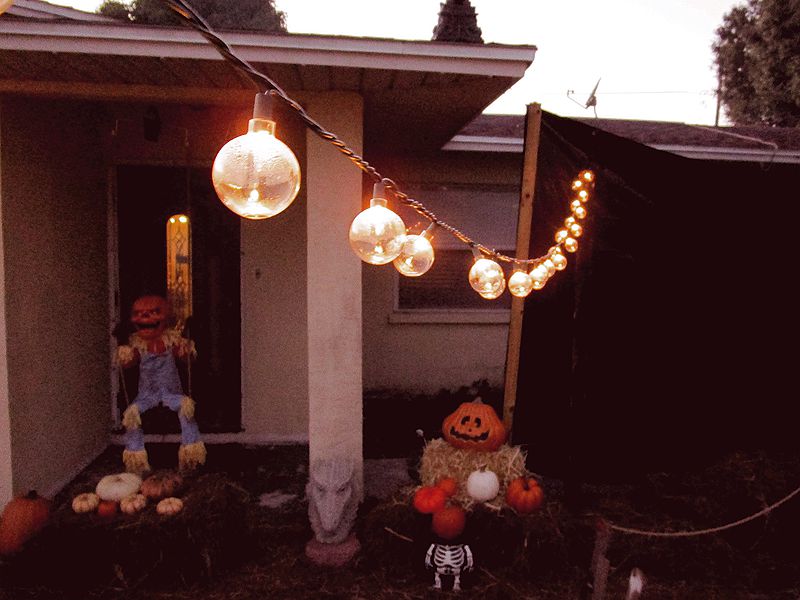
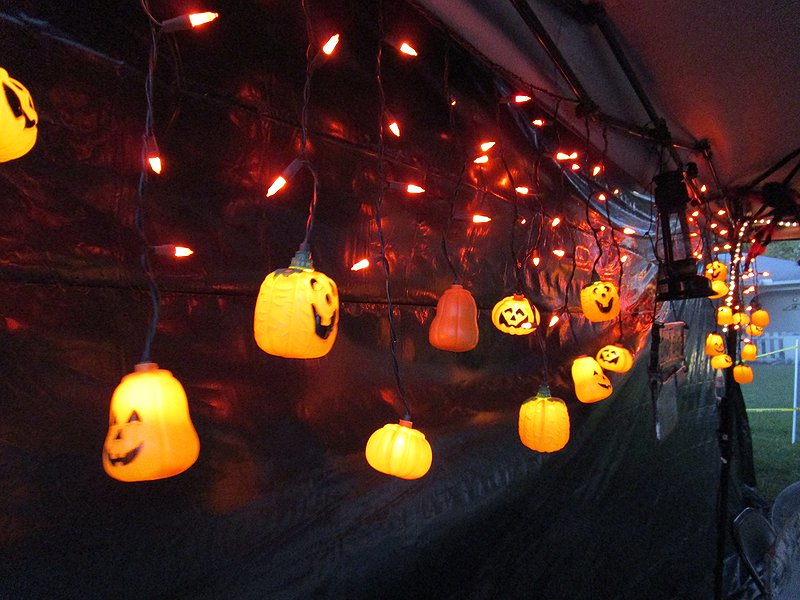
The York Drive Project didn’t have the easiest setup this year. City officials decided the haunt was an “accessory structure” that they could not have in the front of the house. Despite having to shift the entire haunt to the backyard, Brad and Jessica Myers opened on schedule.

This is why I adore home haunts–so much love and creativity was put into this. The theme this year, “Portals of Terror,” left the builders free to create a number of themed scares, many of them inspired by movies.
We hung around for a bit before things opened, chatted with folks, and let another group go ahead so a news cameraman could follow them. We’re not camera shy, but the other group had pre-teens, and pre-teens are screamers. Much more fun to get on camera. After the first group went in, there were sounds of chopping and pounding and screaming. Pretty much what you’d expect. The Portal Guardian, an adorable munchkin in a Rocket Raccoon costume, rushed out front grinning to tell everyone: “He’s tearing them up!”
They got a lot of mileage out of their space; the haunt was surprisingly long, and a lot of fun. When everyone there is having a good time, you do as well. At one point, after the Spousal Unit had been jump-scared about three times, he muttered to himself: “at least it’s not bloody clowns. I hate clowns.” Remember, in a haunt, there is always someone listening. About three steps later, an actor beat against the slats of the wall and shouted: “NO CLOWNS HERE!” As for clowns later? Not telling.
York gets especially high marks for stage direction. There were some genuinely creepy moments, thanks to the blocking of the actors’ movements. There was also some excellent costuming and makeup.
After we went through, we came back to chat, and Brad Myers came out to say hello. We talked a bit about haunts in general, and his own movie-inspired scares. It was great to meet a local haunter. The area isn’t as Halloween friendly as I’m used to, so it’s nice to connect with “my people.” You know, scary folks.

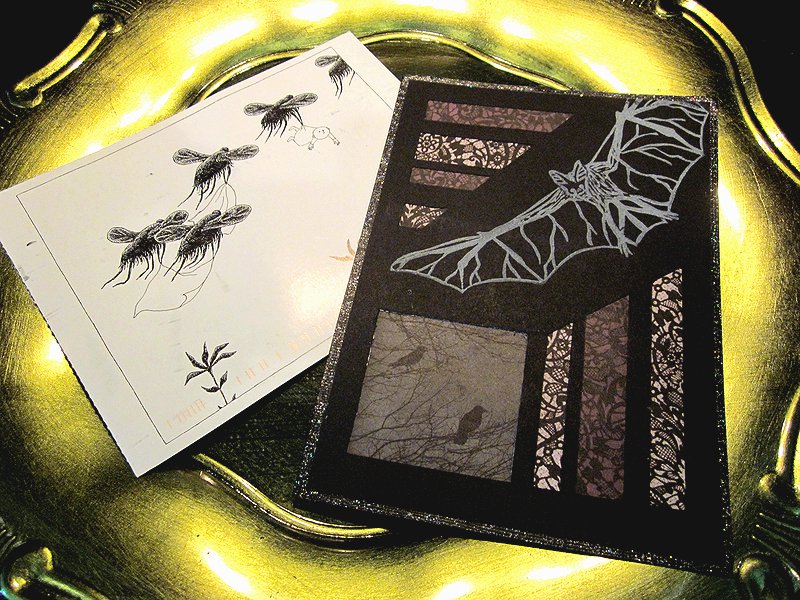
Today’s card comes from the talented Melissa. It is large–a full 12″ x 12″! The back held this intriguing verse:

There are actually three moving parts: the gate, the roof, and the little spider tab on the bottom. This is what it looks like:

Just damned cool. Thank you, Melissa!

Sometimes I go thrifting for the fun of it. I’ll get out $20 cash, and go from thrift store to thrift store, looking for interesting things that spark ideas.

When I saw these swirly lampshades for 50 cents each, I thought of delicate ghosts.

After much experimenting, the ghosts ended up consisting of clear labels, transparency sheets, and tulle.

I noticed an electric votive fit into the lampshade very nicely, so I took advantage of that. I cut down transparency sheets to about 5-1/2″ x 4-1/2″.

I fiddled around with some photographs, and came up with three faces. Here’s a PDF if you would like to use them. I made this sheet, and printed it out on clear label stickers. I printed two so I would have an extra, and also so I could use the second one to guide placement.

Facial features get fussy cut. If the nose and mouth were very close together, I left them attached.

I laid the transparency down in landscape orientation, and placed the guide face in the middle, near the top. I then used it to stick down the features.

The transparency is rolled around an electric votive, and held in place with a bit of tape.

Tape goes on the top seam as well. It won’t show.

I’m using a 6″ wide roll of tulle I got from the dollar store. Cut 4 to 6 lengths of about 15″. The number of lengths depends on your taste in tulle. These ghosts have 4 and 5 lengths.

Smoosh the tulle so it gets all wrinkly. Not only will it look better, it handles better as well.

Place two lengths of tulle over the bottom of the lampshade, crossing one another.

Push the transparency with its candle down on the tulle, into the lampshade, until the candle is just under the lip.

Place a piece of tulle over the opening of the transparency roll, and push it down. Do this with the rest of your tulle lengths, crossing each piece.

Add another electric candle under the base, and you’re done.
These look best in the dark, and would be nice on a spooky black-and-white table arrangement.
Raffle status: Sorry, too delicate to ship.

Mine! Allll mine!
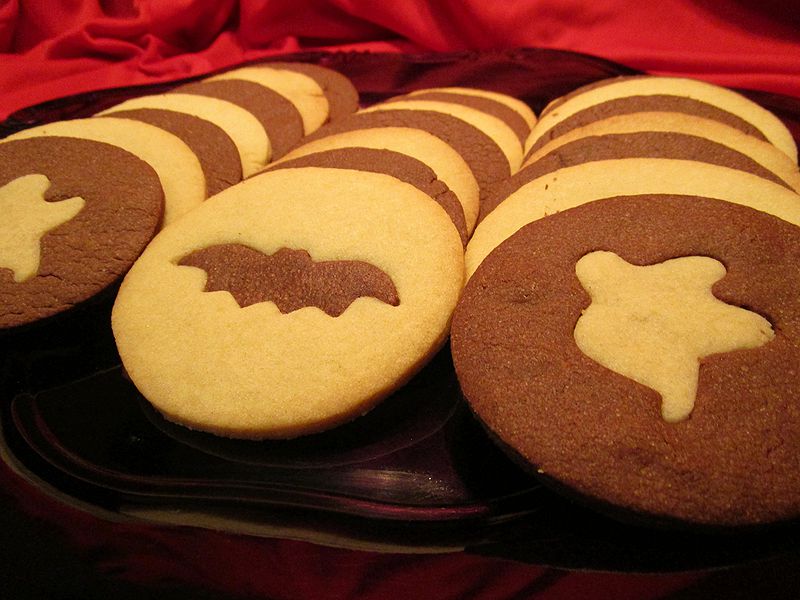
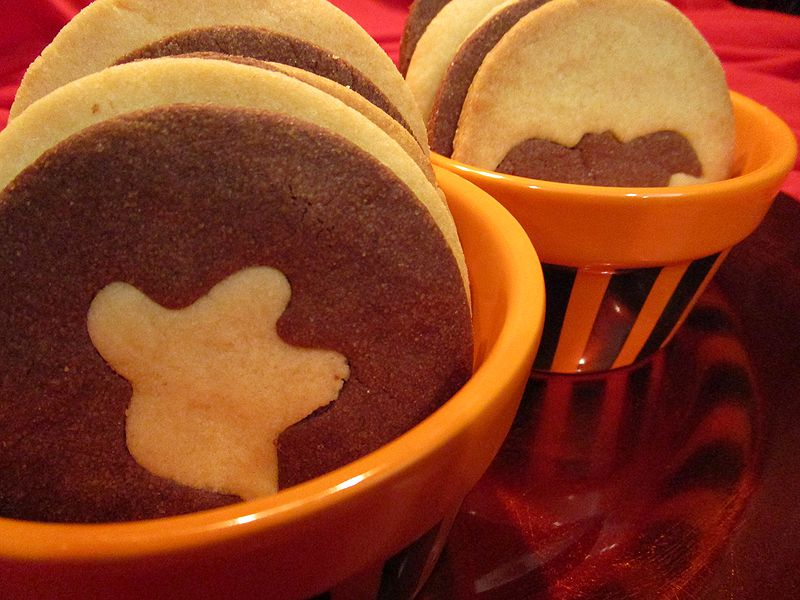
I’m in love with these cookies. They are delicious and elegant. In fact, they’re so nice that the Spousal Unit and I decided to withhold them from his co-workers, and keep them all for ourselves. I’ve adapted the recipe, with several method changes, from My View from the Avenue. For this recipe, you will need a 3″ round cookie cutter, plus mini bat and ghost cutters.
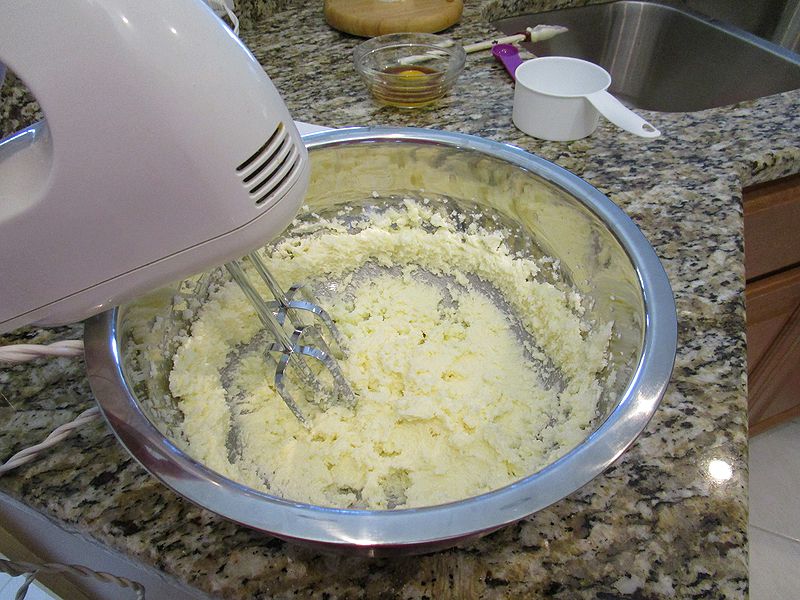
Creaming the butter and sugar. Sounds dirty.
Yield: about 3 dozen 3″ cookies
Ingredients:
1 cup (2 sticks) butter, room temperature
1 cup sugar
1 large egg
2 teaspoons vanilla extract
2 2/3 cups all purpose flour
1 teaspoon baking powder
1/2 teaspoon salt
1/4 cup unsweetened cocoa
*I didn’t really see a reason to knead the dough, but I did it anyway. In the original recipe, this is used to mix in the cocoa, which would take forever. Feel free to skip the kneading and see if it works out. I think it will be fine.
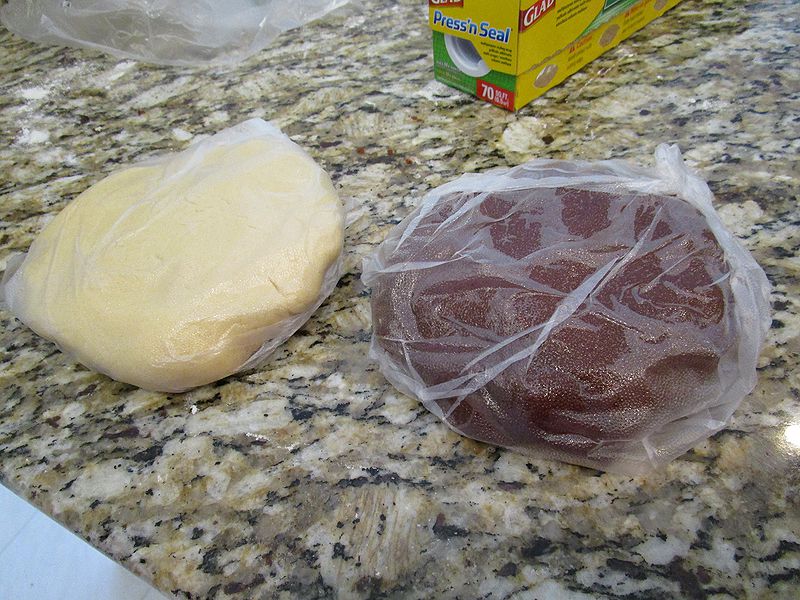
Ready to chillax
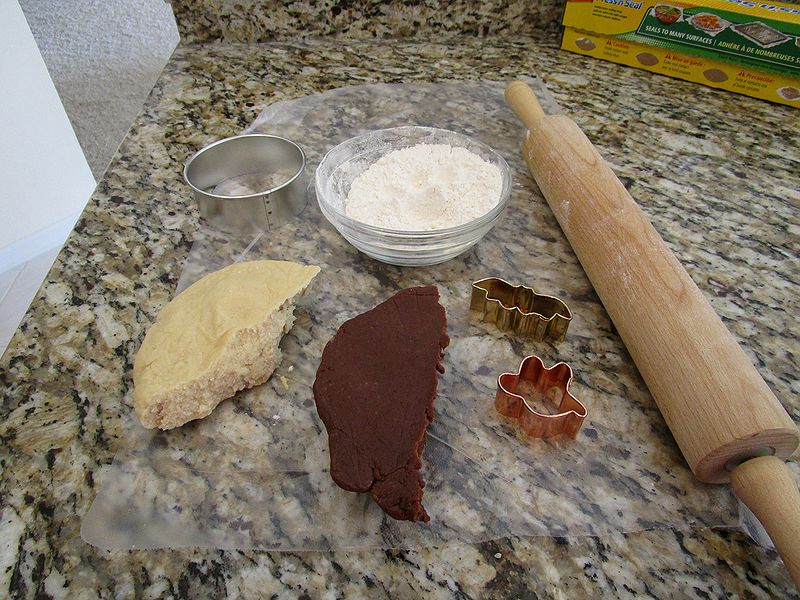
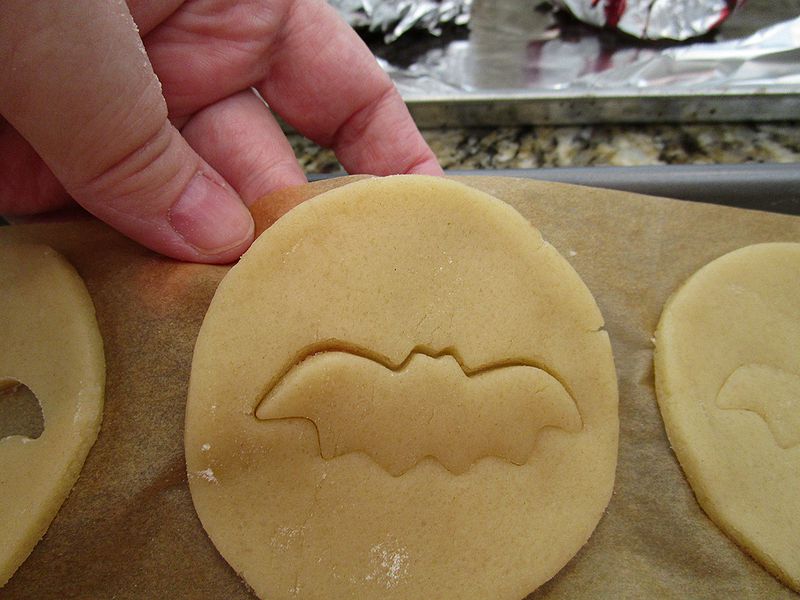
Fun part, coming up!

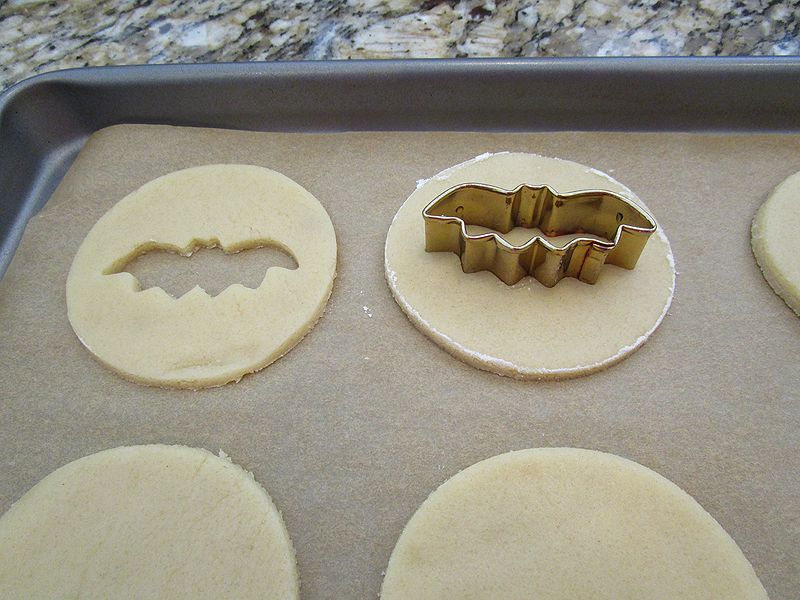
You seriously don’t want to lift these with your fingers
NOTE: Watch your plastic for tears, and replace immediately if this happens. I went through several sheets. You also might want to check the bottom of the last few cookies, though I didn’t end up with any problems.
Na-na-na-na-na-na-na-na
Lift and pull
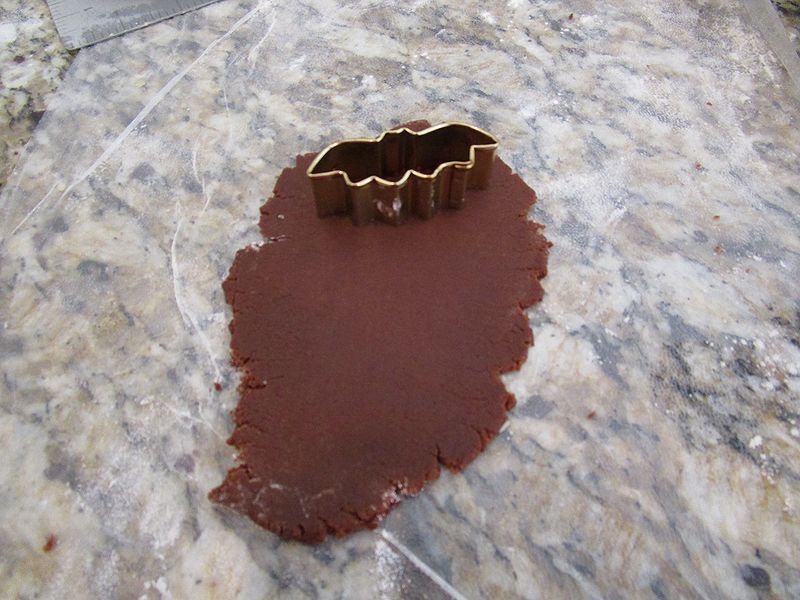
Mmm…chocolate
NOTE: if the chocolate dough becomes crumbly from the additional flour, put a few drops of water on your hands and work it in to the dough.
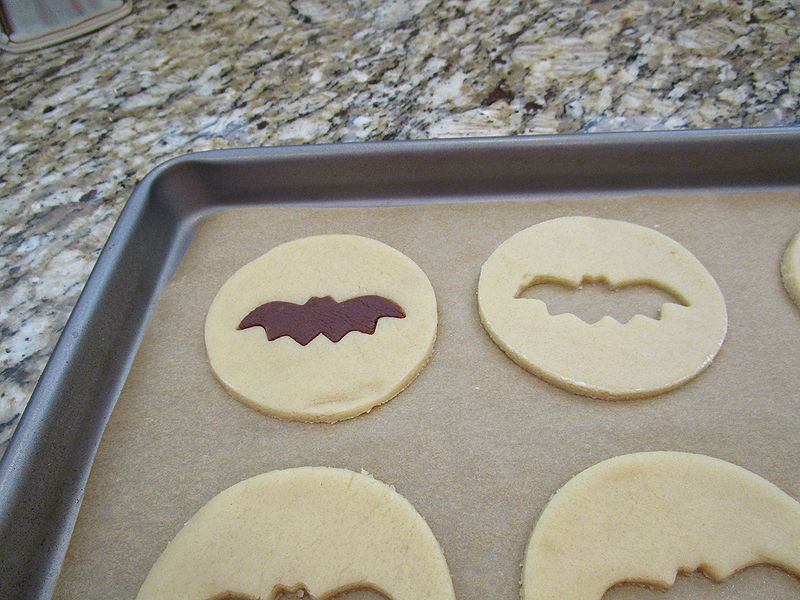
This part is kind of magical

Cracks, seams, etc., are very easy to fix with this dough
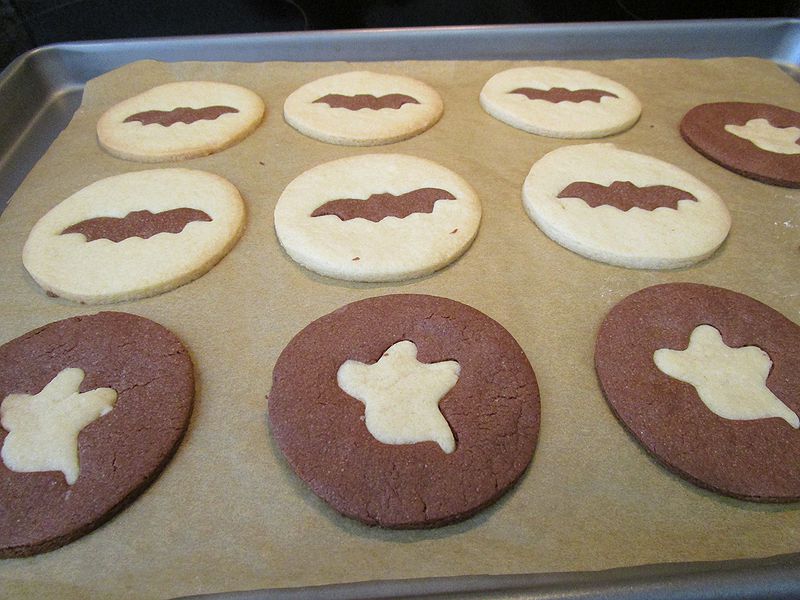
Om to the nom
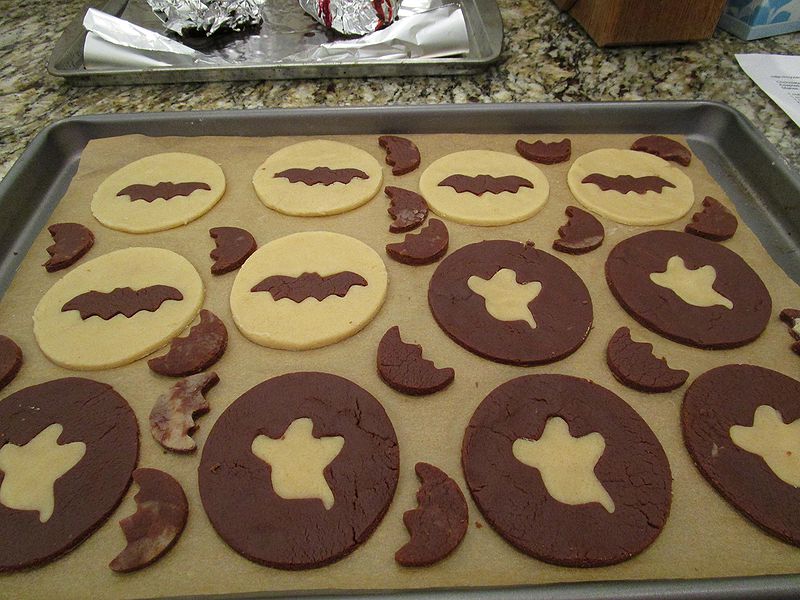
For the curious: those are roast beets in the background. The Spousal Unit loves ’em.
For the leftover dough, I mixed it together and made a bunch of tiny moons, and baked them in between the last batch.
There are currently three left. Oops…two now.
The crispness of the cookies is determined by thickness. Since mine varied wildly, I had a combination of lovely crisp cookies, and slightly soft cookies. Both were wonderful.

I was poking around Pinterest, and I kept seeing neat coffin shrines. When I went to prepare this entry, I learned they were all from the same place: Immortal Visions. She makes lots of delightfully spooky things.

For my own coffin shrine, I decided on one of my favorite themes: the ghost bride. As a further challenge, I decided I would use no wet media. No edge distressing, no antiquing. Just cutting and gluing. I only broke my rule twice, and it was touching up, not altering.

I already had a few little wooden coffins, but I inherited a bunch more, including some that were pre-painted black, from a friend. Time to remove the hardware. I put it in a Ziploc and saved it. You never know when you’re going to need a tiny hinge.

While the touch-up paint on the coffin was drying, I got out the stuff. Good times in the paper closet, the lace drawer, and the Halloween bins. I didn’t use everything here, and of course, I found other stuff to grab later.

In Immortal Visions’ shrines, she uses the coffin lid as a base. I chose several papers for this project, in purple and orange. This goes on top of the lid.
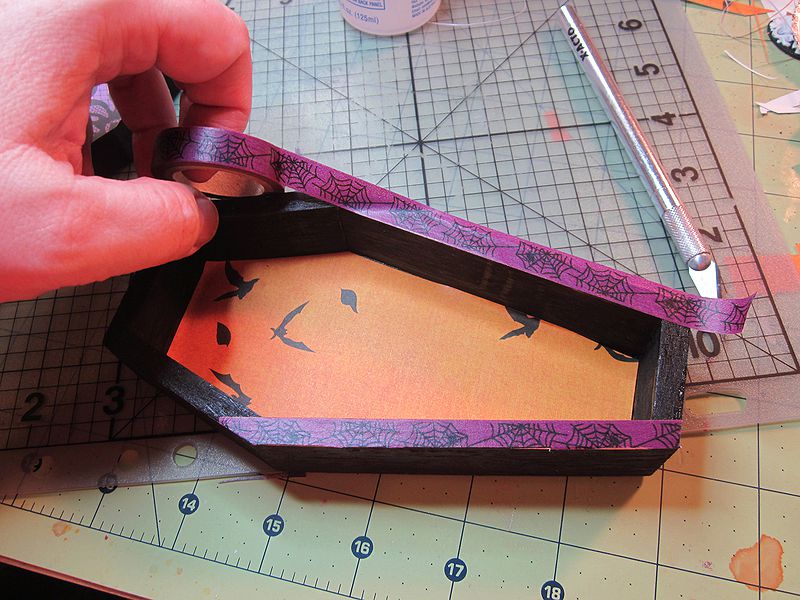
I lined the shrine with orange paper, and edged with washi tape.
Important thing I didn’t take a picture of: that orange paper had a nice graveyard on the bottom. I grabbed one of the stones and used it as a template to cut out with different paper. I cut out a center bit, and added a printout from a vintage photo.

The outside of the shrine gets more washi tape.

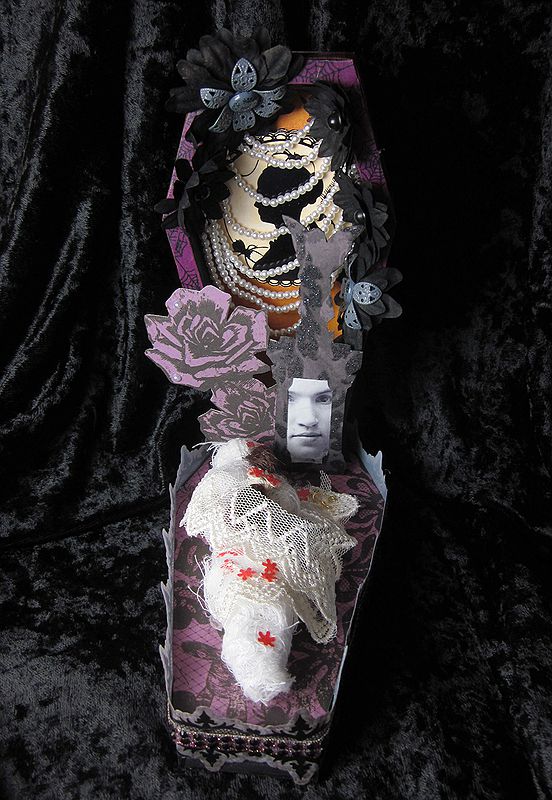
The gravestone was for the front of the upright, along with some purple roses I’d cut from another paper choice. Working on the inside of the shrine, I cut this cameo from another paper collection, and attached it with foam squares.

Much stringing of tiny plastic pearls.

Then with the hot gluing of the tiny plastic pearls.

Paper flowers will cover that glue mess.

Everything is attached, and the shrine top is done. On to the base.

First things first, lets shroud a doll! I actually thought I was going to wrap her arms separately, but I realized I could blast some heat on them to get them to bend a bit. So the doll got unwrapped.

Glue wasn’t going to do it, so her arms got pinned into position with Scor tape. We, uh, won’t talk about me cutting her feet off to make her fit. Yes, I saved the shoes. You never know when you’re going to need tiny shoes.

Once our unfortunate bride was all shrouded, leaving her lovely braid out (because hey, extra creepy hair!), I decided I wanted some tiny flowers. At first, I tried fussy cutting some out of scrapbook paper. I didn’t like the results or the amount of work I was looking at. So hmm…what do I have that can cut a tiny flower? Well, a Christmas edge punch, of course!

The only red that made me happy was the tissue in a heart doily. Go figure. So I cut off the fiddly bits around the solid heart, and managed to get a few flowers out of each one.
Two gold jump rings were tied together and glued on to lace, which winds delicately around the bride.

A Halloween border, from a pile I’ve been wanting to use, edges the base. That border is a sticker, so I carefully applied PVC glue to the top half to get rid of the stickiness.
When I was going through my Shiny bin, looking for accent pearls, I found this fantastic ribbon I bought years ago at a shop in Portland. It had to go on too.

Close shot of the top.

Here’s the middle bit, with the vintage photo. Tres spooky, oui?

Poor Bride. So young, so lovely, so dead.
Raffle status: Sorry, too delicate to ship.

Enter if you dare
Radley Haunted House was our first haunt visit of the season, and what a way to kick things off. The story this year is about the unfortunate Dr. Radley, who obtained a mysterious statue, unleashing a nightmare god who torments him in his sleep.
The queue film is important to the setup. This professionally produced short by Andrew Ford tells the story of Dr. Radley, and the genesis of his nightmare machine. Give it a watch:
The office set is the first room you enter. The film sets you up to experience the story as you walk through, and it’s very effective.
Setting up
We arrived at about 7:00pm, 30 minutes before opening. We got a good parking spot right across the street, and watched the haunters get ready. The haunt cost nearly $15,000, part of which was provided by a Kickstarter. All that funding didn’t go to waste. The score, the film, the details, and the freakin’ amazing costuming all shines.

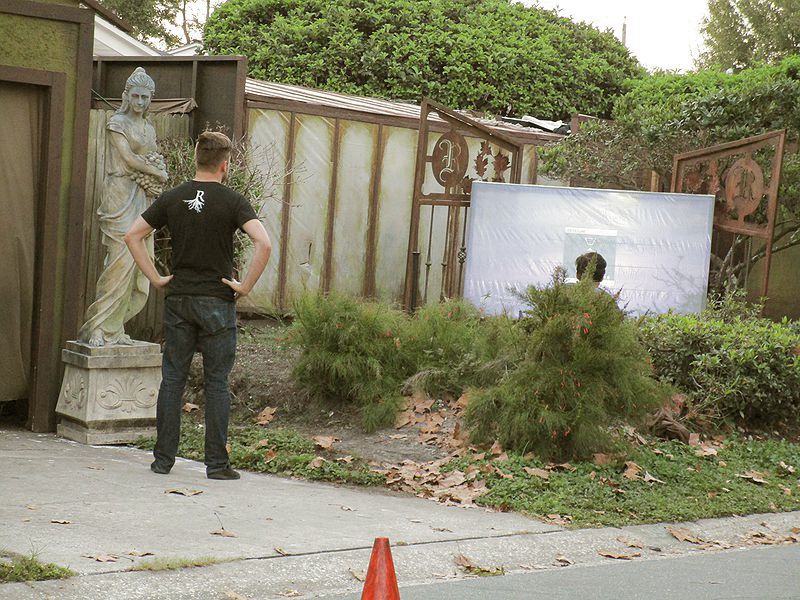
The line just before opening. Can you spot the Spousal Unit?
The two girls in line ahead of us were what I call “screamers,” teenagers who love to be scared, but, well, they’re scared. One of the setup guys (in fact, it was Dr. Radley from the queue film) walked along the line, and the little brunette asked: “Is it scary?” Heh. He answered: “Nah, not at all.” I laughed and laughed. It was kind of an evil laugh.
Folks went in 2 or 3 at a time. When we entered the first room, the girls were still there, afraid to go on. They begged us to go first. I took the lead, and the Spousal Unit brought up the rear, so they would be surrounded by safe, older folks who don’t scare easily. It didn’t take long before my charge had to hold my hand, and I pretty much dragged her and her friend through, with Bill occasionally pushing from the back. They were so terrified. It was adorable.
You won’t get any spoilers from me. I will only say that this is one of the finest haunts I have been to, pro or home. I class it with Baron von Gooloo’s regular gig at Fright Town in Portland, Oregon. The reason is originality. So often, the story is just a loose prop that allows haunters to drag out the same old tropes. At Radley House, the rooms firmly support the story. The actors are great, and the costuming–well I think I already mentioned that.
This was a fantastic experience, and the perfect opener for haunt season.

Radley House is at 3900 19th Street N, St. Petersburg, FL 33714.
Dates: OCT. 9th-12th, 16-19, 23-26, 30-31, NOV. 1-2
$5 donation is appreciated.
I’ve changed the deadline on the raffle to October 29, because I don’t need 11 days to organize a drawing, for pete’s sake.
Here’s a reminder of how it works: