Making Stuff

pd fin 01

There are a ton of pumpkin dioramas out there.  I’ve been wanting to try one with my spare craft pumpkins, and finally got around to it.

pd 01

Here’s the bare pumpkin. I refuse to pay full price on these. I suspect this came from Target for a few dollars. The actual Funkins that craft stores sell are crazy expensive.

pd 02

Rough cut on the opening. I plan to use the cut out piece as a base, tilting it toward the front to create a “stage.” I later regretted this–it ended up crowding the pumpkin and obscuring things. I tell you this so you also do not think this is a good idea.

pd 03

I wanted the background paint job to look like twilight. Sorta worked. First us of my new airbrush.

pd 05

Next, I hot knifed the opening to add scrolls. I like this bit a lot.

pd 04

Yes, it happens I have a Dremel bit that is exactly the right size for string lights to fit snugly. A purple string will light the sky.

pd 06

Long time followers may remember these tiny tombstones from a few years ago. I love these things, and wanted to give them a starring role.

pd 07

I cut squares to fit the tombstones’ supports so they could be more solid before gluing, and so they could be positioned slanted back a ways.  After I had those spots planned, I drilled small holes in front of each stone, plus more for the upcoming tree, for orange string lights.

pd 08

Winding armature wire together to make a spooky tree.

pd 10

Wrapped the tree in washi tape. It’s wonderfully flexible, so I can bend it way down to put things in the pumpkin, then pose it in place. It will also be wired with some orange lights.  In hindsight, I wish I had wrapped the tree in something brighter, as it kind of disappears in the final piece.

pd 11

Some final touches on the pumpkin; the edges of the opening get gold paint.

pd 12

The outside gets an almost-dry rub of gold paint on a paper towel.

pd 13

Stones and tree are in place. Orange lights are wired. Now to cut up a Halloween garland from last year and glue it down as ground cover. After this, both hands were too busy to take a photo as I maneuvered the stage into place.

pd 14

Sky gets wired. I should have done this first, because I decided to drop most of the string down inside the pumpkin, behind and under the stage.

What I learned: Don’t crowd the field.

Raffle status: way too delicate to ship; however, I would be pleased to remove the mini tombstones and send them off.

pd fin 03

Light ’em up!


frank 11

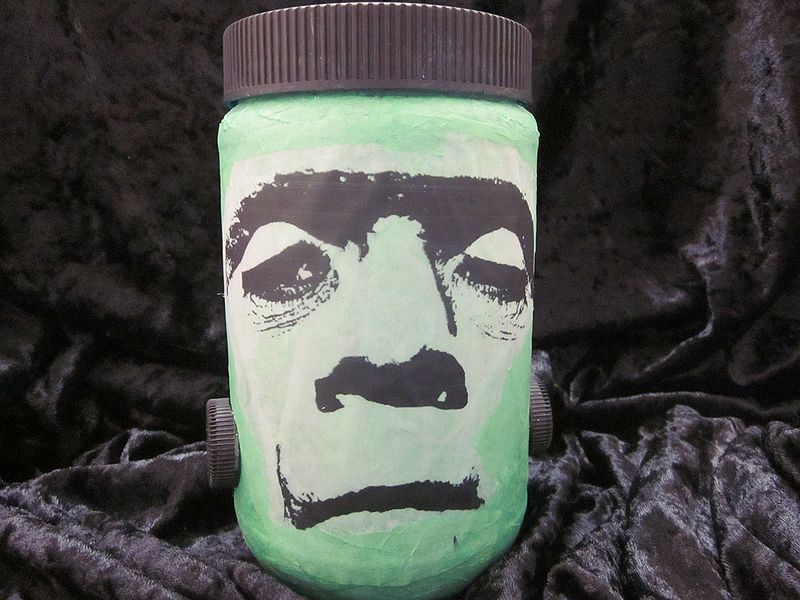
Whenever I see an empty peanut-butter jar, I see the head shape of Frankenstein’s monster. Yeah, welcome to my brain.  I’ve seen several versions of the pb-jar luminaria on Pinterest, mostly with cute jack-o-lantern faces. I wanted to  upscale that a teensy bit, using my love for iconic movie monsters. I’m thinking of doing a whole set, but for now, you just get Frank. Yes, I know the monster didn’t have a name. It’s in honor of one of my favorite all-time animations. It’s short, click.

You will need:

frank 02

–Empty, clean, peanut-butter jar with lid
–Black Paint
–Decoupage glue of some sort. I use liquid matte medium from Golden
–Green tissue paper
–Glue gun
–Vellum or clear full-sheet stickers to print on
–Two twist-off plastic caps. I used water bottle caps.
–Corrugated cardboard scraps

frank 03

Paint the lid black. I’m using cheap craft paint. It was at this point I realized I was wearing one of my favorite shirts. I changed before disaster struck.

frank 04

While that’s drying, cover your jar with tissue paper. Using a brush, lay down a layer of medium. Put tissue on top, then go over the tissue with more medium. I like to tear rough pieces, and encourage wrinkles, as I like the texture. Avoid the lid threads.

frank 05

I took a picture of Boris Karloff’s classic portrayal, posterized it, and erased everything but the facial features. Would you like to use it? Go for it.  After some fiddling with sizes, it got printed on to clear label paper (Avery 8665–it’s kinda frosted, but I love the stuff). Because I have a lowly inkjet, I put a coat of matte sealer on the sticker before doing anything else.

frank 06

Cut around the face in a natural shape (no sharp edges) and attach to the jar. Don’t worry about the edges.

frank 07

They get covered with a little more tissue paper to blend them in.

frank 09

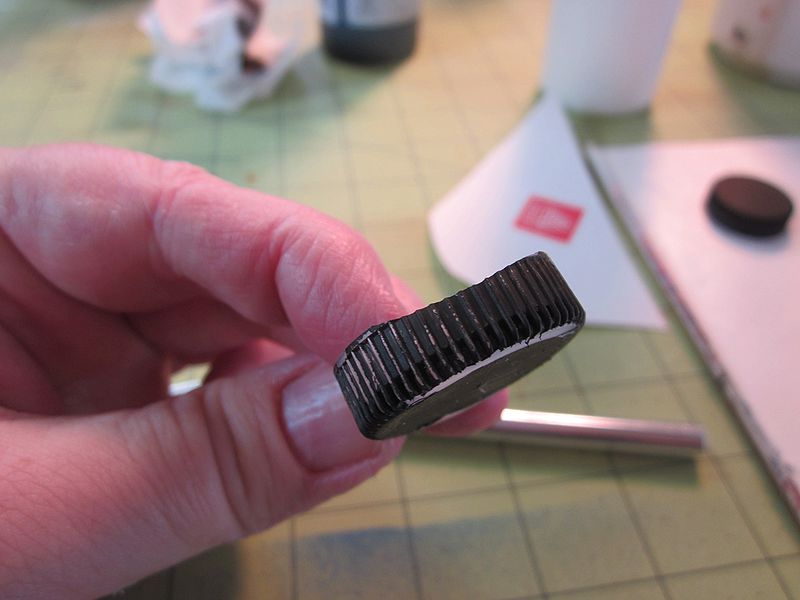
Trim the bottle caps at the top and bottom edge so they fit the pb jar better. I should have done this before I painted them, so I wouldn’t have to do so many touch-ups. Do as I say, not as I do. Trim, then paint.

frank 10

To create a gluing surface in the caps, I stacked and hot glued a couple bits of cardboard. Add your caps low on each side of Frank’s face, and you’re done! Stuff a few battery-powered candles in him and get spooky.

Raffle status: sure, I’ll ship Frank.

frank 12


me n dolly grim

Happy October! As usual here at Spooky Moon, I’ll be presenting a month full of crafts and spooky links.

This year I’m trying something different. I’ll be posting inspiration pieces, and then showing you what I did with it.

Today’s inspiration comes from the fantastic Grim Visions:

Dolly from Grim Visions

Dolly from Grim Visions

While there will be detailed tutorials this month, this entry is more of a ride-along.  In part because I kept forgetting to take pictures. What I used:

  • Doll (from stash)
  • Celluclay
  • Cernit
  • Fabric, lace, and trim (from stash)
  • Fusible webbing
  • Acrylic paint

I didn’t want to make something life-sized, so I got out my Box O’ Dollies, and found something more my scale.

gv dolly 01

Off came her hair (mostly), and her wee head got covered in Celluclay.  As I was hollowing out the eyes, I discovered that the doll’s head got turned while I was covering her, as there was a bunch of hair at the bottom of the eye. Oops! I trimmed it down further and moved on.

gv dolly 02

I have an almost-full bag of Celluclay, and as I worked, I remembered why. It’s like sculpting canned tuna.

Key shapes: The proportions are intentionally out of whack to increase scariness. There is almost no chin, and the mouth comes to a point. I didn’t think there was a nose at first, but looking at more pictures, there is a very simple, triangular shape.

The original doesn’t have a brow ridge, but I decided to put one on mine. I kept it very smooth, in keeping with the feel of the piece. Not adding too many details is hard! At least there are cracks on one side of the face. Here she is, all moist from the first smoothing.

gv dolly 03

Here’s her initial paint job. I decided she wasn’t smooth enough, so I added a coat of medium matte gel over the top of the paint. After this, I again deviated from the inspiration by adding some antiquing.

gv dolly 05

Next: teeth!  I did a lot of experimenting here, trying to make teeth out of various glues and bits of plastic. Nothing gave me enough control. I finally decided on Cernit, which is a very strong and flexible polymer clay, with great translucency. I didn’t need to paint the teeth. Even that had a little trouble with such tiny points, but I’m happy overall. They got stuck in with hot glue, again, after trying half a dozen different things. I’m going to call the strings a feature. To hide some of the glue line, she got lips, sort of. I think they add to the creep factor.

gv dolly 06

Around this time, the Spousal Unit walked into my studio and saw my inspiration image on my worktable. “Holy crap, you’re not going to make something like that, are you?” I point to the drying bench. “Jesus Christ, why would you do that? You’re not right.”  This is how I knew I was on the right track.

Time to dress Ms. Grim. I had an old lace something-or-other I’d picked up at a garage sale. It had a liner, and nice trim.

gv dolly 07

I made a pattern, of sorts. I have never made a doll dress, or a dress of any kind. I have certainly never tried to make a pattern.  I had planned on sewing, but I realized the hems I needed were too tiny for my skills. So I used fusible webbing. Then I thought, hey, let’s use fusible webbing on everything!

gv dolly 09

I did end up making a few stitches by hand to reinforce things, but the webbing worked pretty well. As for the pattern, well, the results were…interesting. Note there’s no picture of the misshapen under dress.

gv dolly 10

After the fusible webbing was no longer helpful, the hot glue gun came out. I love my hot glue gun.

A bit more lace, a bit more trim, and Ms. Grim was ready for her close up. No stand, I just stuck her foot in a glass bottle.

gv dolly 12

I think she’s at least as creepy as the original. Sure, the dress is inept, but those teeth are pretty great.  Dolly Grim says: “Sweet dreams.”

gv dolly 11

What I learned: glue the doll head in place first.

Raffle status: Yes, despite it being kinda delicate, Dolly Grim will be in the raffle. So you can see the, er, “dress” up close.

fauxpal 20

I was working on stuff for my Month of Spookdays, experimenting with adding stuff to hot glue, when I stumbled upon something very unexpected: a pretty decent faux opal, made with hot glue. They look much better in person, and are hard to photograph. Here’s a slightly better shot:

fauxpal 21

Here you can better see the internal texture.

This is how you do it:

fauxpal 10

You will need:

–Hot Glue Gun. Mine is high heat.
–Silicone mold. I’m using a Mod Melt mold. I wish I had one for a plain cabachon, but I could only find facets.
–Ultrafine glitter in Light Blue Transparent, Lavender Transparent, and Gold. My blue (Powder Blue) and lavender (Plum Fun) are from Suzie Sparkle, and the gold (Tang) is Barbara Trombley’s Art Glitter. Sparkle has no web presence, and is a small independent in Oregon. I’m sure other glitters will work—experiment!
–Pearl Powder in Interference Green or Blue. I’m using Pearl-Ex Interference Green.
–Chunky salt of some kind. I’m using “Pure Ocean” salt, which I bought from some wankery place. They probably thought I was going to cook with it. Nope.
–Soft paint brush.
–Heat gun (optional)
–Popsicle stick

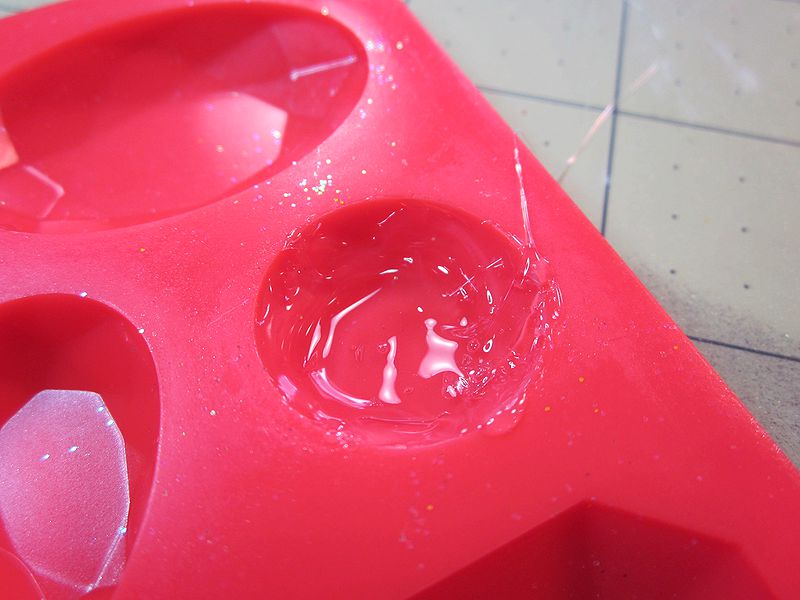
Line your mold with glue and let it cure for a few seconds. It should be soft, but not liquid. This is so you get a decent top. Remove as many air bubbles as you can. I used a toothpick.

Get ready to work quickly. Fill the mold about a third of the way up.

While the glue is hot, layer your glitter. Use mostly blue first (more than you see here—I did a better one later). Add about half as much lavender. Finish off with a tiny bit of gold. The gold here is more centered, but I often put it off to the side.  TIP: Glitter will stick like mad to the mold. Clean it off with a baby wipe.

Add several salt crystals. Keep them away from the edges, and press them firmly into the glue.

With the paint brush, apply a thin layer of pearl powder. Don’t overdo. Blow away excess.

Here’s the thing: hot glue doesn’t stick to salt. Unless you don’t want it to. That means all that salt is just sitting there, and if you put the glue gun nozzle down by it, your salt will move. So drop the last layer of glue on top from a few inches up. Once all the salt is covered, you can move the nozzle down and make sure all the edges are filled. I usually end up over-filling a bit.

Coat the back of the cabochon with pearl powder.

If you have over-filled, you can flatten things out while the glue is still warm with a popsicle stick.

Allow the glue to cool completely, and pull your gem.

Give it a trim. This is more easily done with scissors than a knife.

I think a milky look is more opal-like, but if you want to increase the clarity of your gem, hit it with a heat gun for a few seconds. I flipped over my mold for a heat-resistant surface. If you have facets, this will soften them.

The gem on the right has been clarified.

Of course, they don’t feel at all like opals. But they sure are pretty! If you try this, I’d love to hear back how it went. There’s lots of room left to experiment with colors, glazes, etc. I found that the gems look less opal-like when I used a nice, neat mold. Blobs on the work surface have a wonderful color. Fixing that problem is another project.


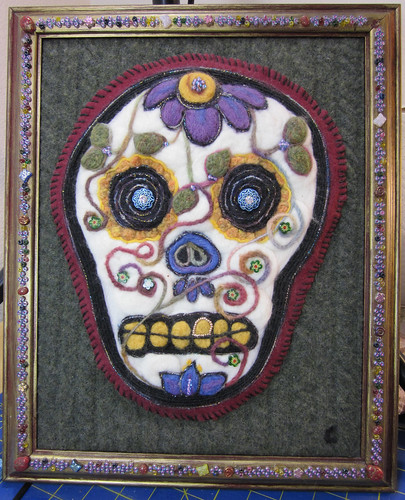
This is an old piece from May, 2009. I had never taken a decent picture of it, and I don’t think I blogged about it, so I thought it was time.

2009 may - calavera y flores

This is my favorite piece. I was supposed to sell it, but you can see that never happened. Someday I may give it away, but not today.

Calavera y Flores-closeup

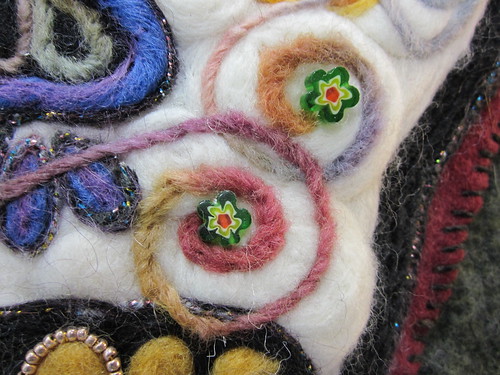
The base is felted in swirls for more texture. Easier to see in person, but I did my best to get a photo. I’m not entirely sure, but I think this may be from a large bag of alpaca I still have a ton of. The green background is a thrift store sweater. The frame came from a garage sale.

Calavera y Flores-closeup

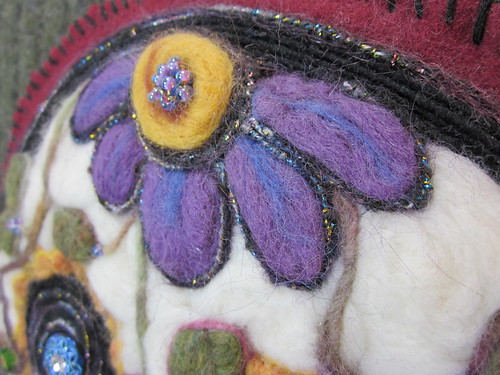
I’m overly fond of that sparkly thread you see lining things. I use it a ton, and have it in several colors. Because, you know, sparkly!

Calavera y Flores-closeup

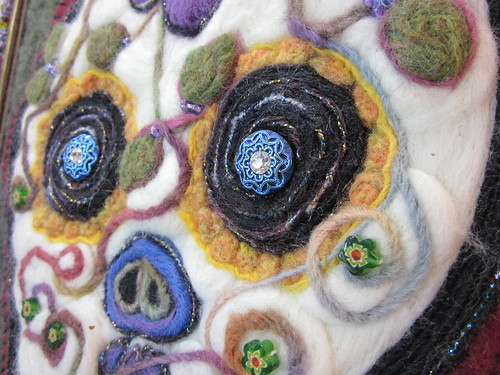
We all have that bead or button or whatever that was too cool to leave in the store, but at the time, you had no idea what you were going to do with it. These buttons, I’m pretty sure, came from Knitt’n Kitten.

After I finished this one, I naturally started another that I haven’t finished. But I will. I love this too much to only do it once.

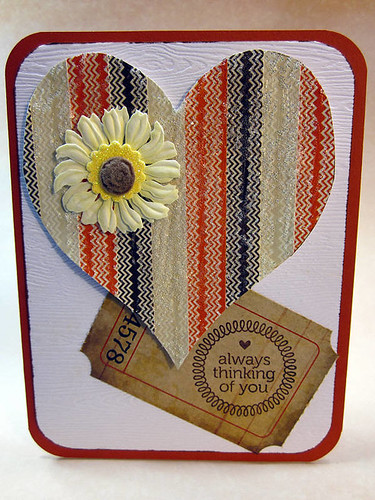
I had a little extra time for play last night after I finished my journal page, so I got out the January Card Kit from Simon Says Stamp and put this together. The base was a scrap I had, and the flower is from Jolee’s Boutique.

Card: Always Thinking of You

The kit had a bunch of different colors of this great zigzag pattern, so I cut some of them into strips and constructed the heart on a piece of scratch paper. I coated the whole thing with more of that Golden Glass Bead Gel from the journal page. I stamped the ticket in Colorbox Chesnut, and used a piece of textured stock to back everything. All but the ink were from the kit.

I recently sent off a set of cards for an Edward Gorey swap. The stamp is hand-carved from artwork by Gorey for a book by Wilkie Collins. I thought the artwork was wonderfully gothic and moody, as so much of Gorey’s work is, and I tried to evoke that moodiness with my treatment.  I used double-embossing on this card, but it’s a very subtle example of the technique. If you’d like to see more, I made a video about it last year.