Archives

All posts for the month October, 2014

pc 14

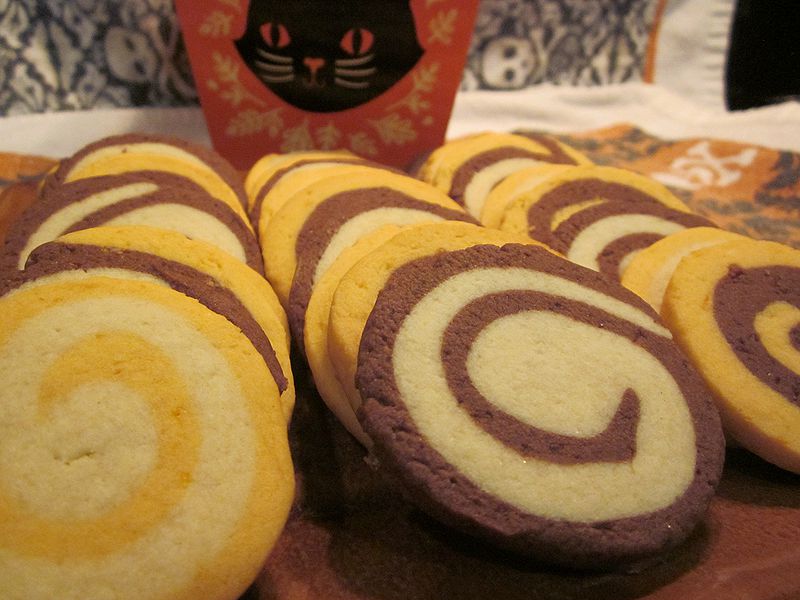
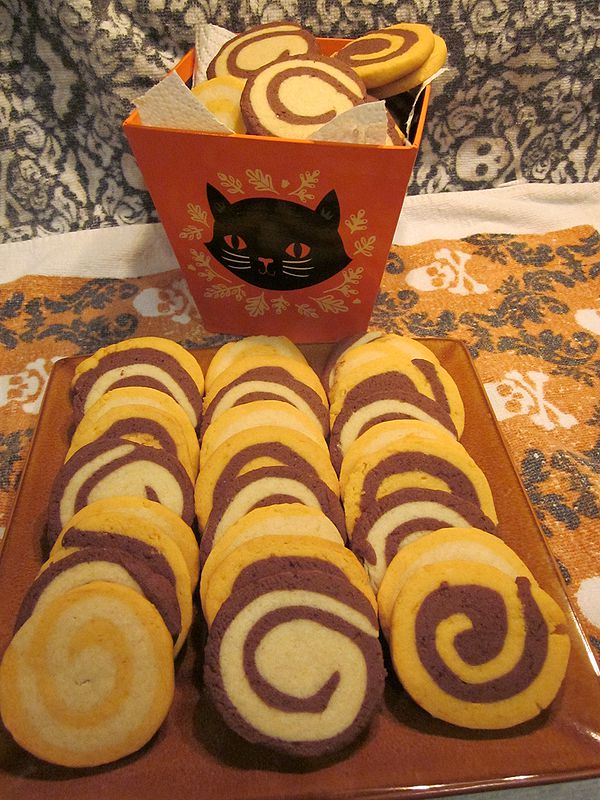
When I saw La Pêche Fraîche’s Orange, Chocolate, and Vanilla Swirl Cookies, I had to give them a try. I shortened the name to be less descriptive and helpful. Mine have a little more orange color in real life, but not much. I’m okay with that, but there will be more food coloring next time. I halved her recipe, and still got six dozen cookies out of it. My measurements:

Vanilla Dough:

  • 1 stick butter
  • 1/2 cup sugar (I actually used a sugar substitute called Whey Low)
  • 3/4 tsp salt (she uses Kosher, which is coarser. I didn’t have it on hand, so I reduced the salt a little)
  • 1/2 egg
  • 1/2 tsp vanilla
  • 1-1/2 cups flour

Orange Dough:

  • 1 stick butter
  • 1/2 cup sugar
  • zest of one orange
  • orange food gel
  • 3/4 tsp salt
  • 1/2 egg
  • 1/2 tsp vanilla
  • 1-1/2 cups flour

Chocolate Dough:

  • 1 stick butter
  • 1/4 cup brown sugar, unpacked
  • 1/4 cup sugar
  • 3/4 tsp salt
  • 1/2 egg
  • 1-1/4 cups flour
  • 1/4 cup cocoa powder

To mix, I followed her directions to the letter, even setting a timer.

Orange zest and sugar

Orange zest and sugar. Pretty!

I noticed that the vanilla dough was not quite as moist as the orange, perhaps because of the oils in the zest.

pc 03

Mmm…chocolate

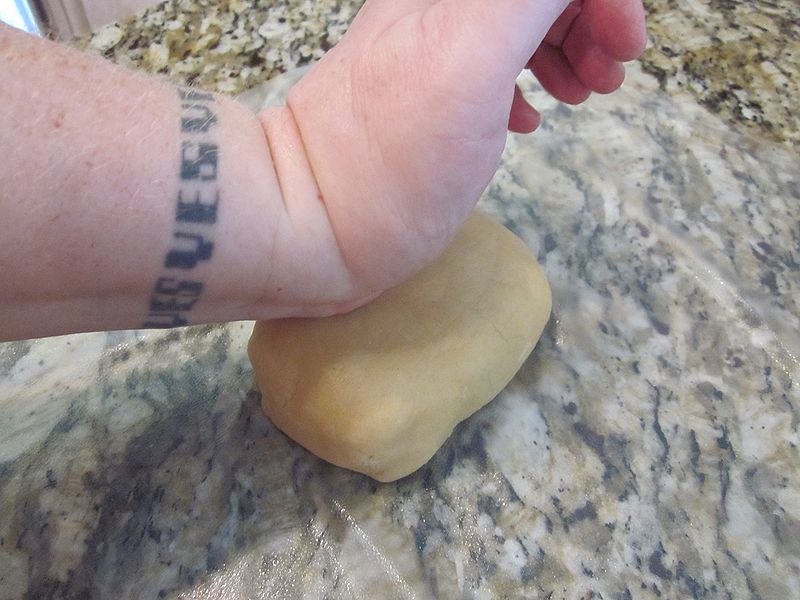
But then the chocolate was also extra-moist. *shrugs* All of the doughs were very workable.

pc 04

Vanilla getting wrapped for the fridge

I dutifully put the dough in the fridge for at least 30 minutes. I’m so glad I’ve become more patient in my old age.

pc 05

Patty cake. Sort of.

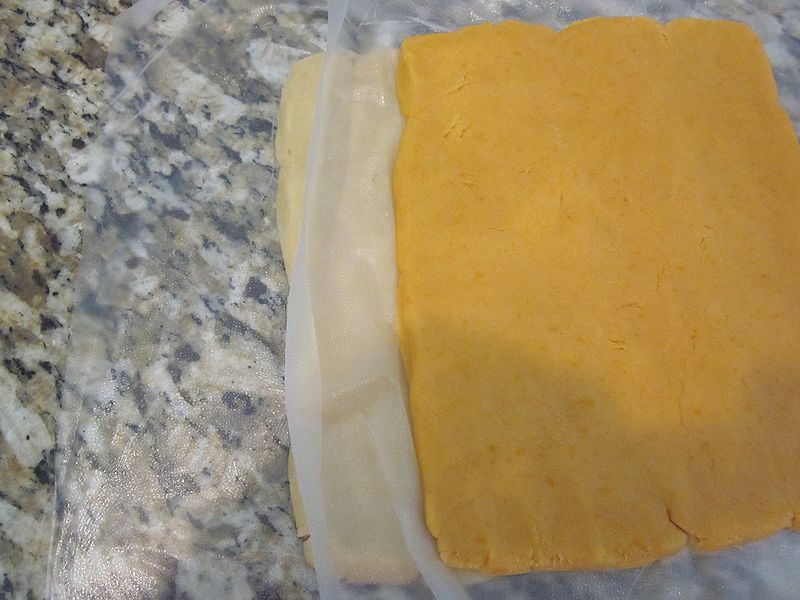
Here’s where I start to diverge from La Pêche Fraîche. Florida is very, very humid. At the moment, it’s been raining for a week, and is even more humid than usual. That means the dough is going to be somewhat sticky. Thing is, you don’t want to flour the board or roller, because you want those layers to stick together nicely. My solution was to put down a sheet of Press ‘n’ Seal, sticky side to the counter, and pat out the dough instead of rolling. This actually gave me a lot more control over the shape of the dough, so I was able to make neat rectangles. Patting out also made it much easier to push cracks together. The slabs were about 1/4″ thick, and measured about 6″ x 7″.

pc 06

Measuring up

Nice thing #1 about using the Press ‘n’ Seal: you can see if the slabs are the same size before you put them together.

pc 07

pc 08

Nice thing #2: it’s really easy to pick up the top slab and lay it on the bottom slab, then peel off the Press ‘n’ Seal from the top.

pc 09

pc 10

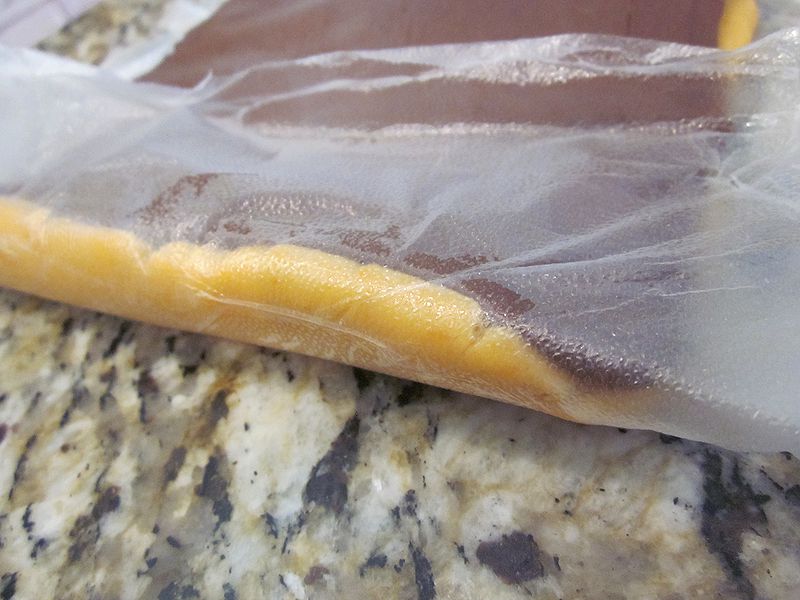
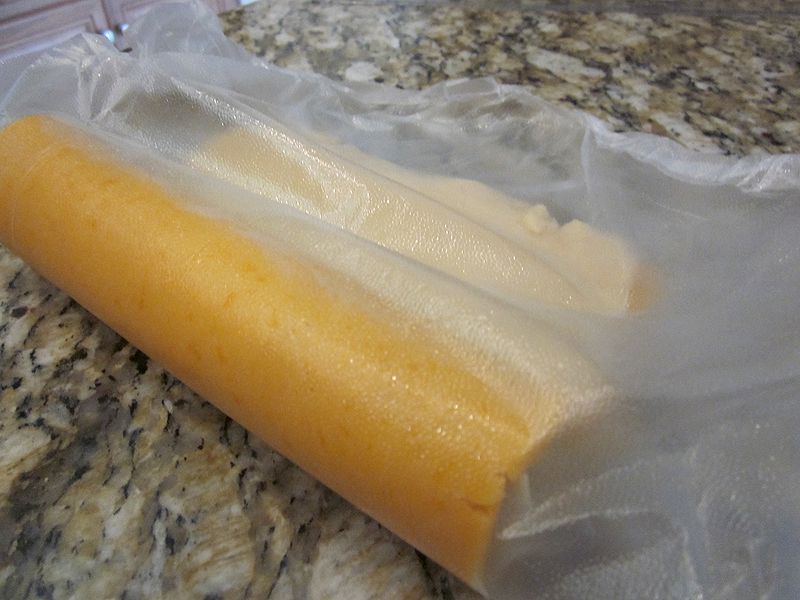
Roll a bit, pull the plastic out of the way. Easy!

Nice thing #3: the plastic makes it really easy to roll the slabs together. I was able to keep them tight with little effort, and I didn’t have to worry about cracks.

I used that same plastic to wrap the roll and put it back in the fridge for another 30 minutes.

pc 11

Once they come out, it’s a good idea to slice the whole roll (if you’re using all of it), then put the slices on the parchment-lined pan. That way the dough doesn’t get warm and squishy while you’re futzing with individual cookies.

pc 12

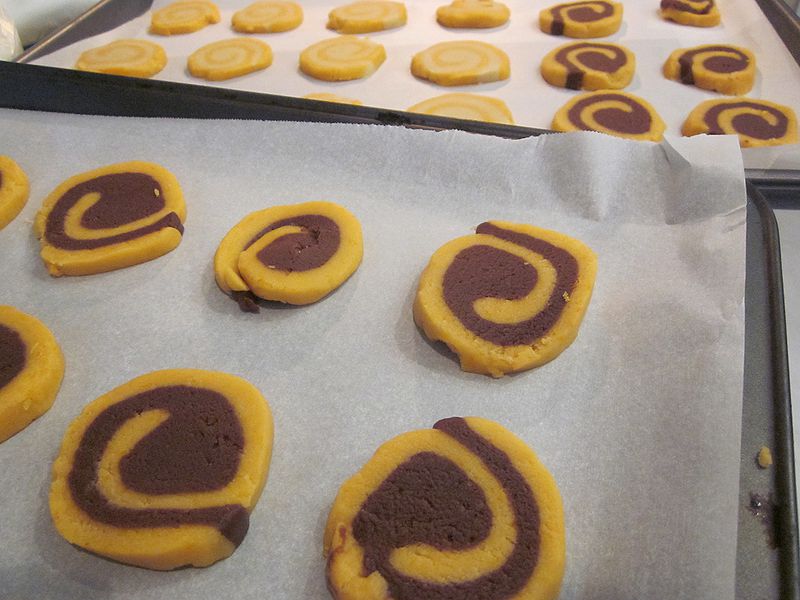
And I totally futzed, but only a little, neatening edges and making them more round. You’ll notice that mine are more swirls than spirals, like the original. This is probably because I did half batches, so my length of dough was shorter. I suppose I could have made the rectangle thinner and longer, creating fewer, but larger and swirlier cookies.

pc 13

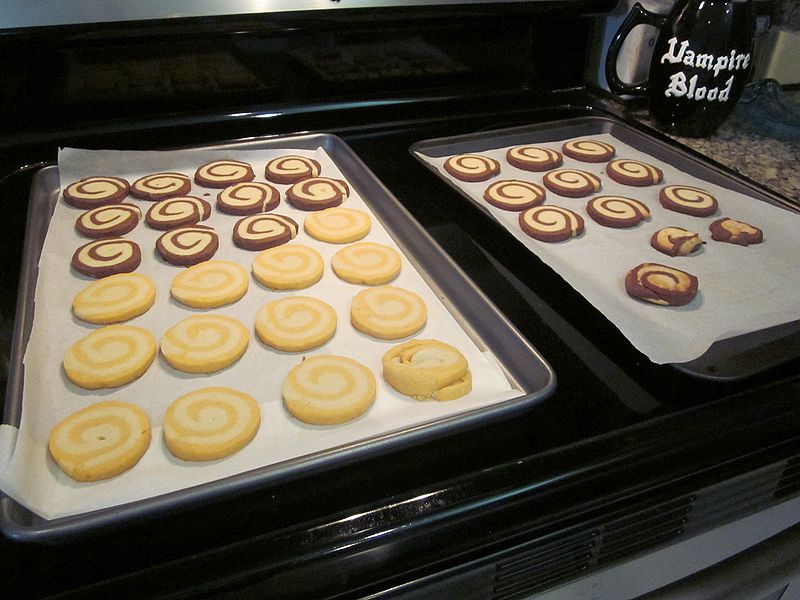
The cookies have a delicate flavor, and aren’t too sweet. Definitely an adult treat. The texture is similar to shortbread. Yum.

pc 15


me n dolly grim

Happy October! As usual here at Spooky Moon, I’ll be presenting a month full of crafts and spooky links.

This year I’m trying something different. I’ll be posting inspiration pieces, and then showing you what I did with it.

Today’s inspiration comes from the fantastic Grim Visions:

Dolly from Grim Visions

Dolly from Grim Visions

While there will be detailed tutorials this month, this entry is more of a ride-along.  In part because I kept forgetting to take pictures. What I used:

  • Doll (from stash)
  • Celluclay
  • Cernit
  • Fabric, lace, and trim (from stash)
  • Fusible webbing
  • Acrylic paint

I didn’t want to make something life-sized, so I got out my Box O’ Dollies, and found something more my scale.

gv dolly 01

Off came her hair (mostly), and her wee head got covered in Celluclay.  As I was hollowing out the eyes, I discovered that the doll’s head got turned while I was covering her, as there was a bunch of hair at the bottom of the eye. Oops! I trimmed it down further and moved on.

gv dolly 02

I have an almost-full bag of Celluclay, and as I worked, I remembered why. It’s like sculpting canned tuna.

Key shapes: The proportions are intentionally out of whack to increase scariness. There is almost no chin, and the mouth comes to a point. I didn’t think there was a nose at first, but looking at more pictures, there is a very simple, triangular shape.

The original doesn’t have a brow ridge, but I decided to put one on mine. I kept it very smooth, in keeping with the feel of the piece. Not adding too many details is hard! At least there are cracks on one side of the face. Here she is, all moist from the first smoothing.

gv dolly 03

Here’s her initial paint job. I decided she wasn’t smooth enough, so I added a coat of medium matte gel over the top of the paint. After this, I again deviated from the inspiration by adding some antiquing.

gv dolly 05

Next: teeth!  I did a lot of experimenting here, trying to make teeth out of various glues and bits of plastic. Nothing gave me enough control. I finally decided on Cernit, which is a very strong and flexible polymer clay, with great translucency. I didn’t need to paint the teeth. Even that had a little trouble with such tiny points, but I’m happy overall. They got stuck in with hot glue, again, after trying half a dozen different things. I’m going to call the strings a feature. To hide some of the glue line, she got lips, sort of. I think they add to the creep factor.

gv dolly 06

Around this time, the Spousal Unit walked into my studio and saw my inspiration image on my worktable. “Holy crap, you’re not going to make something like that, are you?” I point to the drying bench. “Jesus Christ, why would you do that? You’re not right.”  This is how I knew I was on the right track.

Time to dress Ms. Grim. I had an old lace something-or-other I’d picked up at a garage sale. It had a liner, and nice trim.

gv dolly 07

I made a pattern, of sorts. I have never made a doll dress, or a dress of any kind. I have certainly never tried to make a pattern.  I had planned on sewing, but I realized the hems I needed were too tiny for my skills. So I used fusible webbing. Then I thought, hey, let’s use fusible webbing on everything!

gv dolly 09

I did end up making a few stitches by hand to reinforce things, but the webbing worked pretty well. As for the pattern, well, the results were…interesting. Note there’s no picture of the misshapen under dress.

gv dolly 10

After the fusible webbing was no longer helpful, the hot glue gun came out. I love my hot glue gun.

A bit more lace, a bit more trim, and Ms. Grim was ready for her close up. No stand, I just stuck her foot in a glass bottle.

gv dolly 12

I think she’s at least as creepy as the original. Sure, the dress is inept, but those teeth are pretty great.  Dolly Grim says: “Sweet dreams.”

gv dolly 11

What I learned: glue the doll head in place first.

Raffle status: Yes, despite it being kinda delicate, Dolly Grim will be in the raffle. So you can see the, er, “dress” up close.